

Start with 1 to 3 ounces of foam soap per 32-ounce cannon bottle, or 1:5 to 1:15 for a manual foam lance, then top up with water and test on a panel before you commit to a full wash. There is no single universal snow foam dilution ratio because soap concentration, your lance or cannon design, and your water pressure all shift what “right” looks like. Treat any figure here as your starting point, not your finish line.
TL;DR:
- Most users should start with a diluted foam soap ratio of about 1:16 in a 32-ounce cannon bottle, testing on a panel before full application.
- Pressure-washer lances dilute foam mix further during use, often creating a much weaker final ratio around 1:50 or 1:200, requiring a stronger initial mix.
- Mechanical issues like low pressure, worn nozzles, or air pockets frequently cause thin foam or poor cling, making equipment checks a priority before increasing soap concentration.
- Proper testing involves applying foam to a panel, observing cling time for 30 to 60 seconds, and adjusting small amounts of soap incrementally to optimize foam quality.
- Recording the exact mix ratios, bottle size, nozzle setting, and water temperature helps ensure consistent, effective foam application across multiple washes.
Table of Contents
- What is the correct snow foam to water ratio?
- How do you measure and calculate the mix?
- How to dial in your ideal snow foam mix
- Why is your snow foam thin or not clinging properly?
- Safety, label guidance and coating considerations
- Diamondbrite’s guidance on pre-wash and foam without a pressure washer
- Why the test-and-record habit matters more than the ratio itself
- Get the mix right, every time, with Diamondbrite
- Sources
- FAQ
What is the correct snow foam to water ratio?
The honest answer is that it depends on three things: how concentrated your soap is, whether you’re running a foam cannon, a manual lance, or a pressure-washer lance, and how much pressure your machine actually delivers. That’s why every credible dilution guide gives you a range rather than one number, and why you’ll adjust from there.
Here’s where most owners should begin:
- Foam cannon, 32 oz (≈946 ml) bottle: concentrated foam soap, a small amount; standard foam soap, a moderate amount; lower-foaming or budget soap, a bit more. Redline Garage’s dilution cheat sheet uses these general guidelines as its baseline.
- Foam lance or 1-litre lance bottle: typically a low dilution ratio within a recommended range, with soap topped up to 1 litre with water.
- Pressure-washer lance: start with a weaker mix, using a higher dilution ratio in the bottle itself.
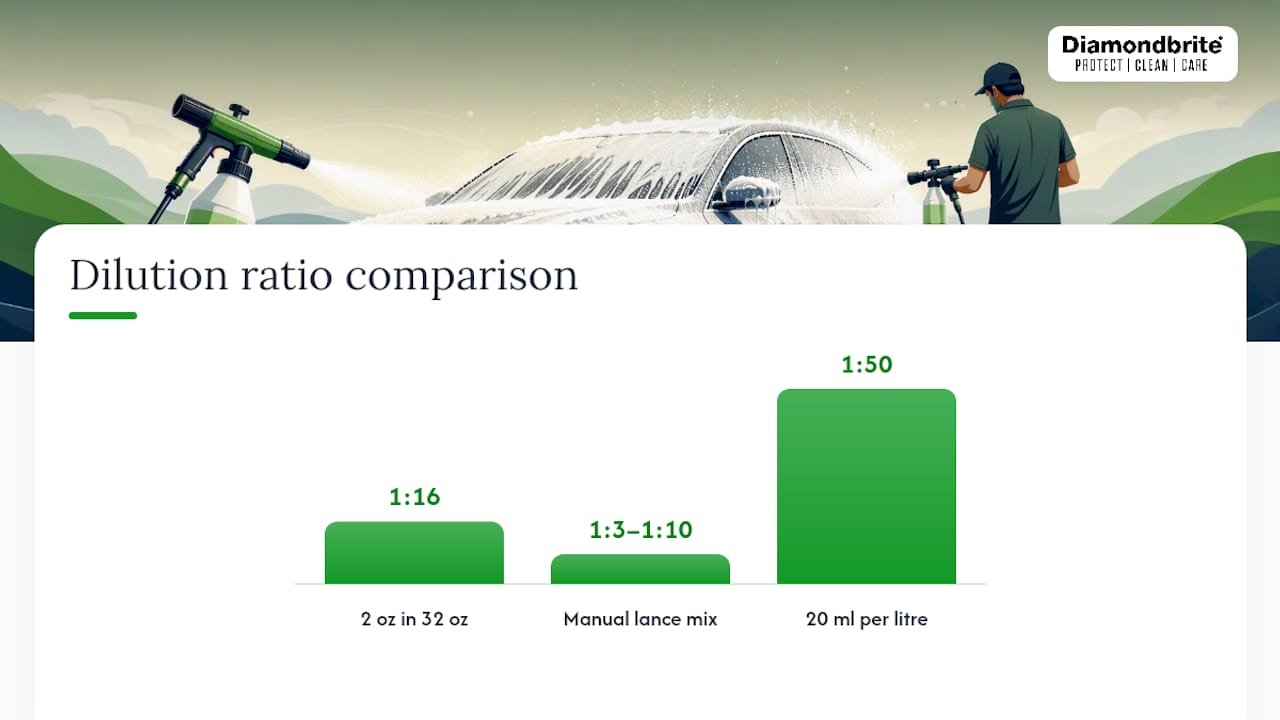
That last point catches a lot of people out, so it’s worth explaining properly. A manual foam cannon or lance sprays whatever you mix, undiluted by anything except what you add. A pressure-washer lance, by contrast, draws your mix through the machine’s own water flow and dilutes it again on the way out. According to AUTO GRAPH Detailing’s dilution guide, a 1:10 to 1:30 mix in the bottle can end up closer to 1:50 or even 1:200 by the time it lands on the paint. Manual lances and cannons need a stronger 1:3 to 1:10 mix precisely because they skip that second dilution step.
Quick conversions worth keeping handy: 1 oz ≈ 30 ml. So 2 oz in a 32 oz bottle is roughly 60 ml in 946 ml, which works out to about a 1:16 ratio. If a label calls for 20 ml per litre, as some Koch-Chemie formulas recommend, that’s a 1:50 ratio, considerably weaker than most cannon mixes, which tells you the product itself is more concentrated.
How do you measure and calculate the mix?
Dilution ratios look intimidating written as “1:10” until you break them down. The first number is product, the second is water, and it’s the total parts that matter, not the exact unit.
- Read the ratio as parts, not units. A 1:10 ratio means 1 part soap to 10 parts water, so in a 1-litre bottle that’s around 100 ml of soap topped up with roughly 900 ml of water to make 1,000 ml total.
- Convert ounces the same way. A 1:16 ratio in a 32 oz bottle means 2 oz of soap and 30 oz of water, which is exactly the “standard” starting point mentioned above.
- Work backwards from a labelled dose. If a bottle says “20 ml per litre,” divide 1,000 by 20 to get a ratio of 1:50. That single calculation tells you instantly whether a product is strong (low numbers, like 1:10) or gentle (high numbers, like 1:50 or more).
- Scale up or down freely. Once you know your ratio, you can mix any bottle size. A 1:15 mix in a 500 ml bottle needs about 33 ml of soap; the same ratio in a 2-litre reservoir needs about 133 ml.
Here’s a quick cheat sheet for common labelled dilutions:
| Labelled ratio | Meaning per 1 litre | Typical use |
|---|---|---|
| 1:5 | 200 ml soap, 800 ml water | Strong lance mix, heavy grime |
| 1:10 | 100 ml soap, 900 ml water | Standard lance or cannon strength |
| 1:16 | 60 ml soap, — water | Standard 32 oz cannon dose |
| 1:30 | 33 ml soap, — water | Pressure-washer lance reservoir |
| 1:50 | 20 ml soap, — water | Concentrated formula, gentle dose |
How to dial in your ideal snow foam mix
Getting the ratio right is less about maths and more about testing, watching, and adjusting in small steps. This is the routine worth building into your regular wash.
- Set your equipment first. Turn the soap knob toward rich (or fill your lance to the recommended mark), open the fan nozzle for wide, even coverage, and use warm water if you have access to it. Redline Garage notes that warm water helps the soap generate and dissolve more evenly than cold.
- Spray a test panel. Pick one door or the bonnet, apply your starting mix, and watch how it behaves over 30 to 60 seconds.
- Check for cling versus run-off. Good foam should sit on the panel and slide slowly, not slump off in seconds or vanish into a thin, watery film.
- Adjust in small increments. Add roughly 10 to 20 ml (or half an ounce) at a time if the foam is thin, and re-test before adding more. Resist the urge to double the dose in one go.
- Stop once it clings for 30 to 60 seconds and rinses cleanly. That’s your winning mix. The Car Care’s guide warns that overdoing it produces a rigid foam that clings too well and refuses to rinse off, which wastes product and adds rinsing time.
- Write the recipe down. Record the exact amount, bottle size, nozzle setting, and water temperature for that soap and rig, so next wash starts where this one finished.
Pro Tip: If you’re still getting thin foam after two or three increment increases, stop adding soap. The problem is very likely mechanical (pressure, nozzle, or orifice), not dilution, and more product will just mask the real issue.
Why is your snow foam thin or not clinging properly?
Before you reach for more soap, it’s worth ruling out the mechanical causes, because they’re the more common culprit. A weak, watery foam is often a hardware problem wearing a dilution costume.
- Low pressure or flow at the cannon. If your pressure washer is underpowered for the cannon attached, no amount of extra soap will fix thin foam.
- Wrong or worn orifice. The small nozzle inside the cannon controls how much air mixes with the soap; a worn or mismatched orifice starves the mix of air.
- Air pocket in the bottle. A poor seal or low water level can let air through unevenly, producing patchy, inconsistent foam.
- Using standard car shampoo instead of dedicated foam soap. Shampoo is built to rinse cleanly, not to hold air, so it will never foam like a proper snow foam formula.
- Hard water. Mineral-heavy water can suppress lather regardless of how much product you add.
Redline Garage’s troubleshooting notes make the same point directly: chasing thin foam with more product is often the wrong fix when the real issue is pressure or the orifice. Work through the list, swap one variable at a time, and only increase your dilution once you’ve confirmed the equipment itself is behaving.
Safety, label guidance and coating considerations
Every dilution range in this guide is a starting point, and the manufacturer’s own label always takes priority over any generic rule of thumb, since formulas genuinely differ. AUTO GRAPH Detailing makes the same case: many products list separate ranges for manual application versus pressure-washer use, and mixing those up leads to either weak foam or an overly harsh dose.
- Check the safety data sheet for hazard or PPE guidance.
- Choose a pH-neutral, coating-safe formula for coated or waxed cars, and patch-test if unsure.
- Label mixed spray bottles clearly, store concentrates properly, and dispose of leftover diluted mix according to local guidance.
Pro Tip: A concentrated, coating-safe foam that only needs a low dose per wash often works out cheaper over a season than a bargain foam you end up overdosing to get the same cling.
Diamondbrite’s guidance on pre-wash and foam without a pressure washer
Getting the ratio right matters, but so does starting with the right product and the right prep. Diamondbrite’s best pre-wash guide walks through how a proper pre-wash loosens grime before contact wash even begins, which reduces the risk of marring paint regardless of how well your foam mix is dialled in. If you don’t own a pressure washer, you’re not excluded from this step either; there are workable low-pressure and no-pressure foam methods that still deliver a decent pre-wash clean.
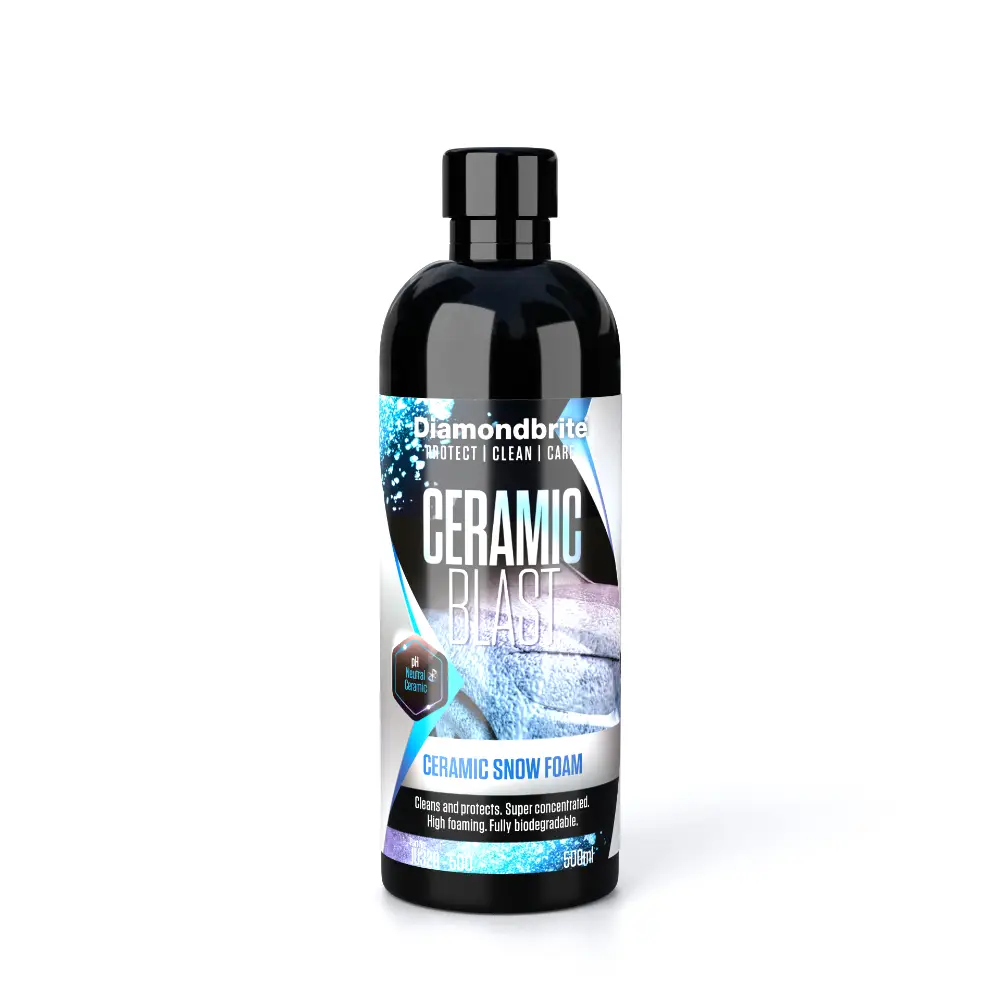
Whatever formula you’re using, always follow the manufacturer’s own directions on the bottle first. Some coating-safe ranges are formulated with pH-neutral chemistry in mind, designed to be compatible with ceramic-protected paintwork rather than detrimental to it.
Why the test-and-record habit matters more than the ratio itself
The number on the bottle is only ever a suggestion. What actually protects your paint and your wallet is the habit of testing a panel, watching how the foam behaves, and writing down what worked. Skip that step and you’ll either overdose your soap for years without realising it, or underdose it and blame the product for poor cling.
Keep a simple note, even just in your phone, of the soap, the bottle, the ratio, and the water temperature that gave you the best result. Do it once properly for each rig you own, and every wash after that becomes faster and cheaper.
— Will
Get the mix right, every time, with Diamondbrite
A dialled-in dilution ratio only works as well as the soap behind it, and that’s where a coating-safe, concentrated formula earns its keep. Some pre-wash and shampoo ranges are built to dose low without sacrificing cling, avoiding the need to overdose a bargain foam just to get decent coverage on a wash.

If ceramic protection is part of your routine, pairing the right foam ratio with the right maintenance products keeps that finish looking sharp for longer. Diamondbrite’s ceramic coating maintenance guide covers how to look after a coated finish between washes, and the best pre-wash guide walks through tested mixes for common setups. Always check the directions on your specific bottle first, since dilution ranges vary by formula, then head to the Diamondbrite shop to pick up a coating-safe foam and get your next wash started.
Sources
- Foam cannon dilution ratio cheat sheet | Redline Garage
- How to use snow foam: why to pre-wash and how to do it
FAQ
What happens if you don’t dilute snow foam?
Undiluted or overly strong snow foam produces a thick, rigid foam that clings but won’t rinse off cleanly, which wastes product and can leave residue on the paint. It’s also unnecessarily harsh, since most formulas are designed to work at a diluted ratio, not neat.
How do you make snow foam solution?
Mix your chosen foam soap with water in your cannon or lance bottle, starting around 1 to 3 ounces per 32 oz bottle or 1:5 to 1:15 for a manual lance, then test on a panel and adjust in small steps until you get 30 to 60 seconds of cling before run-off.
Do you wet the car before foaming?
Yes, giving the car a quick rinse first helps loosen loose dirt and grit and stops the foam from dragging debris across dry paint. It also helps the foam spread evenly rather than beading on a dusty surface.
Can you use washing-up liquid as snow foam?
Washing-up liquid isn’t formulated to foam or cling like a dedicated snow foam, and it’s often too harsh for coated or waxed paintwork, stripping protection rather than working with it. Stick to a pH-neutral, coating-safe foam formula and follow its labelled dilution range for the best result.
