

Start with an eraser or a cloth dampened with isopropyl alcohol; both lift fresh wax from plastic trim without risking the surface. If residue has settled in, move up to a clay bar or a dedicated wax remover. Always spot-test first, especially near clear polycarbonate lenses, and let the milder option do the work before reaching for anything stronger.
TL;DR:
- Wax removal should start with mechanical methods like a vinyl eraser or soft brush before moving to chemical solvents.
- Isopropyl alcohol on a cloth is effective for light wax deposits, but excessive use can cause clouding on some plastics.
- Clay bars and dedicated wax removers are necessary for deeply ingrained or textured wax, with caution advised when using abrasive tools like magic erasers.
- Avoid petroleum-based solvents and hydrocarbon-containing products like original WD‑40 Multi‑Use on soft plastics and polycarbonate lenses to prevent damage.
- Applying a trim restorer or protectant immediately after cleaning helps maintain the plastic’s appearance and protect against future damage.
Table of Contents
- Quick, safe ways to remove wax from plastic trim
- How to strip wax from plastic step by step
- Dealing with stubborn wax in textured or porous trim
- What to avoid when cleaning wax off plastic
- Restoring and protecting trim after cleaning
- Diamondbrite’s take on plastic trim aftercare
- Why DIY wax removal beats most quick fixes
- Keep your finish looking sharp after the wax comes off
- Sources
- FAQ
Quick, safe ways to remove wax from plastic trim
Fresh wax haze on plastic trim is one of the most common aftermaths of a weekend detail, and it responds well to a handful of low-risk techniques. The trick is working through them in order of gentleness, rather than jumping straight to whatever solvent is closest to hand.
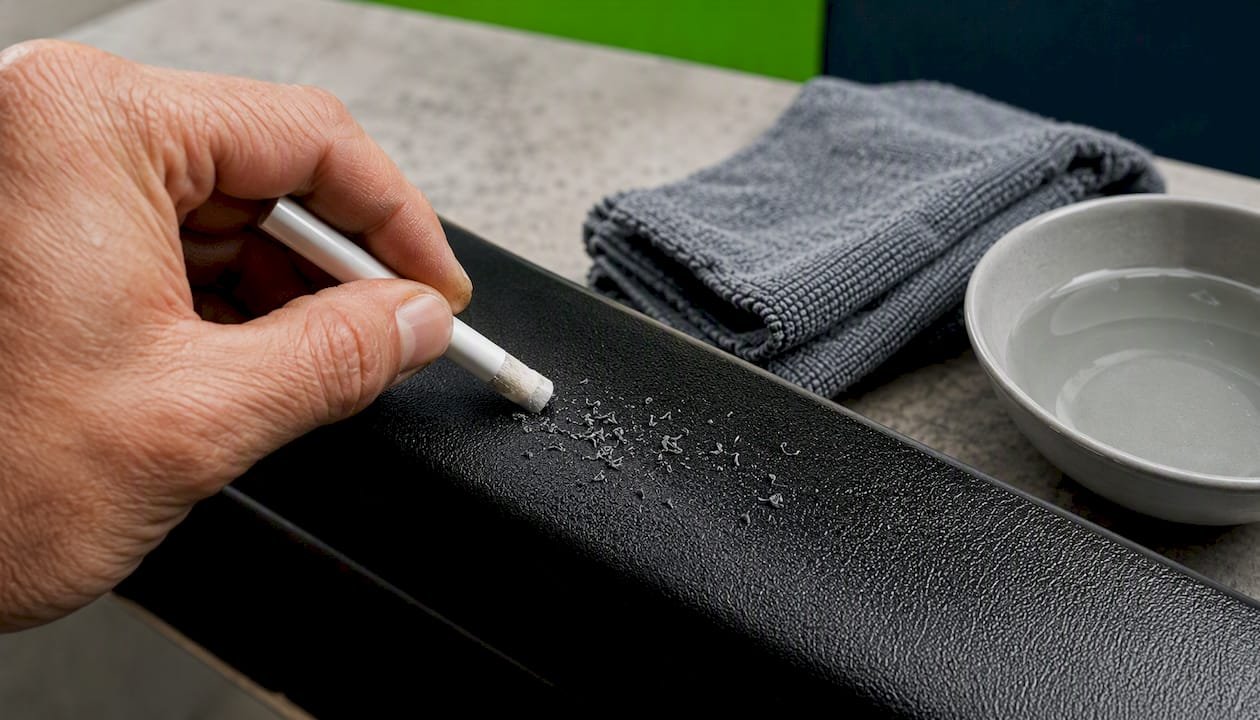
A plain pencil or vinyl eraser is the first port of call for textured black trim. Detailers rate it precisely because it lifts wax mechanically, without introducing anything that could react with the plastic itself. No chemicals, no fumes, just friction doing the job cleanly.
For lighter deposits, isopropyl alcohol on a microfibre cloth cuts through wax quickly. Some owners have reported a cloudy residue appearing on plastic when IPA is applied too liberally, so less is more here.
Older or embedded wax that has sat through a few wash cycles usually needs a clay bar or a dedicated wax remover spray. These lift wax from the pores of textured trim in a way surface wipes cannot manage.
You will see WD‑40 mentioned in older detailing threads, and it’s worth knowing why that advice is outdated. The manufacturer’s own guidance notes that the original Multi‑Use Product contains hydrocarbons that can affect certain plastic polymers over time, and recommends WD‑40 Specialist Silicone instead for anything plastic.
Before you start, gather:
- A clean microfibre cloth
- A soft-bristled toothbrush for texture
- Masking tape to protect adjacent paint edges
- A spare pencil or vinyl eraser
How to strip wax from plastic step by step
Work methodically and you’ll rarely need to escalate beyond the first two methods.
- Prep the area. Wash the trim with a plastic-safe shampoo and dry it fully. Mask the painted edges bordering the trim with tape, then test your chosen method on a small, hidden patch.
- Eraser technique. Rub in straight lines, following the grain of the trim rather than circling. Brush away the crumbling debris with the soft toothbrush and swap the eraser once it becomes saturated with wax.
- Isopropyl alcohol technique. Apply the alcohol to the cloth, never directly onto the trim, then work it in with light agitation. Wipe with a dry section of the cloth to lift the dissolved wax before it can resettle.
- Clay bar technique. Spray clay lubricant generously, then glide the clay across the surface with light pressure. Fold the clay to a clean face frequently. Stop once the trim feels smooth to the touch rather than relying on how it looks.
- Finish. Rinse the panel, dry it thoroughly, and apply a trim restorer or protectant to replace lost oils.
Pro Tip: Check trim by feel with your fingertips, eyes closed, running along the surface. Wax residue often hides from view but announces itself instantly under touch.
Dealing with stubborn wax in textured or porous trim
Deep, ingrained wax in heavily textured trim sometimes shrugs off the gentler methods, and that’s when you need a plan for the next step rather than reaching for something too aggressive.
- Move up to a clay bar or a solvent spray formulated specifically for trim, rather than a general-purpose degreaser.
- Work a soft-bristled brush into the texture to dislodge wax sitting in the pores, then follow with clay.
- Fold and refresh the clay bar often. A saturated clay face just redeposits wax rather than lifting it.
- Reserve a magic eraser for genuinely stubborn spots only, and use the lightest pressure you can manage. Detailers caution that these pads are abrasive and can wear the trim’s surface with repeated use.
- If the trim still looks patchy after two or three careful passes, that’s the point to hand it to a professional detailer rather than risk the finish further.
What to avoid when cleaning wax off plastic
A few habits cause more damage than the wax ever would.
- Skip mineral spirits and strong petroleum-based solvents on soft plastics and, especially, on clear polycarbonate lenses. These can cloud or craze the surface permanently.
- Treat WD‑40 Multi‑Use Product with caution on plastic trim. Its hydrocarbon content is flagged by the manufacturer’s own FAQ as a plastics risk; WD‑40 Specialist Silicone is the safer stand-in.
- Never scrub in circles near painted panels. Straight strokes and masking tape keep your cleaning motion away from the clear coat.
- Always spot-test, and double-check whether the part in question is clear polycarbonate before applying anything beyond a plain eraser.
Detailing forum consensus backs this cautious order: mild mechanical methods first, solvents only if needed, because many trim products simply mask wax rather than lift it from the surface.
Restoring and protecting trim after cleaning
Once the wax is gone, the trim underneath often looks tired and grey, so aftercare matters as much as the removal itself.
- Apply a trim restorer or protectant straight after cleaning to replace the oils stripped out during the process and add a layer of UV defence.
- Before your next wax session, mask the trim with tape and use a dedicated foam applicator pad kept away from painted panels, so you’re not repeating the whole job in a fortnight.
- Build a light, regular cleaning schedule and favour non-oily protectants over greasy dressings, which attract dust and turn white within weeks.
Diamondbrite’s take on plastic trim aftercare
Diamondbrite has spent more than three decades developing car care formulations in its Loughborough lab, working alongside main dealers and professional detailers who need results that hold up, not just look good on the day. That background shapes how we think about trim care specifically: removing wax safely is only half the job, and what you put back matters just as much.
Once trim is clean and dry, a ceramic shampoo formulated for regular washes helps prevent the dull, chalky look that untreated plastic develops over time. For panels bordering the trim, our ceramic glaze range replenishes the paintwork’s finish without leaving the greasy residue that attracts more dust onto adjacent plastic.
If trim has faded badly, oxidised, or shows scratching from years of harsh cleaning, that’s beyond a DIY fix and worth a professional detailer’s attention rather than another product application.
Why DIY wax removal beats most quick fixes
Most advice on removing wax from plastic trim jumps straight to the strongest available product, and that’s exactly backwards. The eraser test tells you something important: if a bit of rubber and friction can shift the problem, you never needed a solvent in the first place.
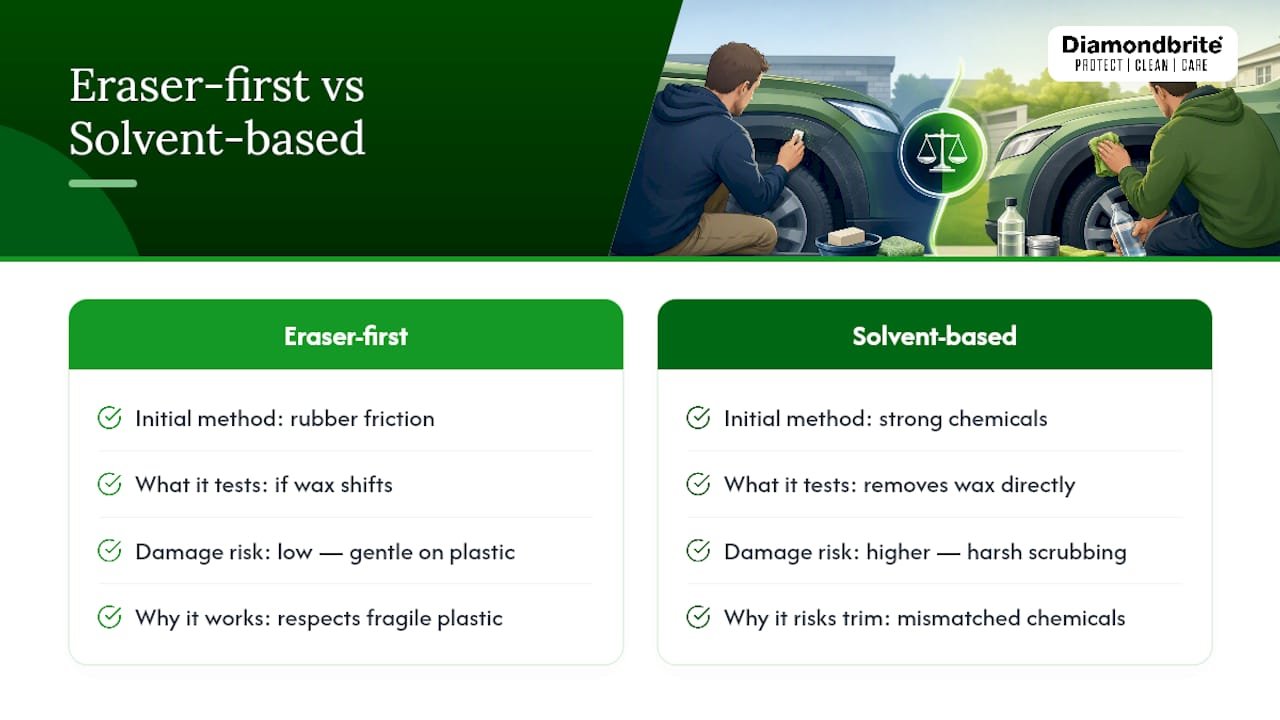
The conventional wisdom that “stronger always wins” falls apart once you look at how plastic trim actually degrades. It’s not usually the wax that ruins textured trim over the years; it’s the accumulated damage from repeated harsh scrubbing and mismatched chemicals used to chase a quick result. Isopropyl alcohol and clay bars work precisely because they respect that the plastic underneath is more fragile than the wax sitting on it.
If you take one thing from this, prioritise sequence over strength. Try the gentlest method that could plausibly work, give it a fair go, and only escalate once you’ve confirmed it genuinely isn’t enough. Your trim will thank you in five years, not just this weekend.
— Will
Keep your finish looking sharp after the wax comes off
Getting wax off your trim is only step one. Diamondbrite’s ceramic shampoo range is built to keep both paintwork and adjacent plastic looking cared for wash after wash, without the greasy build-up that drags dust straight back onto trim you’ve just cleaned.

Unlike generic all-purpose cleaners that leave a residue behind, a wash formulated with ceramic technology rinses cleanly and adds a layer of protection each time you use it, so trim stays cleaner for longer between details. It’s a small swap in your routine that saves you repeating the wax-removal job every few months. Browse the ceramic shampoo range or explore the full Diamondbrite shop to find the right maintenance product for your next wash.
Sources
- WD‑40 UK FAQs
- Removing wax on plastic trim & tar remover? | Detailing World forum
- How to Clean Wax from Plastic Trim | wikiHow
FAQ
Does WD‑40 remove wax from plastic trim?
It can shift wax, but the original Multi‑Use Product contains hydrocarbons that manufacturer guidance flags as risky for some plastics; WD‑40 Specialist Silicone is the safer choice for trim.
Does vinegar dissolve car wax on plastic?
Diluted white vinegar can help break down light wax residue, though it isn’t ideal for every plastic type and needs rinsing off promptly to avoid dulling the surface.
Does WD‑40 clean black plastic trim safely?
Use it cautiously, if at all. The safer route for black plastic trim is an eraser or isopropyl alcohol first, reserving silicone-based sprays for tougher jobs.
What dissolves hardened, stubborn wax on trim?
A clay bar with lubricant or a dedicated wax remover spray lifts hardened wax that has settled into textured or porous trim, where milder wipes and erasers no longer make a dent.
