

A mild-acid spot remover or a 30 to 60 second wipe with a diluted vinegar solution will lift most fresh water spots without touching the clearcoat underneath. That’s the fix for the vast majority of marks you’ll find after a rain shower, a sprinkler pass, or an overdue wash on a hot day. Before you reach for anything stronger, there are a few things worth getting right first.
Start by rinsing the panel with clean water to remove loose grit, then let it cool if it’s been sitting in direct sun. Working on a hot bonnet flash-dries any product you apply and can bake mineral deposits in even further, so patience here saves you a repeat job later.
Do this first, in order:
- Rinse the affected panel with plain water and check it’s cool to the touch.
- Test your chosen spot remover on a small, hidden area, like the inside of a wheel arch lip or door shut.
- Apply the product to the water spots and leave it for 30 to 60 seconds, no longer.
- Wipe gently with a soft microfibre cloth, following the same direction rather than scrubbing in circles.
- Rinse thoroughly and dry the panel with a clean towel.
Before you start, avoid these mistakes:
- Don’t work in direct sunlight or on a warm panel; the product will dry before it can dissolve anything.
- Don’t scrub hard if the spot doesn’t lift straight away. Firm rubbing on a resistant deposit is how owners scratch their own paint.
- Don’t skip the small test patch, even if you’re confident. Some clearcoats react differently to acidic products than others.
Pro Tip: If a spot shrugs off a 60 second dwell with a mild acid, stop. That resistance usually means the deposit has started etching into the clearcoat, and pushing harder with the same product rarely helps. It’s a sign to move to the next stage of correction, not to double the dwell time.
Key Takeaways
Chemistry-first correction, in a fixed escalation order from mild acid to clay to polishing to a professional, removes most water spots while doing the least possible damage to your clearcoat.
| Point | Details |
|---|---|
| Start with mild acid | A diluted vinegar mix or dedicated remover clears most fresh Type 1 spots in 30 to 60 seconds. |
| Diagnose before you treat | Use the fingernail rim and angled-light test to spot etching before reaching for a polisher. |
| Escalate in order | Move from spot remover to clay to light polishing only when the previous step fails. |
| Reapply protection | Claying and polishing strip wax or sealant, so reapply it immediately after correction. |
| Prevent with drying and dispersion | Fast mechanical drying plus a product like Diamondbrite’s Rinse and Shine reduces how long water sits before it evaporates. |
Table of Contents
- What causes water spots and how do you tell surface deposits from etched damage?
- Step-by-step: removing light, surface-level water spots
- Removing stubborn or etched water spots from your car’s paint
- How do you remove water spots from glass, chrome and trim?
- How can you stop water spots coming back?
- Why do pH-neutral shampoos and ceramic sealants matter for spot prevention?
- When should you stop DIY correction and call in a professional?
- Why chemistry-first correction is the right default
- A simple way to cut spotting before it starts
- Sources
- FAQ
What causes water spots and how do you tell surface deposits from etched damage?
Nearly every water spot starts the same way: tap water sits on a panel, evaporates, and leaves behind the minerals it was carrying, mostly calcium and magnesium carbonate, sometimes with traces of iron or silica depending on your local supply. The water disappears; the minerals don’t. What determines whether that residue wipes off in seconds or haunts your bonnet for months is how long it sat there and how hot the panel got while it dried.
Sprinkler overspray, rain that dries in the sun before you get to it, and rinsing a car then leaving it to air-dry are the three most common culprits reported by detailers. Water spots form because of dissolved mineral content in tap water, and the deposits fall into three rough tiers: surface mineral spots sitting on top of the clearcoat, shallow etching where the minerals have started to eat into the surface, and deep etching where the clearcoat itself has been permanently marked.
Diagnosing which tier you’re dealing with takes about two minutes and three simple checks.
- The wet microfibre test. Wipe the spot with a damp microfibre cloth and see if it smears or lifts at all. Surface deposits often soften slightly; etched marks won’t budge.
- The mild-acid wipe test. Apply a small amount of diluted vinegar or a dedicated spot remover, wait the recommended dwell time, then wipe. If the spot vanishes, you’re dealing with Type 1 surface mineral deposits.
- The fingernail and angled-light test. Run a fingernail gently across the spot; if you feel a slight rim or ring around the edge, or the mark shows up as a pale ghost under angled sunlight or a torch, you’re likely looking at etching rather than surface residue.
Most spots that look permanent aren’t. They’re deposits that have been left too long, not damage that’s already happened. The distinction matters because the fix for each is completely different, and using the wrong one wastes effort or, worse, causes the very damage you’re trying to avoid.
Step-by-step: removing light, surface-level water spots
This is where the vast majority of water spot problems get solved, and it’s the stage where a careful, methodical approach pays off most. Diluted vinegar or a dedicated mild-acid spot remover, at roughly a 1:1 to 1:2 ratio with distilled water, will dissolve most fresh Type 1 deposits within a short dwell time. You don’t need anything stronger for a spot that’s only a few days or weeks old.
What you’ll need before you start:
- A pH-neutral car shampoo for the initial wash
- Distilled or deionised water for mixing and rinsing
- A clean spray bottle
- A dedicated water spot remover, or white vinegar for a homemade mix
- Two or three plush microfibre towels
- Nitrile gloves and eye protection if you’re using anything acidic
Once you’re set up, the routine itself follows a clear order:
- Wash the car with a pH-neutral shampoo to remove loose dirt and any wax residue that might block contact with the spots.
- Confirm the panel is cool. Move into shade if you need to.
- Mix your solution (roughly one part distilled white vinegar to one or two parts distilled water) or apply a dedicated spot remover directly.
- Spray it over the affected area and let it sit for 30 to 60 seconds. A spray-on remover works well as a first option for fresh to moderate spotting precisely because it’s gentle enough to use repeatedly without risking the finish.
- Wipe with a soft microfibre cloth, rinse the panel with clean water, and dry immediately.
- Inspect under good light. If a faint outline remains, repeat once more before considering anything stronger.
For spots that have been baked on for longer, or where you’re dealing with hard water high in iron content, citric acid or oxalic acid formulations work faster because oxalate binds to both calcium and iron in the deposit, pulling more of it away in a single pass. These are stronger than a simple vinegar mix, so treat them with more caution: gloves, eye protection, and strict adherence to dwell time on the label.
Roughly nine in ten fresh water spots respond to this chemistry-first stage. If yours doesn’t, that’s useful information in itself, not a failure.
Removing stubborn or etched water spots from your car’s paint
When chemistry alone doesn’t shift a mark, the next safe move is mechanical, not chemical. Reaching for a stronger acid at this point rarely helps and can damage the clearcoat further. Instead, claying the surface first removes bonded contaminants that a spot remover simply can’t touch, minerals that have physically bonded to the surface rather than just sitting on top of it.
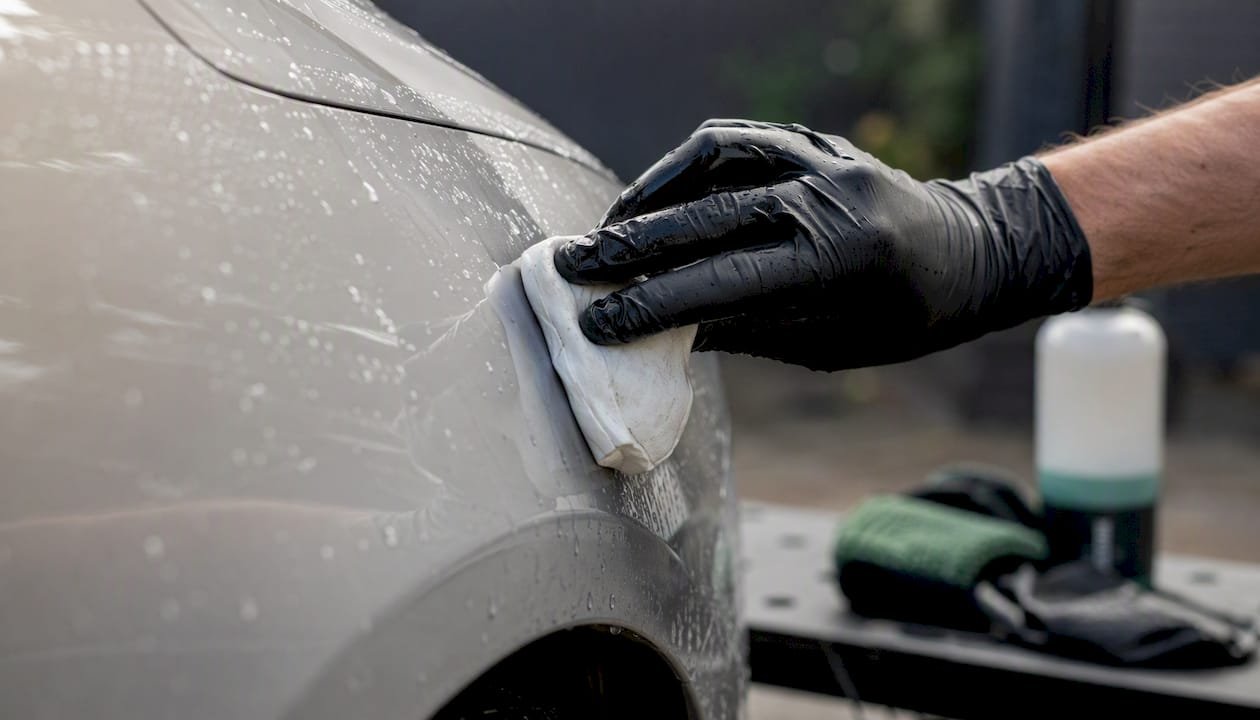
Work a synthetic clay bar or clay mitt over the affected panel with plenty of lubricant, in straight lines rather than circles, checking the clay regularly for embedded grit. Claying strips away wax and sealant along with the contaminants, so plan to reapply protection as soon as you’ve finished.
If the spot survives claying, you’re moving into polishing territory, and this is where a dual-action (DA) polisher earns its keep over hand application:
- Start with the lightest cutting pad and a mild compound. Work a small section at a time.
- Inspect the result under angled light or an LED torch before deciding whether to continue.
- If the spot is fading but not gone, repeat the same light pass rather than jumping to something more aggressive.
- Only step up to a heavier cutting compound if progress genuinely plateaus after two or three passes.
- Finish with a dedicated finishing polish to clear any haze the compound leaves behind.
- Reapply wax, sealant, or a ceramic topper immediately, since both claying and polishing remove existing protection.
The table below gives a rough sense of what to expect at each stage.
| Intervention | Likely result |
|---|---|
| Mild-acid spot remover (30 to 60s dwell) | Removes most fresh Type 1 surface mineral deposits |
| Clay bar decontamination | Lifts bonded minerals that chemistry alone leaves behind |
| Light compound + DA polisher | Corrects shallow (Type 2) etching, visible under angled light |
| Heavier compound, repeated passes | Needed only if light polishing plateaus; more clearcoat removed |
| No improvement after polishing | Suggests Type 3 deep etching; a professional assessment is the next step |
Pro Tip: Dark paint shows polishing marring far more readily than lighter colours. If you’re working on a black or dark blue car, use a smaller test area than you think you need and check your work under direct sun, not just shade, before moving on to the rest of the panel.
Watch for two warning signs while you work: a persistent halo that won’t clear no matter how many passes you make, and a fingernail that still catches a rim around the mark even after polishing. Both point to Type 3 deep etching, where the damage has gone through the clearcoat and no amount of home polishing will fix it.
How do you remove water spots from glass, chrome and trim?
Paint isn’t the only surface that collects mineral deposits, and treating glass or plastic trim the same way you’d treat a bonnet is a common way to cause avoidable damage.
Glass tolerates a stronger approach than paint because there’s no clearcoat to protect. Rinse first, then apply the same 50:50 distilled vinegar and water solution used on paint for light spots. For heavier deposits that won’t shift, a fresh razor blade held flat against wet glass, angled carefully and drawn in one direction, will lift mineral buildup that chemistry alone struggles with. This technique is standard among windscreen specialists, and it’s worth reading a proper windscreen scratch repair guide before attempting it, since the same care around technique applies to spot removal as it does to scratch work. Finish with a glass sealant to make future spots easier to remove.
Chrome and bare metal trim respond well to a dedicated metal polish or a mild acid cleaner, but use it sparingly. Test on a small section first, and avoid anything abrasive; a scouring pad will scratch chrome permanently in the time it takes to lift one water spot.
Plastic and rubber trim need the gentlest approach of all. Acids and strong solvents can dry out or discolour trim over time, so reach for a dedicated trim cleaner and protectant instead, or an isopropyl alcohol wipe where the surface allows it.
- Rinse the affected trim or glass first, before applying anything.
- Choose the surface-appropriate method: vinegar or razor for glass, metal polish for chrome, dedicated trim cleaner for plastic and rubber.
- Test on a hidden section before treating the visible area.
- Rinse and dry thoroughly, then protect: sealant on glass, wax on chrome, protectant on trim.
Pro Tip: Keep separate microfibre towels for glass and paint. A towel that’s picked up polish residue from bodywork can smear or streak glass, undoing the very clarity you’re trying to restore.
How can you stop water spots coming back?
Removing spots is only half the job. If you don’t change how you dry the car, you’ll be doing this again within weeks.
The single biggest factor in prevention is drying speed, not drying effort. Mechanical drying with a blower and plush microfibre towels turns what would otherwise be several minutes of evaporation, and mineral deposit, into a few seconds of active removal. Air-drying feels easier, but it’s exactly the process that creates the spots you’re trying to avoid.
- Use a proper drying towel or a blower to remove standing water within a minute or two of rinsing, rather than letting the car air-dry in the sun.
- Switch to distilled or deionised water for your final rinse if your local supply is hard. Deionised water carries close to zero total dissolved solids, so it evaporates clean instead of leaving mineral residue behind. A portable DI cartridge for your hose is a reasonable investment if you wash regularly.
- Keep a layer of wax, sealant, or a ceramic topper on the car at all times. Protected paint gives water less time and less opportunity to bond with the surface before you dry it off, and reapplying that layer after any correction work matters just as much as applying it the first time.
Pro Tip: Wash in the shade, ideally in the cooler part of the day. A panel that’s warm to the touch dries faster than you can towel it off, and that speed is exactly what creates fresh spots even when you’re being careful.
For more detail on keeping a finish protected long-term rather than just reacting to spots as they appear, this guide to maintaining paint finishes covers the broader routine worth building around your wash day.
Why do pH-neutral shampoos and ceramic sealants matter for spot prevention?
The products you use every wash day quietly decide how much work you’ll be doing later with a spot remover. A high-alkaline shampoo strips wax and sealant faster than it cleans, leaving bare clearcoat exposed to mineral deposits with nothing to slow them down. A pH-neutral shampoo cleans without eating into whatever protection you’ve already applied, which means your wax or ceramic layer keeps doing its job wash after wash.
Water dispersion sprays work on a different principle. Rather than protecting the paint itself, they’re designed to change how water behaves as it dries, encouraging it to sheet off the surface rather than sit in beads. Less time in contact with the panel means fewer minerals have the chance to deposit before you’ve dried the car.
When you’re choosing products for this stage, a few things on the label are worth checking:
- pH-neutral or pH-balanced on a shampoo label signals it won’t strip existing protection.
- Water dispersion or sheeting agent on a drying-stage spray tells you it’s designed to speed up bead formation and runoff, not just add shine.
- Ceramic or polymer-infused on a glaze or sealant points to a more durable, longer-lasting barrier than traditional carnauba wax alone.
Pro Tip: Apply any protective product to a clean, spot-free panel, never straight after a spot removal step without rinsing first. Residual acid left on the surface can interfere with how well wax or sealant bonds.
When should you stop DIY correction and call in a professional?
There’s a clear line between a spot you can fix yourself and one that needs a bodyshop, and knowing where it sits saves you from turning a cosmetic mark into an expensive repaint.
Stop and get professional advice if any of these apply:
- A fingernail still catches a distinct rim around the mark after you’ve tried both chemistry and light polishing.
- A halo or ghost outline persists under angled light even after two or three careful polishing passes.
- The affected area is large, covers multiple panels, or sits on a part of the car where you can’t safely reach with a polisher, like tight edges or badge surrounds.
- You’re polishing a dark colour and starting to see swirl marks or haze building up faster than the spot is clearing.
A professional detailer will typically start with the same conservative ladder you’ve just worked through: assessment, then multi-stage compounding and polishing under controlled light. Where etching has gone through the clearcoat, pros favour deionised water and warn against pushing aggressive DIY polishing on baked-on deposits, because it’s exactly the point where an untrained hand does more harm than the original spot ever would. For genuinely deep etching, wet-sanding and spot repair, or in the worst cases a panel respray, become the only real options.
Pro Tip: Photograph the spot before you attempt anything, and ask the detailer for a small test correction on one panel first before committing to the full car. It gives you a realistic idea of the result and the cost before you’re locked into the whole job.
Why chemistry-first correction is the right default
Product development in car care teaches you one thing early: the finish that lasts is the one you damage the least while fixing. Every abrasive pass on a polisher removes a fraction of clearcoat that never comes back, so the instinct to reach for compound before you’ve tried a simple acid wipe is almost always the wrong instinct, even when it feels more thorough.
A mild-acid spot remover costs you sixty seconds and risks nothing if you’ve tested it properly first. A DA polisher, however carefully used, is permanent removal of material. That asymmetry is why the escalation ladder in this guide runs in a fixed order, chemistry, then clay, then polish, then a professional, rather than jumping straight to whichever method looks the most satisfying on a video.
The mistake owners make most often isn’t skipping steps. It’s rushing the dwell time on a spot remover, deciding after ten seconds that it “isn’t working,” and reaching for a compound that wasn’t necessary. Give the chemistry its full sixty seconds before you judge it. And whichever stage actually clears the mark, reapply your protection straight away. Bare clearcoat left unprotected after correction is simply inviting the same spot back within a week.
A simple way to cut spotting before it starts
Most of the effort in removing water spots goes into fixing damage that better drying technique would have prevented in the first place. That’s the gap Diamondbrite’s Rinse and Shine water dispersion spray is built to close: applied during the drying stage, straight after your final rinse, it encourages water to sheet and bead away from the panel rather than sit and evaporate on the surface.
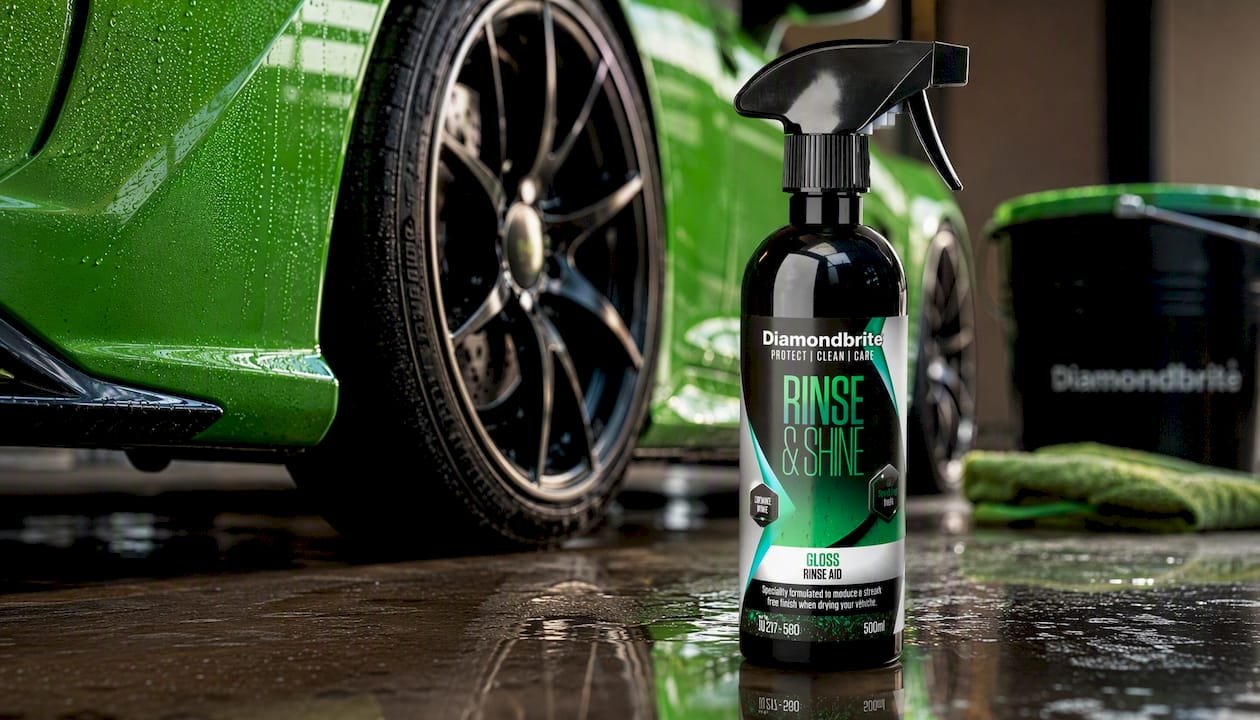
That matters because every minute water spends sitting on a hot panel is a minute minerals have to deposit. Rinse and Shine is designed to shorten that window, working alongside a pH-neutral shampoo and a proper drying towel or blower rather than replacing either. It’s a small addition to a wash routine you probably already have, not a new system to learn.
If you’ve just worked through a spot removal job using the steps above, this is the point to add it to your kit. Pair it with a pH-neutral shampoo for the wash stage and a plush microfibre or blower for drying, and you’ll spend a lot less time back on this guide next month. Visit the Diamondbrite shop to see Rinse and Shine alongside the rest of the range built for exactly this stage of the wash.
Sources
- What Causes Water Spots (and What Dissolves Them) · CarCareTruth
- What Causes Water Spots on Cars: A Pro’s Guide to Prevention & Removal – The Mobile Buff
- How Do You Remove Water Spots and Stains from Car Paint for Good? – AutoDetailPedia
- How To Prevent And Remove Water Spots? | Water Filter Systems – Just Car Care
FAQ
Is it possible to remove water spots from a car?
Yes. Most water spots are surface mineral deposits that lift with a mild-acid spot remover or diluted vinegar solution within 30 to 60 seconds, though genuinely etched marks need polishing or professional correction.
Does WD-40 remove water spots on a car?
WD-40 isn’t formulated as a mineral spot remover and isn’t a substitute for a proper pH-neutral or mild-acid product, using a dedicated water spot remover or a diluted vinegar solution gives far more predictable, safer results on paint.
Can water spots on a car be permanent?
Yes, if minerals sit long enough or bake on in sun, they can etch through the clearcoat, creating a permanent mark that chemistry alone won’t remove and that may need polishing or, in severe cases, a respray.
Can water spots be buffed out?
Shallow etching often responds well to polishing with a DA polisher and a light cutting pad, but deep etching that’s gone through the clearcoat can’t be buffed out safely and typically needs professional wet-sanding or a respray.
