

The fastest, safest way to remove caravan black streaks is to apply a purpose-made, non-abrasive black streak remover after a proper pre-wash, then rinse thoroughly. Skip anything abrasive: products like T-Cut can permanently damage the thin paint and GRP layers caravans are built with. We make caravan-safe cleaning products, and we’ll walk you through exactly how to use them below.
TL;DR:
- Use a caravan-specific, non-abrasive black streak remover after a thorough pre-wash to prevent damage to delicate GRP, ABS, and aluminum surfaces.
- Apply the cleaner in shade, let it dwell for one to two minutes, then gently agitate with a soft cloth before thoroughly rinsing from top to bottom.
- Choose products labelled safe for leisure vehicle surfaces, biodegradable, and free from heavy solvents, avoiding car-focused or abrasive compounds like T-Cut.
- Prevent streaks by regularly cleaning fittings like seals and roof fittings, then applying protective wax or ceramic sealant on dry surfaces in shaded conditions.
- DIY remedies such as WD-40 or alcohol sanitiser should be tested cautiously and followed by a protective wax to avoid residues and seal deterioration.
Table of Contents
- The step-by-step method for removing black streaks
- Choosing a black streak remover that won’t harm your caravan
- Safe DIY options and what to avoid
- Stopping black streaks before they start
- How our products fit into a caravan-safe routine
- When cleaning alone won’t solve it
- Get your caravan cleaning kit sorted
- FAQ
- Sources
The step-by-step method for removing black streaks
Black streaks form when rubber seals, awning rails and roof fittings oxidise and wash down the panels in rainwater, leaving stubborn vertical marks. Tackling them properly means working through the same sequence every time, rather than reaching for whatever’s under the sink.
- Pre-wash the whole caravan with a caravan-safe shampoo, ideally using the two-bucket method (one bucket of clean rinse water, one of soapy water) to avoid dragging grit across the panels.
- Apply a dedicated black streak remover or a well-diluted caravan cleaner directly to the marks.
- Let it dwell for one to two minutes. Don’t let it dry on the surface; that’s when residues and streaking tend to get worse rather than better.
- Agitate gently with a soft microfibre cloth or a soft-bristle brush, working in straight lines rather than scrubbing in circles.
- Rinse thoroughly from top to bottom, so you’re not redepositing dirty water onto panels you’ve already cleaned.
- Repeat on stubborn sections rather than pressing harder or leaving the product on longer than recommended.
- Finish with a protective wax or ceramic sealant once the panel is dry, so future grime has less to grip onto.
This sequence mirrors the approach Camplify’s guide to motorhome black streaks sets out: pre-wash, apply, dwell, agitate, rinse, repeat, then protect. It works because caravan exteriors (GRP, ABS plastics, aluminium trims) are softer and thinner than car bodywork, so the job is about patience and the right chemistry, not elbow grease.
Pro Tip: Work on one panel at a time in the shade. If the remover starts to dry before you’ve rinsed it off, you’ll be fighting new marks instead of removing old ones.
Choosing a black streak remover that won’t harm your caravan
Not every cleaner marketed for “exterior streaks” is safe to use on a caravan. Car-focused products are often formulated for thick, hard automotive paint, which behaves very differently to the surfaces on a touring van or motorhome.
Look for a product that is:
- Labelled safe for GRP, ABS, acrylic windows, aluminium and rubber seals, not just “automotive paint”.
- Biodegradable and free from heavy solvents or strong bleach.
- Supplied with clear dilution guidance on its technical data sheet, so you’re not guessing the ratio.
- Described with terms like “gentle”, “non-abrasive” or “specialist leisure vehicle formula” rather than “cutting” or “compound”.
Specialised 1L black streak removers typically cost between £5.69 and £11.99 in the UK, with concentrates often working out better value once you factor in how many washes they cover on a full-size caravan. A manufacturer technical data sheet for caravan cleaners usually states dilution ratios alongside confirmation of safe use on GRP, ABS, aluminium, rubber and acrylic, and some formulas also claim to slow algae regrowth between washes.
Buy from specialist caravan accessory shops, leisure retailers or reputable online sellers who stock leisure-vehicle-specific ranges, rather than assuming a supermarket car shampoo will do the same job. And whatever you do, leave T-Cut and other cutting compounds in the garage: they’re designed to remove a layer of car paint to correct swirls, which is the opposite of what a caravan’s thinner finish can tolerate.
Safe DIY options and what to avoid
Caravan forums are full of home remedies, and a few are genuinely useful in moderation. Most need a cautious approach, though, because what works on a car doesn’t always translate safely to a caravan’s seals and plastics.
- WD-40 or alcohol-based hand sanitiser are sometimes suggested for stubborn marks, but both can leave residues or soften rubber seals over time, so use sparingly and only as a last resort.
- Always test on a hidden patch first, such as a lower rear panel, and rinse thoroughly before judging the result.
- Never mix bleach or strong detergents with other cleaning chemicals; the fumes and reactions aren’t worth the risk.
- Avoid abrasive scouring pads entirely, and keep T-Cut off caravan bodywork altogether.
- If you do use a DIY fix, follow it with a protective wax to lift any residue left behind and reduce the chance of streaks returning quickly.
A Caravan Club forum thread on T-Cut captures the split well: plenty of owners have tried household fixes, but the consensus leans towards caution rather than confidence.
Stopping black streaks before they start
Cleaning the streaks themselves only buys you time if the source keeps producing them. Prevention means targeting the fittings that cause the staining, not just the panels underneath.
- Clean the source points first: awning rails, roof lights, vents, door handles and window seals are where oxidised rubber and grime originate.
- Wash in the shade, early or late in the day, avoiding direct sun so cleaner doesn’t dry on the surface before you’ve rinsed it.
- Blot-dry with a microfibre towel rather than letting water evaporate naturally, which leaves mineral spots that look like fresh streaking.
- Apply wax or a ceramic protectant to both the body and the appendages once everything is clean and dry.
- Reapply protection at the interval your product recommends, typically every few months depending on use and storage conditions.
- Inspect seals regularly for cracking or perishing, and only replace them if they’re physically degraded rather than simply dirty.
The Caravan Club’s own exterior cleaning advice backs this up: cooler conditions and prompt drying prevent residue marks that are often mistaken for new streaks.
Pro Tip: Keep a small bottle of your streak remover in the caravan’s storage locker. Catching a fresh mark within a week or two is far easier than letting months of rain bake it into the panel.
How our products fit into a caravan-safe routine
Every step above maps onto a product type, which makes building a kit straightforward rather than overwhelming.
- Use a ceramic shampoo for the pre-wash stage, since it lifts grime without stripping any existing protection.
- Reach for a non-abrasive caravan cleaner for spot treatment on streaks themselves, applied exactly as the label describes.
- Finish with a ceramic glaze or sealant to build a slicker surface that sheds dirt and rainwater more easily between washes.
Our guides on the two-bucket wash and five to ten minute pre-wash explain why that sequence reduces swirling and surface damage, and they apply just as well to a caravan’s panels as to a car’s. Always follow the dilution and application guidance on the product’s technical data sheet; it protects seals, decals and graphics just as much as it protects the finish.
When cleaning alone won’t solve it
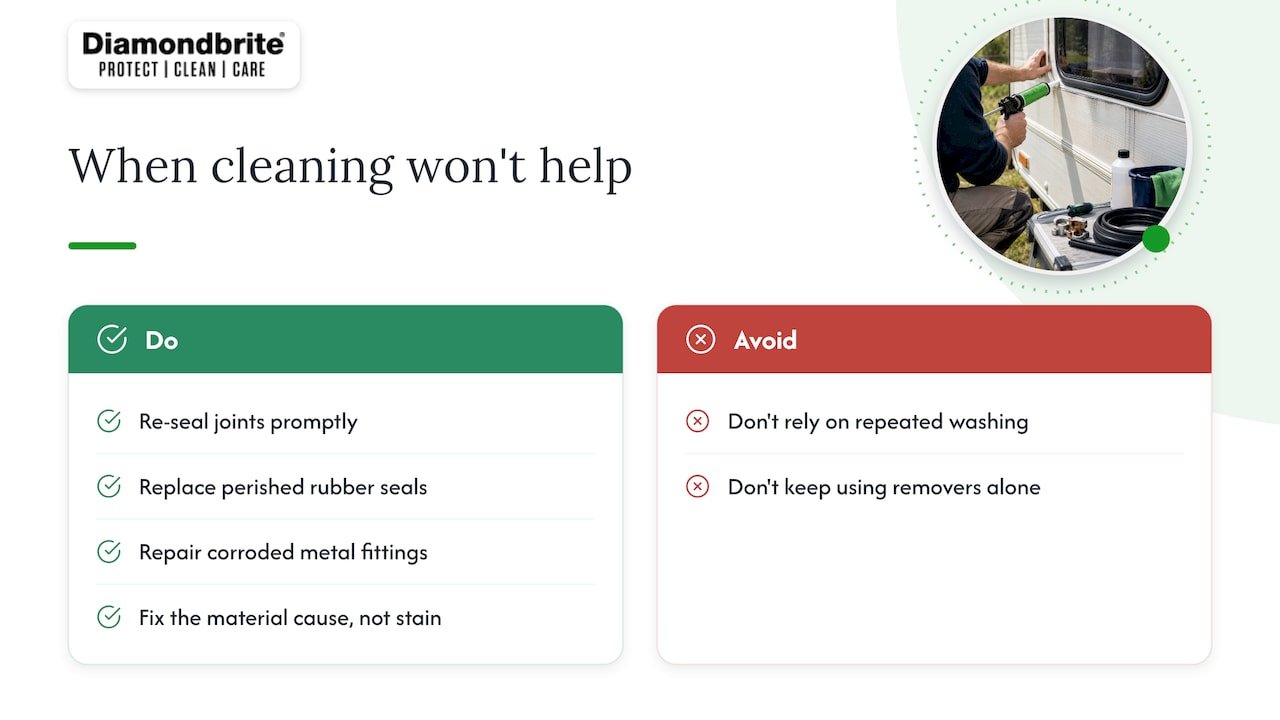
Sometimes what looks like a stubborn streak is actually a sign of something deeper: discolouration that won’t lift, seals that have gone brittle, or metal fittings showing corrosion rather than surface grime. That’s a material problem, not a cleaning one.
In those cases, repeated washing is just buying time. Re-sealing joints or replacing perished rubber seals costs more upfront than another bottle of remover, but it stops the staining at its source rather than treating the same symptom every few weeks.
— Will
Get your caravan cleaning kit sorted
Our ceramic shampoo, caravan-safe cleaners and glaze range are designed for this kind of job: tough on streaks, gentle on seals and GRP. 
Browse our full range of car, leisure and marine care products to put together a kit that covers pre-wash, spot treatment and protection in one go. Check each product’s technical data sheet for dilution and application details before you start, so the results last.
FAQ
What is the most effective black streak remover?
The most effective option is a specialist, non-abrasive remover formulated specifically for caravans or motorhomes, used after a proper pre-wash and rinsed thoroughly. These typically cost between £5.69 and £11.99 per litre in the UK, with concentrates often giving better value on larger vehicles.
What is a good homemade black streak remover?
There isn’t a reliably safe homemade formula; household options like WD-40 or alcohol-based hand sanitiser are sometimes used on forums but can leave residues or soften seals. If you try one, test it on a hidden panel first, rinse thoroughly, and follow up with a protective wax.
What is the best way to remove black streaks from a camper?
Pre-wash with a caravan-safe shampoo, apply a dedicated black streak remover, let it dwell for one to two minutes, then agitate gently with a soft cloth before rinsing from top to bottom. This sequence is recommended for motorhomes and campers alike, and repeating it on stubborn sections works better than scrubbing harder.
Can you use T-Cut on a caravan?
No, T-Cut and similar cutting compounds are designed for thick automotive paint and are generally unsuitable for caravan bodywork, since caravan paint and GRP layers are thinner and can be permanently damaged. Stick to products labelled safe for GRP, ABS and acrylic surfaces instead.
Sources
- Fenwicks black streak remover — product listing (MotorhomeShop)
- How to remove black streaks from a motorhome — Camplify blog
- Should you use T Cut on your caravan? — Caravan Helper
- Caravan & motorhome cleaner technical data sheet (Floorseal)
