

The safest way to remove brake dust is to clean cool wheels with a pH-safe reactive or iron remover, leave it to dwell for a few minutes, agitate gently with soft brushes, then rinse and dry thoroughly. Skip household solvents, wire brushes, and razor blades. Finish with a sealant so the next clean is easier.
TL;DR:
- Using a pH-neutral cleaner and iron fallout remover prevents damage when removing baked-on brake dust from delicate wheel finishes.
- Cool wheels in shade before cleaning to avoid staining and ensure the chemicals work effectively without flash drying.
- Heavy or bonded dust should be tackled with chemical removers and clay bars, avoiding abrasive tools that can strip coatings or scratch surfaces.
- Regular inspection and applying wheel sealant or ceramic coating can significantly reduce future brake dust buildup and simplify cleaning.
- Proper cleaning includes pre-rinsing, gentle agitation, and thorough drying; skipping these steps increases the risk of permanent wheel surface damage.
Table of Contents
- What is brake dust and why does it damage wheel finishes?
- How do you remove brake dust step by step?
- How do you deal with heavy or baked-on brake dust?
- What tools and products actually work?
- How often should you clean your wheels to prevent buildup?
- What are the biggest mistakes people make removing brake dust?
- A detailer’s take on getting this right
- Keep brake dust off with the Diamondbrite maintenance routine
- Sources
- FAQ
What is brake dust and why does it damage wheel finishes?
Brake dust is a gritty mix of metal filings from your pads and discs, carbon residue, and adhesive particles that flake off during braking. Left alone, it oxidises fast, and that oxidised layer can bite into lacquer coatings over time. Heat makes it worse: hot rotors bond dust to your wheel face far more aggressively than dust that lands cold. Some pad compounds throw off more metallic dust than others, and if you drive stop-start through town daily, your wheels take more of a hammering than someone on longer, steadier runs.
Certain finishes cop it worse than others:
- Diamond-cut alloys, where the exposed metal layer has no lacquer buffer
- Chrome, which shows staining and pitting quickly once the surface is compromised
- Uncoated or lightly coated aluminium, which oxidises faster than a sealed or ceramic-protected wheel
How do you remove brake dust step by step?
Getting this right isn’t complicated, but the order matters more than most owners realise. Rushing the sequence, or skipping the cool-down, is where most wheel damage actually starts.
- Park in shade and let the wheels cool. Never work on hot alloys straight off a drive. Warm metal makes cleaning products flash and dry almost instantly, which is when staining happens.
- Glove up. Iron removers and wheel cleaners are strong stuff, so wear gloves and eye protection before you start.
- Pre-rinse with a hose or pressure washer on moderate pressure. This knocks off loose grit before any chemical touches the surface, and it stops you grinding grit into the finish with a brush later.
- Apply a pH-neutral wheel cleaner or iron fallout remover. Spray evenly across the face, spokes and barrel.
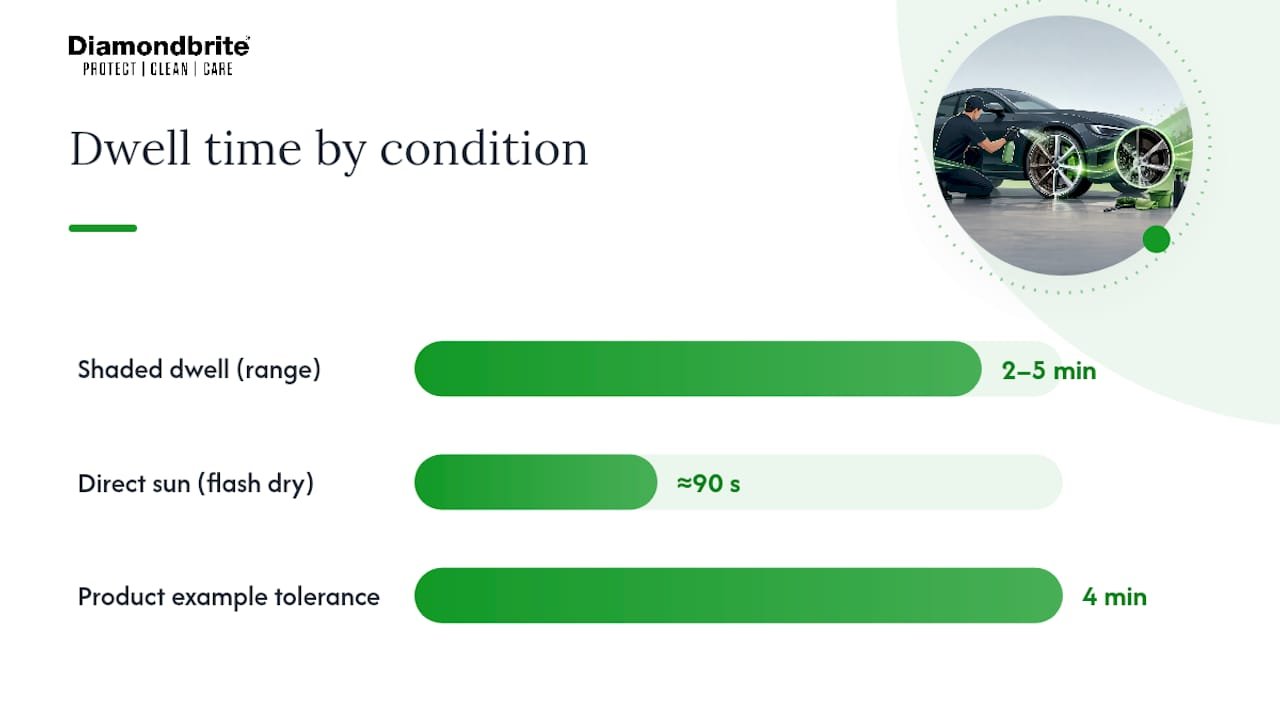
- Give it two to five minutes to dwell. Do not let it dry out. If the wheel is in direct sun, work in smaller sections rather than the whole car at once.
- Agitate with a soft wheel brush on the face and spokes, then switch to smaller detail brushes for lug nuts, valve stems, and the inner barrel.
- Rinse from the top down, working downward so contaminated water doesn’t run back over clean areas.
- Dry with a clean microfiber towel and check for missed patches, especially behind the spokes.
This sequence mirrors what professional detailers actually do: rinse first, use gentle chemistry, agitate with soft tools, and repeat rather than scrub harder.
Pro Tip: Work one wheel at a time in hot weather. A product that’s fine sitting for four minutes on a shaded wheel can flash dry in ninety seconds on one baking in direct sun, and that’s exactly when spotting happens.
How do you deal with heavy or baked-on brake dust?
Stubborn contamination that’s bonded itself to the surface needs a different approach, but not a more aggressive one. The instinct to scrub harder or bring out something abrasive is exactly the wrong move.
- Reach for a reputable iron fallout remover. These react chemically with embedded metallic particles, often turning purple or red as they work, which is your visual cue that the product is doing its job rather than just sitting there.
- Repeat the safe cycle rather than escalating pressure. Two gentle passes with proper dwell time shift more bonded dust than one aggressive scrub, and they do it without stressing the clear coat.
- For fallout that’s fully bonded, a clay bar or clay mitt can lift what chemicals alone won’t shift, provided the finish is compatible. Follow with a light polish if the surface looks dull afterwards.
- Never bring out metal wool, wire brushes, or razor blades. These strip lacquer and leave scratches that trap dust even faster than before.
- If you’re looking at pitting, greying, or etching that won’t budge, that’s corrosion damage, not surface dust, and a wheel refurbishment specialist is the only realistic fix at that point.
A two-stage routine, a safe pH-neutral cleaner first and an iron remover only where needed, protects delicate finishes while still handling the contamination that a standard wash won’t touch.
What tools and products actually work?
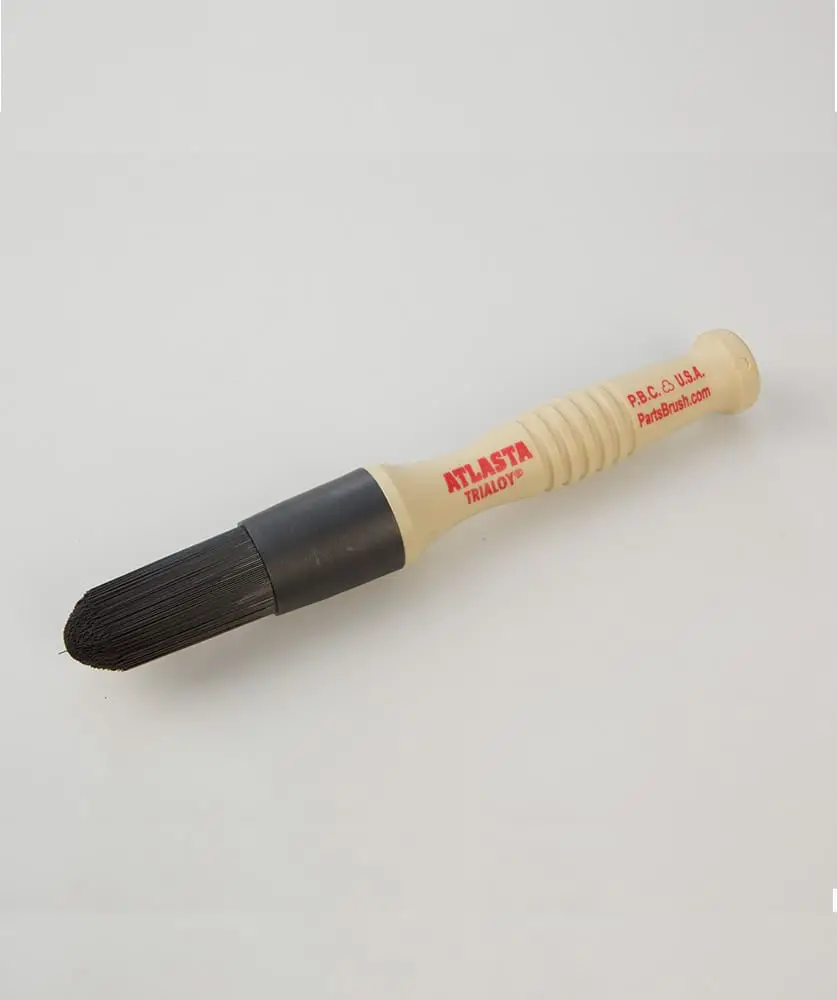
You don’t need a garage full of kit, but a few specific items make a genuine difference. Skip the all-purpose household stuff and build a small, dedicated set instead.
Tools worth having:
- A soft wheel brush for the face and spokes
- A smaller detail brush for barrels, lug nuts, and tight spots
- Dedicated microfiber wheel towels, kept separate from your paintwork towels
- A hose or pressure washer for pre-rinsing
- A two-bucket setup if you’re washing the whole car in the same session
Product categories to stock:
- A pH-neutral wheel cleaner for routine dust
- An iron fallout remover for bonded, baked-on contamination
- A ceramic wheel shampoo to maintain protection between deeper cleans
- A wheel sealant to reduce how strongly dust bonds in the future
Steer clear of acidic wheel cleaners and harsh alkaline degreasers on delicate or coated finishes, metal-bristled brushes of any kind, household solvents, and anything with a blade edge. A ceramic maintenance shampoo, used to top up an existing coating, slots neatly into this routine and keeps the protective layer working rather than fighting it.
How often should you clean your wheels to prevent buildup?
Prevention beats treatment every time, largely because it turns a scrubbing job into a quick wipe-down. Frequent weekly washes suit those doing daily stop-start driving or running high-metallic pads, while less frequent washes may suffice for steadier motorway commuters.
- Wash weekly to fortnightly, adjusted for your driving style and pad type
- Apply a wheel sealant every few months, or a ceramic maintenance coating on a longer annual cycle, since protective layers make dust adhere less and stretch the gap between heavy cleans
- After spirited driving or hard braking, a quick rinse and wipe once the wheels have cooled stops fresh dust bonding overnight
What are the biggest mistakes people make removing brake dust?
Most wheel damage isn’t caused by brake dust itself. It’s caused by how someone tried to remove it.
- Cleaning hot wheels, or letting product sit until it dries: flashing on warm metal is one of the most common causes of permanent spotting
- Reaching for metal brushes, razor blades, or solvent rags like acetone, all of which strip protective layers
- Skipping the final rinse and dry, leaving product residue to sit and streak
- Ignoring the barrel and behind the spokes, where dust builds up unseen
- Handling iron removers without gloves or eye protection, and ignoring the manufacturer’s instructions on dwell time and dilution
Pro Tip: Rinse before you think a product needs it, not after. If you’re wondering whether it’s starting to dry, it already is.
A detailer’s take on getting this right
Most of the damage I see on wheels didn’t come from brake dust. It came from someone trying to shift it too fast, with the wrong tool, on a hot afternoon. That’s the pattern every time.
On ceramic-coated wheels, dilute your iron remover slightly rather than using it at full strength. The coating already resists bonding, so you don’t need the aggressive dwell you’d use on bare alloy, and going gentler protects the coating rather than stripping it back to nothing. Uncoated wheels can take the standard concentration, but they’ll need attention more often because they’ve got no protective layer doing any of the work for you.
The single habit that separates a good result from a ruined finish is refusing to let anything dry on warm metal. Everything else in this guide is detail. That one rule is the difference.
— Will
Keep brake dust off with the Diamondbrite maintenance routine
Once you’ve got the safe cleaning steps down, the real win is making the next clean easier than this one. Diamondbrite builds that into a simple four-step routine: pre-wash to lift loose grit, a ceramic shampoo wash to clean without stripping any existing protection, a wheel-safe iron remover only where dust has bonded, then a wheel sealant to finish. Each step supports the next, rather than fighting it.

If your wheels are already ceramic-coated, our guide on how to clean ceramic coated wheels walks through the exact dilution and dwell adjustments that keep the coating intact. For the sealant side of things, ceramic coating maintenance covers reapplication timing so you’re not guessing when it’s due. Ready to put a proper kit together? Head to the Diamondbrite shop for starter packs that cover pre-wash, shampoo, and sealant in one order, and get your next wheel clean down to minutes instead of a weekend job.
Sources
For deeper product-specific guidance, see Diamondbrite’s clean ceramic coated wheels routine and ceramic coating maintenance schedule. For independent detailing reference, see Halfords’ brake dust guide and Wheelwright’s alloy wheel care advice.
- How to clean alloy wheels like a professional
- Alloy wheel care | Wheelwright
- How to Remove Brake Dust Without Damaging Alloys – Quick Tyre Fix
- Removing ingrained brake dust from alloy wheels
FAQ
What removes brake dust easily?
A pH-neutral wheel cleaner handles fresh dust, while a dedicated iron fallout remover shifts bonded, baked-on contamination without the need for scrubbing or abrasive tools.
Does WD-40 remove brake dust?
WD-40 and similar household products can strip lacquer and leave residue behind, so they’re best avoided; a proper pH-safe wheel cleaner or iron remover does the job without the risk.
How should brake dust be removed?
Cool the wheels, pre-rinse, apply a pH-safe cleaner or iron remover for two to five minutes, agitate with soft brushes, then rinse thoroughly and dry with a microfiber towel.
Is brake dust permanent?
Fresh brake dust isn’t permanent if you clean it off promptly, but left to bake on and oxidise repeatedly, it can etch lacquer or corrode bare metal, damage that no consumer product can fully reverse.
