

To protect vinyl and rubber, clean thoroughly first, then choose a low-solvent or ceramic-infused protectant and apply thin, even coats with the doors open for ventilation. Water-based dressings suit most interior trim, while ceramic-infused formulas last longer and resist UV fading better. Never use silicone dressings on tyre treads: they can leave a dangerously slippery surface.
TL;DR:
- Dressings made with water need monthly reapplication, while ceramic coatings last 12 to 24 months, with top ups every 3 to 6 months.
- Proper preparation means clearing debris, cleaning with a pH neutral product, degreasing stubborn areas, and letting each thin coat cure fully.
- Use tire dressing only on sidewalls, keep it off treads and braking surfaces, and never apply vinyl or rubber products to leather.
- For indoor application, open doors and windows, wear disposable nitrile gloves, and choose products made with water to limit chemical exposure in the cabin.
Table of Contents
- Protectant types explained: water-based, silicone and ceramic
- Step-by-step: clean, restore and protect vinyl and rubber
- Tyres, trim, vinyl and leather: what each surface needs
- Why vinyl and rubber fade and crack in the first place
- How often to check and reapply protectant
- A ceramic approach to longer-lasting vinyl and rubber protection
- Staying safe: ventilation, gloves and tyre work
- DIY dressing or ceramic investment: our honest take
- Where to find our ceramic protection products
- FAQ
- Sources
Protectant types explained: water-based, silicone and ceramic
Picking the right product matters more than how often you apply it. The three main categories behave quite differently once they’re on your trim, and each suits a different job.
Water-based dressings are the easiest to live with day to day. They carry low odour, work well on interior dashboards and door cards, and rarely leave a greasy residue on your hands or clothes. Most general-purpose trim restorers fall into this category, and they’re a sensible default when you’re not sure what else to reach for.
Silicone and solvent-based dressings deliver a deeper, wetter shine, which is why they’re popular for show finishes. The trade-off is durability: that shine tends to fade within days rather than weeks, and the silicone content can migrate onto glass or paintwork nearby. Independent product tests comparing tyre dressings found that solvent and silicone formulas often give a strong initial finish but fade sooner than water-based alternatives, with some carrying a real risk of overspray onto surfaces you didn’t mean to treat.
Ceramic-infused protectants sit at the premium end. They bond more firmly to the surface, build a hydrophobic layer that sheds water and road grime, and hold up far longer against UV exposure than either of the alternatives above. They’re particularly good at helping faded, chalky trim regain some depth of colour, though they ask for more careful prep to get full value from the coating.
Format matters almost as much as chemistry:
- Sprays: fastest to apply across large areas, but harder to control on vertical or textured trim without overspray.
- Gels: thicker consistency gives you more control, useful for detailed or textured panels.
- Wipes: convenient for quick top-ups and tight interior spaces, though coverage is thinner and shorter-lived.
If you’re treating a mix of interior and exterior surfaces, it’s worth keeping at least one water-based option and one longer-lasting formula on hand rather than relying on a single product for everything.
Step-by-step: clean, restore and protect vinyl and rubber
Protection only works as well as the surface beneath it. Skipping preparation is the single biggest reason a dressing fails early or looks patchy within a week.
- Remove loose debris first. Vacuum interior vinyl and brush down exterior trim to clear dust, grit and leaf matter before any liquid touches the surface.
- Wash with a pH-neutral cleaner. A dedicated interior cleaner or a mild all-purpose spray lifts grease without stripping existing dressing or attacking the vinyl’s own plasticisers.
- Degrease stubborn areas. Door shuts, sills and engine bay trim often need a stronger degreaser; work it in with a soft brush on textured surfaces to reach into the grain.
- Clay bar where contamination persists. For exterior rubber seals and trim that still feel rough after washing, a clay bar lifts bonded contaminants that washing alone won’t shift, a step detailing professionals rely on precisely because it improves how well any sealant that follows will bond and last.
- Restore faded trim before sealing. If the plastic has gone grey or chalky, a dedicated trim rejuvenator applied first gives the protectant something to lock in, rather than sealing in dullness.
- Apply protectant to an applicator, not the panel. Spray onto a microfibre cloth or foam applicator rather than directly onto the trim; this gives you even spread and avoids pooling in seams.
- Work thin, even coats. One light pass beats one heavy one. A thick layer takes longer to cure and is more likely to attract dust while it’s still tacky.
- Let each coat cure fully before adding another. Rushing a second coat onto a wet first one usually results in a patchy, uneven finish once it dries.
- Remove overspray immediately. Wipe down glass, paint and any contact surfaces the spray reached before it sets.
- Check tyre contact patches before driving. If you’ve dressed sidewalls, wipe away any product that’s crept onto the tread or the area that meets the road.
If you’d rather skip the chemical route on heavily soiled interiors, steam cleaning is worth considering: dry vapour steam cleaning with extraction lifts grime from vinyl and rubber without leaving any chemical residue behind, which can simplify the protection step that follows since you’re starting from a genuinely clean, dry surface.
Pro Tip: Leave freshly dressed tyres to cure for at least 20 to 30 minutes before driving; product that hasn’t set can fling onto your bodywork at speed.
Tyres, trim, vinyl and leather: what each surface needs
Treating every rubber and vinyl surface the same way is one of the quickest ways to cause damage or create a safety hazard. Each substrate has its own rules.
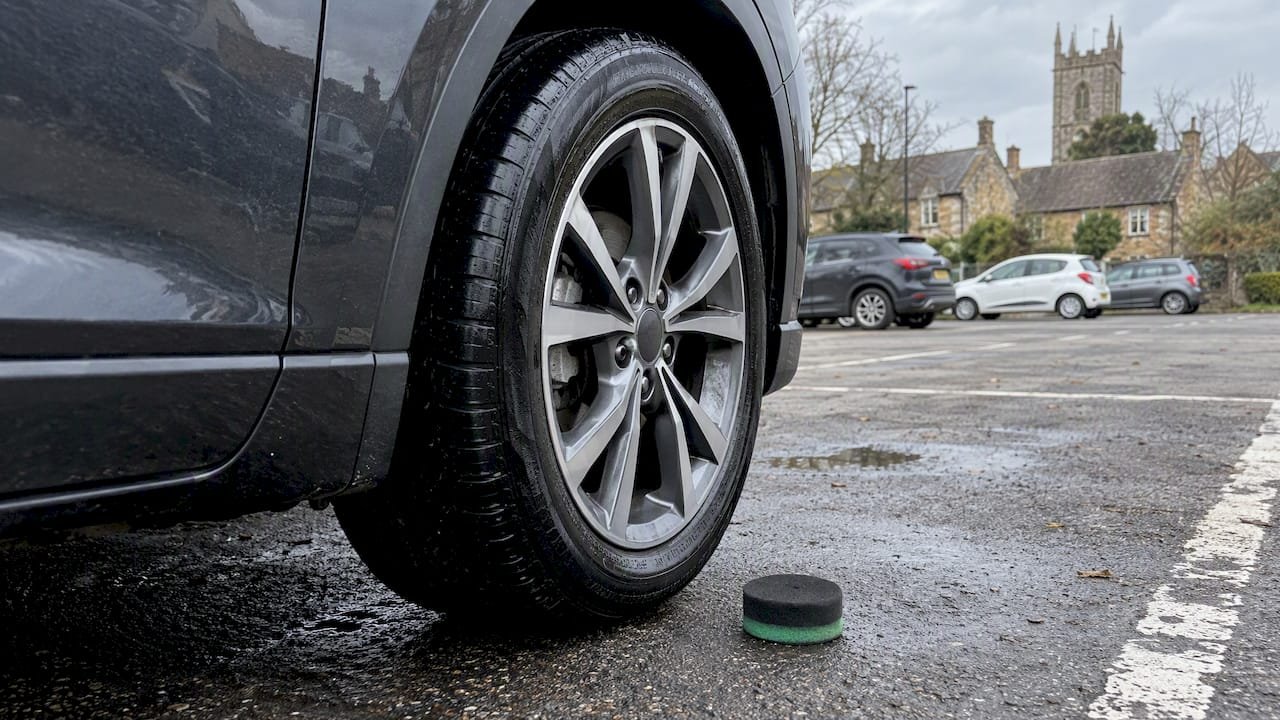
- Tyres: use a tyre-specific dressing on sidewalls only, and never let it touch the tread or any braking surface. Silicone-based sidewall dressings that migrate onto the tread can seriously reduce grip.
- Exterior textured trim: bumpers, wheel arch liners and side mouldings respond best to several thin coats rather than one thick application, and a durable or ceramic-based topcoat holds its finish noticeably longer than a basic dressing in constant weather exposure.
- Interior vinyl and rubber: dashboards, door cards and seals benefit from low-solvent, water-based products. Stronger solvent formulas raise the risk of fumes building up in a closed cabin and can leave faint staining on lighter-coloured trim.
- Leather: never use a vinyl or rubber protectant on leather seats or trim. Leather needs its own dedicated cleaner and conditioner; vinyl dressings aren’t formulated for leather’s fibre structure and can leave it tacky or discoloured over time.
The interior and exterior split matters beyond just the formula. Interior surfaces are shielded from direct UV and rain but exposed to heat build-up behind glass, which can be just as punishing over a summer. Exterior rubber and vinyl face the opposite problem: constant moisture and ultraviolet exposure but better ventilation. Matching the protectant’s chemistry and durability to the specific environment, rather than buying one product for the whole car, is what keeps trim looking consistent inside and out.
Why vinyl and rubber fade and crack in the first place
Understanding what actually damages these materials makes it much easier to prioritise prevention over repeated patch-ups.
- UV and heat exposure: sunlight breaks down the polymer chains in vinyl and rubber, while repeated heat cycling accelerates the process, leaving surfaces brittle and prone to cracking.
- Plasticiser migration: plasticisers are what keep vinyl flexible, and certain adhesives can draw them out over time. Technical guidance on the process notes that SBR-based adhesives are among the fastest to trigger this migration, leaving vinyl stiffer and more likely to split along bonded edges.
- Solvent damage: harsh solvent-based cleaners and dressings can strip the stabilisers built into vinyl and rubber during manufacture, speeding up the very cracking a protectant is meant to prevent.
- Moisture and road salt: repeated wetting and drying cycles, especially with winter road salt, dry out rubber seals and weaken their flexibility faster than UV alone would.
Spotting the difference between surface fading and structural damage matters. A light, even greying that responds to a trim rejuvenator is cosmetic. Deep cracking, visible splits along seams, or rubber that’s gone hard and brittle to the touch usually means the material has degraded beyond what any dressing can fix, and replacement is the more sensible route than continuing to treat it.
How often to check and reapply protectant
A realistic maintenance routine depends entirely on which product category you’ve chosen, since the categories age at very different rates.
- After every wash: give treated surfaces a quick visual check and wipe over; this catches early fading before it becomes obvious.
- Water-based dressings: plan to reapply roughly monthly, and sooner after heavy rain or a winter stretch involving road salt, since these formulas don’t hold up as long against repeated washing.
- Ceramic-infused protectants: correctly applied coatings can realistically protect plastic trim for 12 to 24 months, with a light top-up every 3 to 6 months keeping the finish looking its sharpest.
- Autumn and winter checks: inspect seals and trim for salt residue and early drying out; this is when rubber tends to suffer most.
- Spring renewal: a fuller clean-and-restore pass once the worst of the weather has passed resets trim for the summer ahead.
Pro Tip: Keep a simple note of when you last applied a ceramic protectant; it’s easy to lose track over 12 to 24 months and reapply later than you meant to.
A ceramic approach to longer-lasting vinyl and rubber protection
For owners who’d rather not be reapplying a dressing every few weeks, a ceramic-based approach changes the maintenance picture considerably. We formulate our ceramic glaze and ceramic shampoo to build a hydrophobic layer across treated trim that resists UV breakdown far longer than a conventional dressing, while also making routine washing easier because grime has less to cling to.
- How it works: the ceramic layer bonds to the surface rather than simply sitting on top, which is why it holds up through repeated washing in a way standard dressings don’t.
- What to expect: applied correctly on plastic and rubber trim, ceramic protection realistically holds for 12 to 24 months before a full reapplication is needed, matching the durability window seen across ceramic-based automotive products generally.
- Who it suits: owners dealing with already-faded trim, or anyone who’d rather do the job properly once a year than top up a spray every month.
- Keeping it clean: once applied, stick to pH-neutral shampoos and avoid harsh degreasers directly on the coated area, since stripping the ceramic layer early defeats the point of using it.
Our ceramic shampoo and glaze range is formulated to extend protection on plastic trim, giving faded exterior trim a realistic path back to a consistent, UV-resistant finish. You can see the full range, including our ceramic shampoo and its benefits for paintwork, alongside our dedicated trim and interior lines.
Staying safe: ventilation, gloves and tyre work
Chemical protectants are only as safe as how you handle them, and a closed car cabin changes the risk considerably. HSE guidance on degreasers and chemical handling notes that substances considered safe in an open workshop can become genuinely dangerous inside an enclosed vehicle, so keep doors and windows wide open throughout application.
- Ventilate before you start: open all doors and at least two windows when using any chemical cleaner or dressing inside the cabin.
- Wear nitrile gloves: single-use gloves protect your skin from solvent exposure, and HSE guidance advises disposing of them straight after use rather than reusing them.
- Favour water-based where you can: swapping a solvent aerosol for a water-based equivalent indoors removes a meaningful chunk of the exposure risk.
- Keep solvents away from tyre work: HSE’s guidance for motor vehicle repair warns that solvent vapours near tyres being worked on can create a genuine ignition risk, so never spray solvent-based products in a confined space around a tyre that’s being fitted or repaired.
DIY dressing or ceramic investment: our honest take
The DIY dressing route wins on upfront cost and speed. If you’re happy reapplying a water-based product monthly and your trim isn’t badly faded, there’s no real need to spend more. Where that logic breaks down is when owners underestimate how much time repeated reapplication actually costs over a year, especially once they factor in the prep work a good result demands each time.
Ceramic protection asks more of you upfront: proper cleaning, sometimes a clay bar pass, and a careful first application. What you get back is a finish that doesn’t need revisiting for months rather than weeks, and genuinely better resistance to the UV exposure that causes most fading in the first place. The right choice depends less on budget and more on how badly your trim has already faded and how much prep work you’re realistically willing to put in before you even open the bottle.
— Will
Where to find our ceramic protection products
Once you know which approach suits your trim, choosing the right product is the easy part. Our ceramic glaze and ceramic shampoo are built around the same long-lasting, UV-resistant protection discussed throughout this guide, so you’re not left guessing which formula does what.

- Browse our full range of automotive care and ceramic products to find the right line for your vehicle’s trim and rubber seals.
- Check our interior ceramic coating page if you’re weighing up whether interior protection is worth the investment for your car.
- Read up on protecting alloy wheels with ceramic coatings if you’re tackling a full exterior refresh alongside your trim.
If your trim has already faded or you’re simply tired of monthly top-ups, our ceramic range is a direct, one-stop way to get longer-lasting results without juggling several different products.
FAQ
What is the best protectant for plastic, rubber and vinyl?
A water-based dressing suits general upkeep on most plastic, rubber and vinyl surfaces, while a ceramic-infused protectant offers longer-lasting protection and better UV resistance for trim that’s already faded. The right choice depends on how long you want the protection to last and how faded the surface already is.
Can you use vinyl and rubber care products on tyres?
General vinyl and rubber protectants should only go on tyre sidewalls, never on the tread or any surface that contacts the road. A product formulated specifically for tyre sidewalls is the safer choice, since some silicone-based dressings can reduce grip if they migrate onto the tread.
What is a good protectant for rubber?
Water-based dressings work well for everyday rubber seals and trim, offering low odour and minimal residue. For rubber that’s already showing signs of UV fading or hardening, a ceramic-infused protectant gives longer protection between applications, typically 12 to 24 months when applied correctly.
Can vinyl and rubber care products be used on leather?
No, vinyl and rubber protectants aren’t suitable for leather seats or trim and can leave the surface tacky or discoloured. Leather needs its own dedicated cleaner and conditioner formulated for its fibre structure rather than a vinyl-specific dressing.
Sources
- HSE: Degreasers and chemical handling in motor vehicle repair
- The Glue People: What is plasticiser migration?
- Autocar: Product test — what tyre dressing is best?
