

The safe way to clean door jambs is simple: dry-wipe loose grit first, then work a gentle all-purpose cleaner into the panel with a soft brush, rinse with a controlled trickle rather than a jet, dry thoroughly, and finish with a light protectant. This sequence stops rust taking hold, keeps rubber seals supple, and gives your car a genuinely finished look. A ceramic-safe shampoo like those in Diamondbrite’s range works well as your cleaner if your car is coated.
TL;DR:
- Regularly cleaning door jambs prevents rust from developing and reveals early signs of corrosion or seal damage before they become costly repairs.
- Use gentle, pH-neutral all-purpose cleaners or ceramic-safe shampoos with soft brushes and dry-wipe first to avoid scratches and moisture intrusion.
- Apply lubricants like white lithium grease to hinges twice a year to maintain smooth operation and prevent rust buildup.
- Condition rubber seals with silicone-based products to keep them flexible and prevent cracks caused by drying or cracking.
- Conduct deep cleans after harsh weather, off-road trips, or before selling, but maintain a monthly quick wipe to catch grime early.
Table of Contents
- What tools and supplies do you need to clean door jambs?
- How do you clean car door jambs step by step?
- How should you clean and lubricate hinges and latches?
- How do you clean rubber seals without ruining them?
- How do you dry and protect painted door jambs?
- How often should you clean door jambs?
- Which products work best for coated and everyday cars?
- What detailers notice that owners miss
- Keep your door jambs and coating in top condition
- Sources
- FAQ
What tools and supplies do you need to clean door jambs?
Before you open a single door, lay your kit out on the boot lid or a tray. Half the battle with door jamb maintenance is having the right tool to hand instead of improvising with whatever’s in the boot.
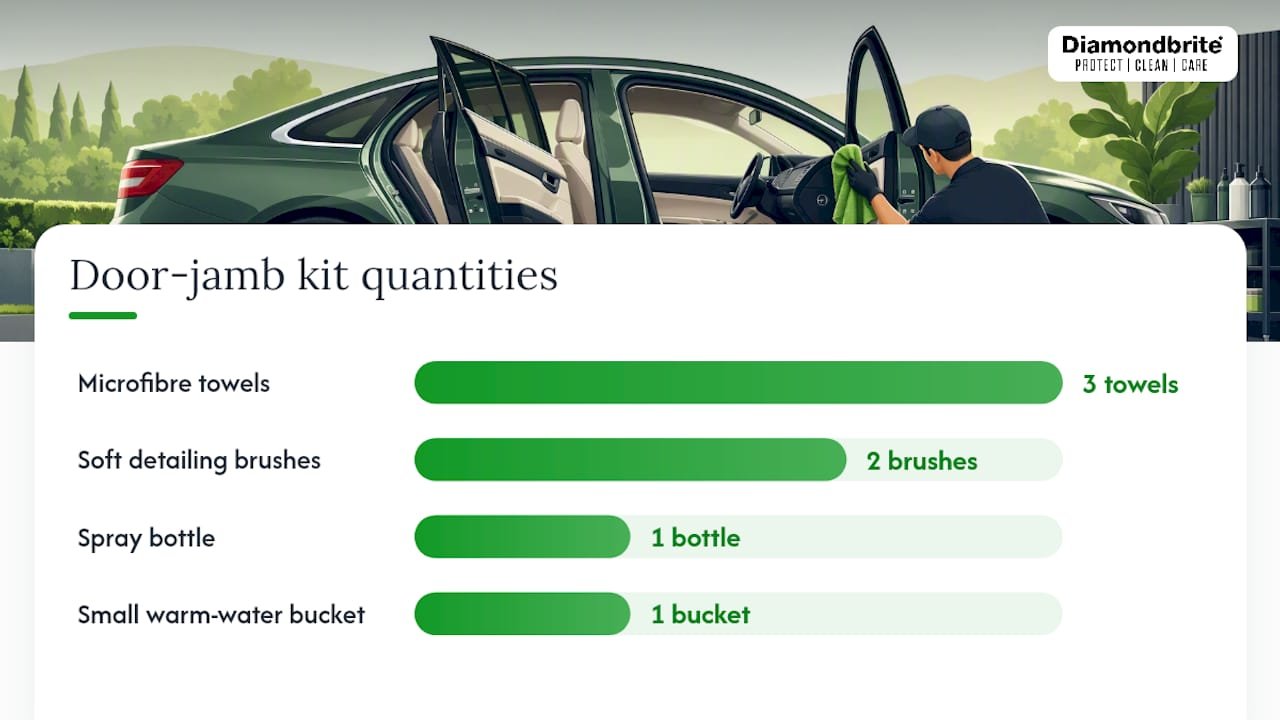
You’ll want at least three microfibre towels, kept separate by job. One does the initial dry wipe, one carries your cleaner, and the last is reserved purely for drying. Add a couple of soft-detailing brushes in different sizes, a handful of detailing swabs for tight corners, a spray bottle, and a small bucket of warm water.
On cleaning products, keep it simple:
- A pH-neutral all-purpose cleaner (APC) for general road film and dust
- A mild degreaser, used sparingly, for oily build-up around hinges
- A diluted ceramic-safe shampoo if your car carries a coating, since standard degreasers can strip or dull that protection
- Nitrile gloves, and eye protection if you’re working with degreaser
What you leave out of the kit matters just as much. Skip household solvents, kitchen abrasive pads, and anything with grit. A soft-detailing brush paired with an APC is enough for painted jambs in nearly every case, and a stronger degreaser should only come out for stubborn grease, applied carefully and away from seals. Never point a hose or pressure washer directly into the jamb area either. High-pressure water forces moisture into electronics and under weather seals, which is a far more expensive problem than a dirty jamb ever was.
How do you clean car door jambs step by step?
Work one door at a time, and treat each jamb as its own small job rather than rushing round the whole car at once. That’s how mistakes creep in.
1. Inspect before you touch anything. Open the door fully and look closely at the jamb: salt residue near the sill, grease around the hinge, early rust freckles on exposed metal, a seal that’s gone stiff or cracked, and the wiring loom that runs to the door itself. Knowing where the wiring sits now saves you a nasty surprise later with a spray bottle.
2. Dry-wipe loose grit first. Take your first microfibre and wipe away dust, sand, and loose debris before any liquid goes near the panel. This single step is the one most people skip, and it’s the reason so many jambs end up with fine scratch marks. Dry-wiping before applying any cleaner prevents grit being dragged across the paint once it’s wet.
3. Apply cleaner and agitate gently. Spray your APC or diluted shampoo onto a towel or brush, never directly onto hinges, latches, or exposed wiring connectors. Work it into the panel with light, overlapping passes, then bring in a smaller brush or a detailing swab for the seams, bolt recesses, and the gap where the door skin meets the jamb. This is where months of grime actually hide.
4. Rinse with control, not force. A spray bottle or a low-pressure hose setting is all you need. Aim the stream so it flows off the jamb rather than into it, and repeat the cleaner-and-agitate step on any patch that’s still holding grease or tar. For genuinely neglected jambs, steam cleaning can cut through heavy contamination faster, but it demands care. Excess steam or water can migrate into the door cavity and interior carpet, so keep sessions short and controlled if you go this route.
5. Dry thoroughly, right into the corners. Swap to your dedicated drying towel and work every seam, bolt hole, and hinge recess. Follow up with a dry swab in the tightest gaps, since trapped moisture in these spots is exactly what starts corrosion months down the line. Finish with a final pass of fresh microfibre across the whole panel.
Pro Tip: Resist the urge to scrub hard on your first pass. Detailing communities consistently favour repeated light passes over one aggressive scrub, because gentle, repeated agitation lifts grime without risking swirl marks or clear coat damage.
How should you clean and lubricate hinges and latches?
Hinges are a special case, because some of what you’re looking at is meant to be there. Grease on a hinge pin is doing its job; the same grease smeared across the surrounding paintwork is contamination that needs removing.
Work through it like this:
- Leave visible grease on the hinge mechanism itself alone unless it’s clearly old, gritty, or dried out
- Apply a mild degreaser to a towel or small brush, not straight onto the hardware, and target only the grease that has spread onto painted surfaces
- Rinse that area with a controlled trickle and dry it completely before moving on
- Once clean and dry, apply a small amount of white lithium grease or a purpose-made hinge lubricant to the pivot points only, never onto surrounding paint
- For locks, use a graphite-based lubricant only if your vehicle manufacturer recommends it; the wrong product here can gum up a mechanism rather than free it
A door that’s starting to sag slightly or squeak on opening is usually asking for this exact treatment, not a full respray or a trip to the garage. Five minutes with the right lubricant on each hinge, done twice a year, keeps latches working smoothly and stops rust from creeping into the pivot points where you’d never spot it during a normal wash.
How do you clean rubber seals without ruining them?
Rubber seals do a quiet but important job: keeping water, wind noise, and draughts out of the cabin. Treat them roughly and you’ll pay for it later with a leak or a whistling door at motorway speed.
Clean seals with a mild cleaner and a soft cloth, working along the length of the rubber rather than scrubbing in circles. Hold off on degreaser here unless you’re planning to condition the seal straight afterwards, since stronger products can leave rubber dry and prone to cracking if left untreated.
When it comes to conditioning:
- Avoid petroleum-based dressings entirely; they attract dust and grime, which defeats the purpose
- Choose a silicone-based conditioner or a product made specifically for rubber seals
- Apply a small amount, spread it thinly, and buff off any excess with a clean cloth
- Test a small hidden section first if you’re trying a new product, since some conditioners can leave seals feeling tacky or slightly slippery
Done right, a conditioned seal stays flexible through the coldest part of the year, which is exactly when stiff, cracked rubber tends to fail.
How do you dry and protect painted door jambs?
Drying is not optional, and it is not the same step as cleaning. Water left sitting in a seam or bolt recess is precisely what turns a clean jamb into a rusty one over a winter.
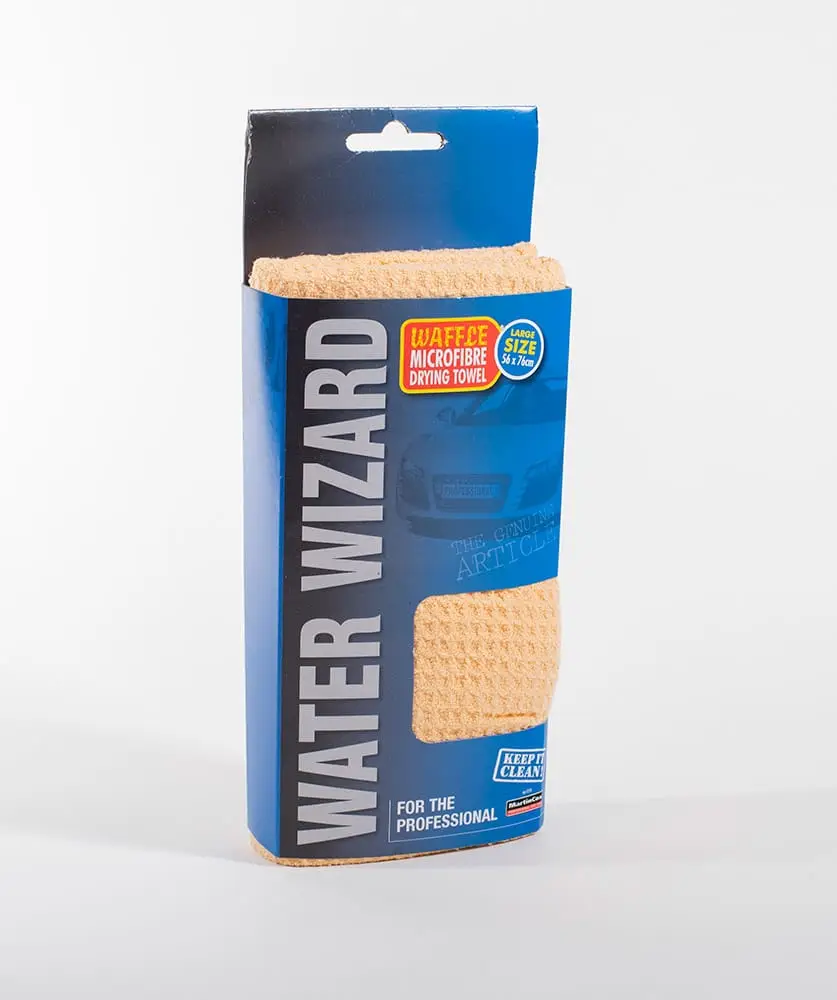
Go over every jamb with a fresh, dry microfibre once you’ve finished rinsing, paying particular attention to seams and the lower edge where water naturally pools. A final light pass with a dry swab in the deepest corners catches what the towel can’t reach.
Once dry, protection is worth the extra two minutes:
- A light spray wax or sealant on painted jambs helps repel dust and road film between cleans, and a protectant applied to a painted jamb can genuinely speed up your next monthly wipe-down because grime simply doesn’t stick as readily
- On ceramic-coated cars, stick to pH-neutral shampoos and maintenance products designed for coatings; standard shampoos and degreasers can strip or dull a ceramic layer far faster than normal wear would
- Keep protectant away from latch contact points and the edges where weather seals meet the body, since a build-up here can affect how well the seal grips or how smoothly the latch engages
Skip this step and you’re simply doing the same full clean again next month instead of a quick wipe.
How often should you clean door jambs?
Door jamb maintenance splits neatly into two speeds: quick upkeep and a proper deep clean.
For quick maintenance, a wipe-down every few washes, or roughly once a month, is enough to stop grit building into a scrubbing job. This takes 10 to 20 minutes per car and mostly involves the dry-wipe-and-light-clean routine covered earlier.
A deep clean deserves two to four sessions a year, timed around the moments your jambs take the most punishment:
- After winter, once road salt has had a chance to sit in every seam
- Following muddy or off-road trips, where grit works its way deep into hinge recesses
- Before putting the car up for sale, since buyers routinely judge overall condition by details like clean door jambs far more than they judge the bonnet
Budget 30 to 60 minutes or more for a proper deep clean, depending on how much grime has built up since the last one.
Which products work best for coated and everyday cars?
The product you reach for should match what’s on the panel. A standard, uncoated painted jamb tolerates a broader range of cleaners. A ceramic-coated car needs more discipline.
For coated cars, a pH-neutral ceramic-safe shampoo is the safer default over a general APC, because it cleans effectively without breaking down the coating’s hydrophobic layer. This slightly changes your rinsing habits too: a gentler, more thorough rinse clears shampoo residue without you needing to scrub as hard, since the coating itself is already resisting dirt adhesion.
A few application notes worth keeping in mind:
- Dilute shampoo according to the bottle’s guidance rather than guessing; too strong a mix wastes product without cleaning any better
- Apply cleaner to your towel or brush first, never spray it directly into hinge mechanisms or wiring connectors
- Buff off any excess protectant or shampoo residue before it dries, particularly in visible seams
If you want to go deeper on keeping a coating in good condition beyond the door jambs themselves, Diamondbrite’s guide on ceramic coating maintenance and its notes on cleaning an engine bay safely cover the same careful, low-abrasion approach applied to other trouble spots on the car.
What detailers notice that owners miss
Most people treat door jamb cleaning as a cosmetic afterthought, something you do once for a valeting job or before selling the car. That’s the wrong frame entirely.
A dirty jamb hides information. The grit that builds up in a seam traps moisture against bare metal, and by the time you see a rust bloom on the visible edge, it’s usually been developing for months underneath. Wiping jambs regularly isn’t really about shine at all; it’s the cheapest early-warning system you have for corrosion and seal wear, and it costs you fifteen minutes rather than a bodywork repair bill.
The habit that actually moves the needle isn’t a fancier product or a longer session. It’s frequency. Owners who fold a two-minute jamb wipe into every third or fourth wash catch problems while they’re still cosmetic. Owners who wait for the annual deep clean often find the rust already has a foothold. If you take one thing from this, make it that: little and often beats thorough and rare, every time.
— Will
Keep your door jambs and coating in top condition
A clean jamb is only half the story if the rest of the car’s protection is fading. Ceramic-safe shampoos, light spray sealants, and rubber conditioners are formulated to work alongside the same gentle routine covered above, without the risk of stripping a coating or drying out a seal that a generic supermarket cleaner carries.

If your car already carries a ceramic layer, the shampoo you use on the bodywork can double up safely on painted jambs too, supporting a consistent maintenance routine rather than juggling separate products. Read through how to keep your ceramic coating in top condition for the fuller routine, then head to the Diamondbrite shop to pick up the shampoo, sealant, or conditioner that matches what your car needs next.
Sources
- How to Clean Car Door Jambs: Quick, Easy Cleaning Guide
- How to Clean Car Door Jambs and Hinges (Based on Severity)
- Door jamb cleaning guide for a cleaner car
FAQ
What is the best way to clean door jambs?
Dry-wipe loose grit first, clean with a pH-neutral APC or ceramic-safe shampoo and a soft brush, rinse gently, dry thoroughly, then apply a light protectant to painted areas.
Is washing-up liquid safe to use on a car?
Household washing-up liquid is too harsh for regular car care since it strips wax, sealant, and ceramic coatings, and a dedicated pH-neutral car shampoo protects both the paintwork and the coating far better.
What is a flush door jamb?
A flush door jamb refers to a door design where the door panel sits level with the surrounding bodywork rather than protruding, a styling choice common on modern cars that still requires the same seam and hinge attention during cleaning.
What is the best car door jamb cleaner?
A pH-neutral all-purpose cleaner suits most painted jambs, while a dedicated ceramic-safe shampoo is the safer choice for coated cars, since it cleans effectively without breaking down the coating.
How often should I deep clean my door jambs?
Aim for several deep cleans a year, timed after winter salt exposure, muddy trips, or before selling the car, with a quicker monthly wipe-down in between to stop grit building up.
