

The safest way to clean a car headliner is a low-moisture, cloth-transfer method: spray your cleaner onto a cloth, never directly onto the fabric, and blot small sections rather than scrubbing. This keeps water and solvents away from the foam backing and glue behind the fabric. Soaking, harsh chemicals or vigorous rubbing can cause sagging that no amount of patience will undo, so always test your cleaner on a hidden patch first and let each section dry fully before moving on.
TL;DR:
- Using a low-moisture, cloth-transfer method prevents damage caused by soaking or harsh chemicals, which can lead to sagging or bubbling of the headliner fabric.
- Always test any cleaning product on a hidden patch and dry each small section completely before moving to the next to avoid residual dampness that can weaken the adhesive.
- Foam-based, pH-neutral upholstery cleaners are safest, as they allow precise application and reduce the risk of liquid seeping into the foam backing.
- Proper drying, including ventilation and avoiding heat, is critical because trapped moisture can soften glue and promote mold growth long after cleaning.
- Regular maintenance like gentle vacuuming and prompt spill blotting can extend the headliner’s appearance and prevent deep stains or damage over time.
Table of Contents
- What you need before you start
- Why headliners are so easy to damage
- Choosing the right tools and products
- The step-by-step cleaning method
- Fixing specific stains without causing new damage
- Drying properly matters more than the clean itself
- Keeping your headliner clean for longer
- How Diamondbrite supports safe headliner care
- A word on patience over quick fixes
- Why Diamondbrite fits your headliner routine
- Sources
- FAQ
What you need before you start
Gather your kit before you touch the fabric, and you will avoid the two mistakes that ruin most headliners: too much liquid and the wrong product.
- Tools: white or light microfibre cloths, a soft-bristle brush, a vacuum with an upholstery attachment, and a spray bottle filled with distilled water.
- Products: a pH-balanced automotive upholstery cleaner or a foam-type interior cleaner.
- Avoid: bleach, ammonia, and strong all-purpose cleaners, none of which are suited to headliner fabric or its foam backing, according to Dyson’s car interior cleaning guide.
- Golden rule: mist the cleaner onto the cloth, blot rather than rub, work in patches of roughly 10 to 20 centimetres, and let each patch air-dry completely.
Why headliners are so easy to damage
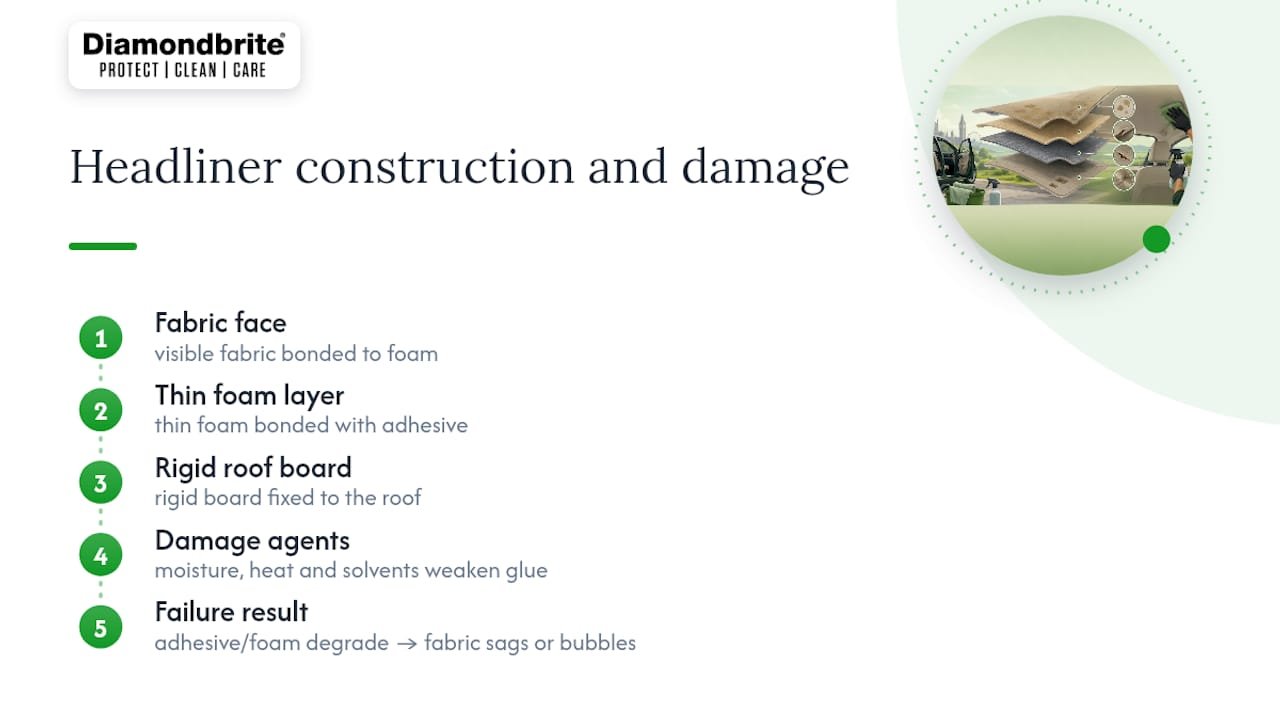
A car headliner is built from a fabric face bonded to a thin foam layer, which is then glued to a rigid board fixed to the roof. That sandwich construction is what makes it fragile. Moisture, heat and solvents soften the adhesive and break down the foam, and once the foam degrades, the fabric loses its grip and starts to sag or bubble. The most common DIY mistakes, soaking the fabric with a spray bottle, scrubbing in circles, or reaching for a household degreaser, all attack that hidden glue layer rather than the visible stain.
Choosing the right tools and products
Stick to white or light-coloured microfibre cloths. Coloured cloths can transfer dye onto pale headliner fabric, especially once it is damp, so keep a dedicated set aside for interior work.
Foam-based and pH-neutral upholstery cleaners are the safer choice because the foam lets you see exactly how much product you have applied, which limits how much liquid can seep into the backing, as Amazing Cars and Drives notes in its headliner stain guide.
- Test any product on a hidden patch, such as near a grab handle, and wait a few minutes to check for colour change or texture damage.
- Skip steam cleaners for DIY use: the combined heat and moisture raise the risk of delamination, and even professionals apply steam with caution.
- Never use a stiff brush or an abrasive pad; a soft-bristle brush is as firm as headliner fabric should ever see.
Pro Tip: Keep two cloths on hand for every section, one to apply the cleaner and a dry one to blot straight afterwards, so moisture never sits on the fabric longer than a few seconds.
The step-by-step cleaning method
Work through the headliner methodically rather than tackling it as one big job. Small sections and immediate drying are what separate a safe clean from a costly repair.
- Prepare the car. Park in the shade, open the doors and windows for airflow, and vacuum the headliner gently with a soft brush attachment to lift loose dust before any liquid goes near it.
- Protect nearby surfaces. Cover trims, sun visor edges and glass with a cloth so overspray does not run down onto paint or upholstery.
- Spot test first. Apply a small amount of your chosen cleaner to a cloth, dab an inconspicuous area, and wait several minutes to check for discolouration or texture change.
- Spot-clean stains. Spray the cleaner onto the cloth, never the fabric, then blot from the outer edge of the stain towards its centre. Switch to a clean section of cloth as soon as one gets dirty, and repeat rather than pressing harder.
- Move to a controlled overall clean if needed. Work in squares of roughly 10 to 20 centimetres, apply foam cleaner sparingly, and blot or extract each square immediately with a dry cloth before starting the next.
- Check your work. Run a dry hand or cloth over each cleaned section; if it still feels tacky or damp, blot again rather than leaving it to dry on its own.
- Ventilate to dry. Leave doors and windows open, ideally with a fan pointed into the cabin, until every section feels completely dry to the touch.
- Never spray liquid directly onto the headliner fabric.
- Never use circular scrubbing motions; straight-line blotting or gentle unidirectional wiping avoids fraying fibres and changing the fabric’s nap, a point Dyson makes specifically about headliner care.
Fixing specific stains without causing new damage
Different marks call for different fixes, but the same low-moisture principle runs through all of them.
- Water marks: blot first, then mist distilled water onto a cloth and blot again. Distilled water avoids the mineral deposits that tap water can leave behind once it dries, according to Amazing Cars and Drives.
- Grease or oil: dab isopropyl alcohol or a gentle upholstery degreaser onto a cloth, blot the mark, then dry the area thoroughly.
- Ink: apply a tiny amount of alcohol to a cotton swab and dab carefully rather than wiping, testing on a hidden patch beforehand since ink stains can be stubborn.
- Mould or lingering odour: treat the surface with a diluted vinegar or alcohol solution on a cloth, then ventilate the cabin fully to let it dry out completely.
Pro Tip: For a large, fresh spill, a shop vacuum on low suction with an upholstery nozzle pulls out far more moisture than blotting alone, provided you move it slowly and never let the suction drag on the fabric.
Old, deeply set stains, visible sagging, or mould that covers more than a small patch are jobs for a professional. Trying to force a fix at that stage tends to make the damage permanent rather than solving it, as CleaningBro’s headliner guide points out.
Drying properly matters more than the clean itself
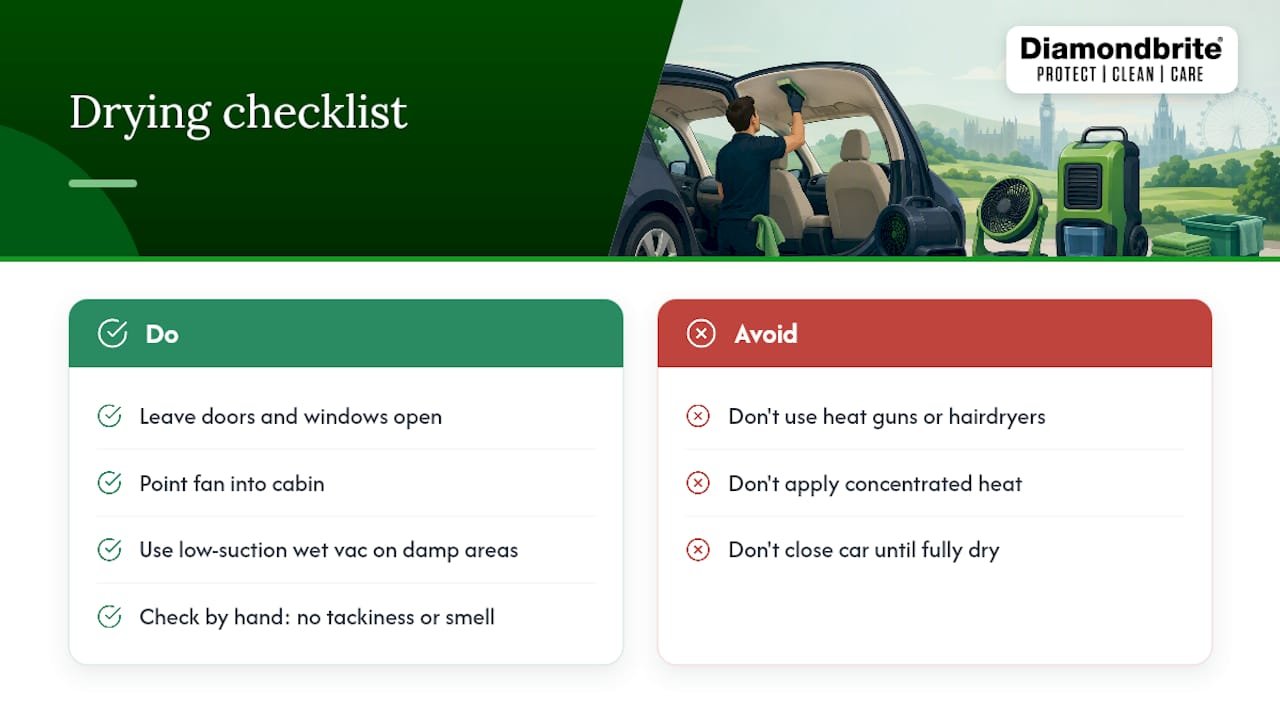
Drying is the step that actually protects the headliner, because trapped moisture is what softens the glue and invites mould long after the cleaning is done. Leave the doors and windows open, point a fan into the cabin, and use a low-suction wet vac on any section that still feels damp. Avoid heat guns or hairdryers, since concentrated heat can do the same damage as oversaturation. Before closing the car up, run your hand over every treated area: it should feel completely dry, with no tackiness and no lingering smell.
Keeping your headliner clean for longer
A little regular attention avoids most of the deep-clean headaches altogether.
- Vacuum the headliner gently with a soft brush attachment every few weeks to stop dust building into grime.
- Blot spills the moment they happen, and address damp or humid conditions in the cabin quickly rather than letting moisture linger.
- Cut back on smoking or eating in the car, and give the headliner a light once-over during your regular interior clean.
How Diamondbrite supports safe headliner care
Some interior car care product ranges are built around the same low-moisture principle that keeps headliners safe: apply to a cloth, test first, and dry fully before closing up the car. These lines often include pH-balanced options formulated for automotive fabrics rather than generic household cleaners.
- Automotive Interior products for fabric and headliner-safe cleaning.
- Automotive Ceramic products for added protection on treated surfaces.
- Automotive Core Range essentials for routine interior maintenance.
A word on patience over quick fixes
Most headliner damage comes from rushing, not from a lack of skill. Small sections, a dry cloth, and enough time for the car to air out will save you more grief than any shortcut.
— Will
Why Diamondbrite fits your headliner routine

Once you know the low-moisture method, the only thing left is choosing a cleaner that will not tempt you to oversaturate the fabric. Some products formulated for cabin fabrics rather than household surfaces are designed to work with the cloth-and-blot technique rather than against it. Mist a small amount onto your microfibre cloth, work your patch, blot dry, and move on, exactly the routine this guide has walked you through.
Beyond the headliner, the same Automotive Interior products carry over to seats and door cards, so one purchase covers more of your cabin than a single-use headliner spray. Browse the full Diamondbrite range to find the interior products that suit your car, and pair them with the drying habits above for results that last.
Sources
- How to Clean a Car Interior: A Step-by-Step Guide | Dyson UK
- Removing Water Stains from Car Headlining: A 101 Full Guide! | Amazing Cars and Drives
- How to Clean a Headliner in a Car: Step-by-Step Guide – CleaningBro
FAQ
What can I use to clean the headliner in my car?
Use a pH-balanced automotive upholstery cleaner or a foam-type interior cleaner applied to a white microfibre cloth, never sprayed straight onto the fabric. Blot small sections and dry each one fully before moving on, following the low-moisture approach recommended by Dyson.
What is a good car headliner cleaning kit?
A solid kit includes white microfibre cloths, a soft-bristle brush, a vacuum with an upholstery attachment, a spray bottle of distilled water, and a pH-balanced upholstery cleaner. Diamondbrite’s Automotive Interior range covers the cleaner element of that kit with a product formulated for cabin fabrics.
What is the best cleaner for car roof liners?
There is no single best product, but pH-neutral cleaners labelled specifically for automotive upholstery are the safer choice over generic household cleaners, according to Dyson. Foam-type cleaners are particularly useful because they make it easy to see how much product you have applied.
Can I use a steam cleaner to clean my car headliner?
Steam cleaning is generally not recommended for DIY headliner care because the combined heat and moisture raise the risk of delamination. Professionals sometimes use controlled steam applied to a cloth rather than directly onto the fabric, but this is not a beginner-friendly technique.
How do I remove water stains from a car headliner?
Blot the mark first, then mist distilled water onto a cloth and blot again rather than spraying water directly onto the fabric. Distilled water helps avoid the mineral spotting that tap water can leave behind, as noted by Amazing Cars and Drives.
