

Mechanical abrasion, not chemistry, is what actually removes a cured ceramic coating. Controlled polishing, sometimes followed by wet sanding on stubborn professional-grade coatings, is the method that works reliably. Household solvents and most bottled “removers” soften the surface at best and damage paint at worst.
The coating comes away as part of the clear coat’s top layer being levelled, not because a chemical dissolves it. Treat every removal job as a paint correction job first.
Before you reach for a polisher, run through this:
- Do test an inconspicuous panel first, such as inside a door shut.
- Do check or estimate paint thickness before you start.
- Do decontaminate fully with a strip wash before assuming the coating has failed.
- Don’t use acetone, brake cleaner, or bathroom acids on the clear coat.
- Don’t skip straight to heavy cutting compound.
Key Takeaways
Mechanical polishing removes ceramic coating reliably by abrading a few microns of clear coat, while chemical removers only soften recent coatings and household solvents damage paint without touching a cured coating.
| Point | Details |
|---|---|
| Mechanical abrasion is the reliable method | Controlled polishing removes the coating along with a thin layer of clear coat. |
| Test before you commit | Water beading and IPA wipe tests reveal whether the coating has failed or just needs decontaminating. |
| Escalate gradually | Start with the least aggressive pad and polish, and only cut harder if the coating resists. |
| Chemical removers have limits | They soften lightly cured coatings but won’t dissolve a fully cured professional-grade coating alone. |
| Protect what you correct | A pH neutral shampoo and fresh Diamondbrite glaze prepare and protect the paint once removal is finished. |
Table of Contents
- Why you might want ceramic coating removal
- Do you actually need to remove the coating?
- Getting your car ready: strip wash and decontamination
- Mechanical removal: the polishing workflow that actually works
- Chemical removers: useful prep, not a magic solvent
- How do you know the coating is actually gone?
- The real risk: thinning or burning through your clear coat
- Finishing up: polish, prep, and re-coating
- Products worth having on hand for the job
- Sources
- FAQ
Why you might want ceramic coating removal
Most people don’t remove a coating on a whim. A failed or patchy application, with high spots, streaking, or an uneven sheen, is the most common trigger. Sometimes the coating hasn’t failed at all; it’s just clogged with contamination and no longer beading water the way it should. Other reasons are more deliberate:
- You’re prepping for full paint correction or a colour change.
- You want to strip an old, worn coating before reapplying a fresh one.
- Etching, staining, or chemical damage has gone deep enough that you need bare paint access to fix it properly.
Knowing which of these applies to you shapes everything that follows.
Do you actually need to remove the coating?
Before committing to a full strip, run a quick diagnostic. Water behaviour tells you a lot: tight beading means the coating is still active, while water sheeting flat or sitting in patches suggests it’s degraded or contaminated rather than gone.
- Wash the car and let a panel air dry, then observe how water sits on the surface.
- Wipe a test area with a weak IPA and water solution. Genuine residue on the towel points to leftover wax or sealant rather than coating failure. Isopropyl alcohol won’t strip a properly cured coating on its own, but it’s an excellent diagnostic tool for revealing what’s underneath.
- If beading has weakened but the coating still resists IPA, try an iron remover and clay bar session before assuming you need full removal.
Pro Tip: A “failed” coating is often just clogged with traffic film and old wax. A proper decontamination wash can restore beading without you touching a polisher at all.
If a strip wash and clay bar bring the coating back to life, stop there. Full removal is only worth the paint you sacrifice when the coating is genuinely spent.
Getting your car ready: strip wash and decontamination
Skipping preparation is the single biggest reason DIY removals go wrong. A proper stepwise approach starts with decontamination, not a polisher.
- Strip-wash using a wax-stripping shampoo, applied with the two-bucket method to avoid dragging grit across fresh paint.
- Run an iron fallout remover and tar remover, then clay bar or clay mitt the whole car to lift embedded debris.
- Work in the shade with cool panels; direct sun flashes products off before they can work.
- Wear gloves and eye protection, and check your pads and backing plates before you switch on the polisher.
- If you have access to a paint thickness gauge, take baseline readings now, while the surface is still coated, so you have something to compare against later.
Mechanical removal: the polishing workflow that actually works
Machine polishing with cutting compound is the most widely used removal method, and for good reason: it’s the one that consistently gets a cured coating off without guesswork about chemistry.
Start conservative. Experienced detailers recommend beginning with the least aggressive pad and polish combination you own, testing a small area, and only escalating if the coating genuinely resists. Jumping straight to a heavy cutting compound on your first pass is how people burn through clear coat they didn’t need to lose.
What you’ll need:
- A dual-action polisher (rotary tools are far less forgiving for this job).
- A pad range from finishing through to cutting, plus matched compounds.
- Clean microfibres for wiping between passes.
- A paint thickness gauge, if you can get hold of one.
The workflow itself:
- Work one small panel section at a time, roughly 60cm square.
- Make a pass, wipe the area clean, and inspect under a bright light before deciding whether to repeat.
- Once the coating lifts, run a finishing polish over the same area to remove any marring the cutting stage left behind.
- Move to the next section and repeat, checking thickness periodically rather than only at the start and end.
Here’s what that actually costs you in clear coat, based on typical results from a two-pass session:
| Polishing stage | Clear coat removed |
|---|---|
| Single cutting pass | Roughly 3 to 5 microns |
| Two-pass cutting session | a few microns total. |
| Factory clear coat depth (typical) | a few microns |
That headroom sounds generous until you remember previous corrections, stone chips, or a respray may have already thinned a panel. This is exactly why measuring thickness matters rather than judging by eye.
Pro Tip: Keep a written note of thickness readings per panel as you go. If you ever need bodywork or another correction down the line, that record tells you and any professional exactly how much margin is left.
Wet sanding sits above all of this. It removes coating that simply won’t respond to machine polishing, but it’s aggressive, unforgiving, and genuinely a job for an experienced technician rather than a weekend project.
Chemical removers: useful prep, not a magic solvent
Bottled ceramic coating strippers are marketed as a quick fix, and they do have a role. Products designed to soften or break down a coating can work on recently applied or lightly cured layers, making the surface easier to polish afterwards.
What they generally can’t do is dissolve a fully cured, professional-grade 9H coating on their own. Treat them as a pre-treatment step, not the whole job:
- Apply as directed, allow proper dwell time, and agitate gently with a soft applicator.
- Rinse thoroughly before you assess how much coating remains.
- Follow immediately with polishing rather than a second or third chemical application.
Household acids, acetone, and paint thinners show up constantly in DIY forums, but they’re largely ineffective against a cured coating and genuinely risky to trim, plastics, and the clear coat itself.
Skip them entirely. If a dedicated remover doesn’t shift it, the answer is polishing, not a stronger solvent.
How do you know the coating is actually gone?
Run the same IPA wipe and water test from earlier. No beading, and a clean towel after the wipe, means the coating is gone rather than just thinned.
- Feel the surface: a slick, almost sticky texture usually means coating remains; a smooth, squeaky-clean feel after claying suggests it’s gone.
- Check under an inspection light for haze, high spots, or fresh micro-marring you’ll need to polish out.
- Re-measure thickness. If a reading has dropped further than expected on one panel, stop and reassess before continuing.
The real risk: thinning or burning through your clear coat
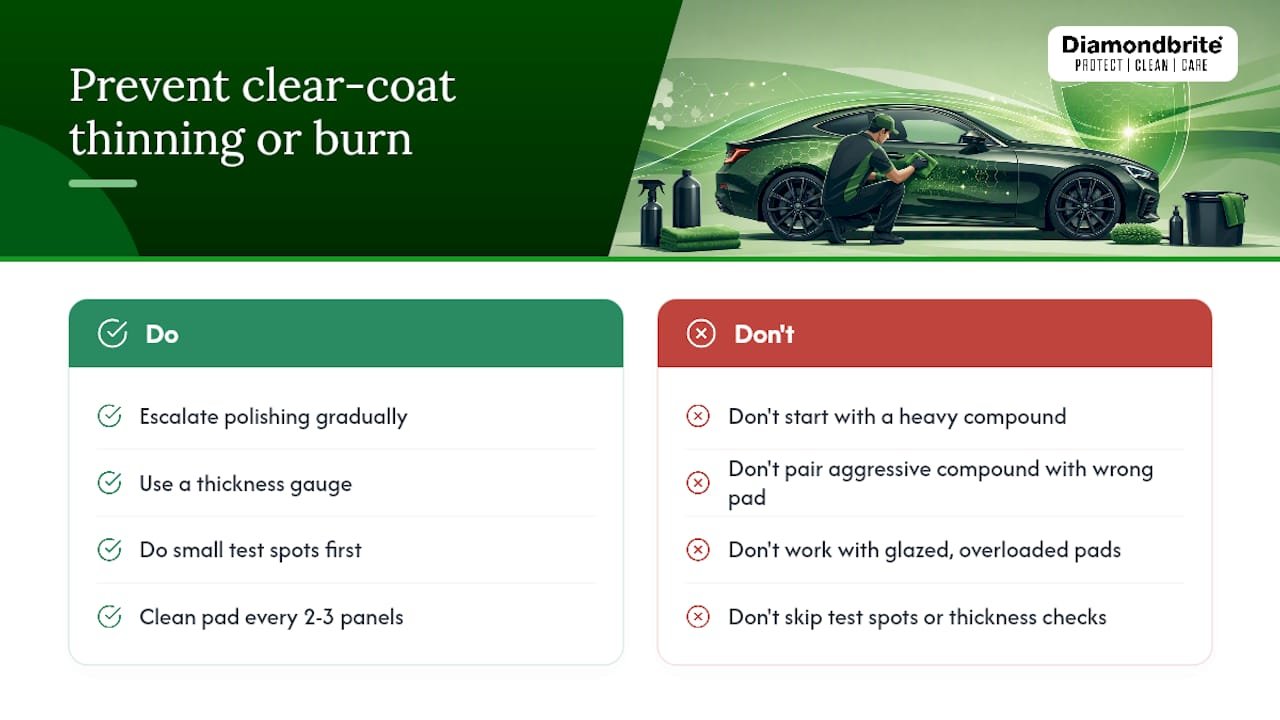
Over-polishing, or pairing too aggressive a compound with the wrong pad, is how clear coat gets thinned past safe limits or burned through entirely. Neither is repairable without a respray.
Escalate gradually. If a finishing pad and light polish shift the coating, there’s no reason to reach for a heavy cutting compound just to save a few minutes.
A thickness gauge and small test spots are your safety net here, not an optional extra. Watch your pads too: a glazed, overloaded pad generates more heat for less cutting power, which is exactly the combination that causes burn marks.
Pro Tip: Clean your pad every two or three panel sections. A fresh pad face cuts more efficiently and runs cooler than a clogged one.
Why cured ceramic coatings resist chemical attack
A cured SiO2 coating doesn’t just sit on top of the clear coat, it chemically bonds into it, forming a hard, cross-linked matrix. That’s precisely why solvents struggle: anything strong enough to break that bond is usually strong enough to attack the paint underneath it too.
- Cured coatings resist most consumer-grade chemistry by design.
- Aggressive enough solvents to work risk the clear coat as much as the coating.
- For 9H or professional-grade coatings, controlled abrasion, or a professional, is the safer route.
Finishing up: polish, prep, and re-coating
Once the coating is off, don’t leave bare clear coat exposed longer than necessary.
- Run a finishing polish over every panel you cut, to remove marring before it’s sealed under anything new.
- Wipe down with IPA or a dedicated panel wipe to strip oils and confirm the surface will accept a fresh coating.
- Re-coat as soon as the surface is clean and stable, ideally the same day, since bare clear coat oxidises faster than you’d expect.
A detailer’s honest take on DIY versus professional help
Attempt removal yourself if you’re dealing with a consumer-grade coating, you own decent tools, and you’re prepared to test before committing. Send it to a professional if the clear coat is thin, you suspect a professional-grade coating, or wet sanding looks likely. Either way, a quality ceramic glaze belongs on that freshly corrected paint.
Products worth having on hand for the job
Getting the surface ready for new protection matters just as much as the removal itself. A pH neutral shampoo strips grime without attacking freshly corrected paint, which is exactly why we’d point you towards a proper pH neutral car shampoo for ceramic-coated cars rather than whatever’s under the sink.

For decontamination before you even switch on the polisher, an iron remover and clay session sorts out most “failed” coatings that are actually just clogged, something worth checking with a resource like this ceramic coating overview before you write the coating off entirely. Once your paint is corrected and clean, get protection back on quickly rather than leaving bare clear coat exposed. Diamondbrite’s range covers this stage properly, from prep sprays through to full ceramic glazes, and it’s all built around British formulations rather than a one-size-fits-all approach. If your panels have a matte finish, check the specifics on our matte paint ceramic coating guide before picking a product, since gloss and matte finishes need different treatment. Head to the Diamondbrite shop to pick the right shampoo, polish, and glaze for your next step.
Sources
For more detail on stepwise removal, see this Surrey, BC guide and real-world DIY discussion on the MX5OC forum. For anything involving thin clear coat or a suspected professional-grade coating, consult a detailer directly.
- How to Safely Remove Ceramic Coating | Surrey, BC Guide
- How to Remove Ceramic Coating From a Car Safely at Home –
- Top 10 Safe Methods to Strip Ceramic Coating from Car
- How to Safely Remove Ceramic Coating | Happy Valley Experts
- Does Isopropyl Alcohol Remove Ceramic Coating? – Best Ceramics Review
FAQ
Does isopropyl alcohol remove ceramic coating?
No. IPA is useful for revealing whether coating remains and for removing surface oils, but it won’t strip a fully cured coating on its own.
How do you remove a dried-up or degraded ceramic coating?
Start with a strip wash and clay bar to rule out clogging, then move to progressive machine polishing if the coating still resists after decontamination.
What destroys ceramic coating?
Controlled machine polishing is what actually removes it in a workshop setting; outside of that, harsh chemical exposure or abrasive contact can degrade a coating unintentionally over time.
Will acetone remove ceramic coating?
Acetone is largely ineffective against a cured coating and risks damaging clear coat, trim, and plastics, so it’s not worth the gamble.
Is ceramic coating scratch proof?
No coating is scratch proof. A cured coating adds a hard, sacrificial layer that resists light marring, but it can still be scratched or worn down over time.
