

Yes, in almost every case, you should clay bar before applying a ceramic coating, because coatings bond directly to the paint and bonded contaminants stop that bond from forming properly. The only real exceptions are brand-new panels with genuinely smooth paint, and you can confirm that with a simple baggie test. For most cars, the sequence is wash, chemical decontamination, clay if the test says you need it, then an IPA wipe before you coat.
TL;DR:
- Claying removes bonded contaminants that chemicals alone cannot, preventing early coating failure, uneven gloss, and poor hydrophobic performance.
- Use a light baggie test to determine if contamination remains, especially on vertical panels and roofs, before claying.
- Claying should be performed after chemical decontamination and before polishing, never vice versa, to avoid damaging the paint.
- Avoid claying on a ceramic-coated car younger than 12 months unless necessary, and always reapply a maintenance spray afterward.
- Proper prep includes thorough washing, decontamination, claying, IPA wipe, and careful inspection to ensure optimal ceramic coating adhesion and longevity.
Table of Contents
- Why claying matters for ceramic-coating adhesion and longevity
- Claying versus polishing and chemical decontamination — what each step does
- How to clay your car before ceramic coating, step by step
- Should you clay a car that already has a ceramic coating?
- What experienced detailers know that most guides skip
- Get your prep right with the correct Diamondbrite products
- Sources
- FAQ
Why claying matters for ceramic-coating adhesion and longevity
A ceramic coating doesn’t sit on top of your paint like a wax. It bonds chemically to the clear coat, which means the coating is only ever as good as the surface it’s applied to. Coat over a contaminated panel and you’re not protecting your paint, you’re sealing dirt underneath a layer of glass-like resin.
Washing removes loose grime, and chemical decontamination (an iron remover, for example) dissolves specific bonded nasties like rail dust and brake dust particles. But neither touches everything. Clay bar treatment is the mechanical step that lifts what’s left behind, and it catches things chemicals alone often miss: embedded iron fallout, oversprayed paint from nearby bodywork, and stubborn tar that has welded itself to the clear coat over months of driving.
Skip this step and the consequences show up fast. Coating over contamination tends to produce:
- Patchy, uneven gloss where the coating has bonded inconsistently across the panel
- Weak spots that fail early, sometimes within weeks rather than years
- Poor beading and slickness, because the coating can’t form a uniform hydrophobic layer over bumpy, contaminated paint
- Visible high spots where the coating has pooled around raised contaminants
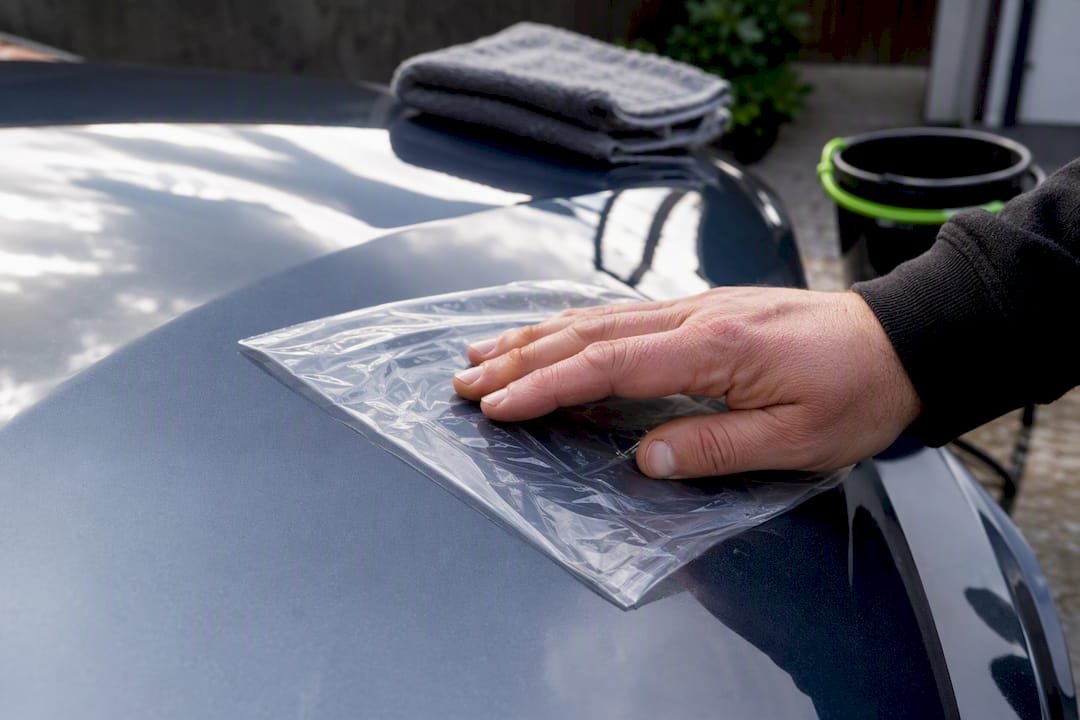
Here’s the quickest way to know where you stand. Wash your hand, slip it inside a sandwich bag, and run your fingertips lightly over the paint. Smooth as glass means you’re probably fine. Gritty, rough, or speckled means contamination is still there, and no amount of washing will shift it. This baggie test takes thirty seconds and it’s the single most reliable way to decide whether claying is worth your afternoon.
Pro Tip: Do the baggie test on a door panel and the bonnet separately. Bonnets and roofs collect far more airborne fallout than vertical panels, so they often need more attention.
Claying versus polishing and chemical decontamination — what each step does
These three stages get lumped together constantly, and that confusion causes real problems for people prepping their own cars. Each one solves a different problem, and using the wrong one wastes time or, worse, damages your paint.
- Chemical decontamination dissolves specific bonded particles, mainly ferrous metal (iron fallout) and sometimes tar, using a dedicated spray. It’s the first line of attack and it’s non-abrasive.
- Claying is mechanical decontamination. The clay’s slight tack grips onto whatever chemicals couldn’t dissolve, pulling it physically off the surface as you glide the clay across lubricated paint.
- Polishing is paint correction, not decontamination. It uses light abrasion to level out swirls, scratches, and holograms that sit within the clear coat itself.
A professional prep sequence typically runs foam pre-soak and a two-bucket wash, then chemical decontamination, then clay, then polish only if the paint needs correcting, then an IPA panel wipe, then the coating itself. That order matters. Clay before you’ve decontaminated chemically and you’re dragging semi-dissolved iron particles across the paint, which risks marring. Polish before you clay and you’re buffing contaminants deeper into the surface rather than lifting them off.
It’s also worth being clear-eyed about what clay cannot do. Clay removes contamination, not defects — if your paint has swirl marks or holograms from a previous bad wash, only polishing will shift them. Plenty of cars need decontamination but not correction, and plenty need both.
How to clay your car before ceramic coating, step by step
This is the part most guides rush, and it’s the part that decides whether your prep day goes smoothly or ends with a marred bonnet. Here’s a workflow built for a single weekend session.
Before you touch the clay:
- Pre-soak with a foam lance or pump sprayer, then wash using the two-bucket method, one bucket for clean rinse water and shampoo, one for rinsing your mitt, so you’re not dragging grit back onto the paint.
- Apply a dedicated iron remover across every panel and let it dwell as directed. Watch for the purple “bleeding” reaction on wheels and paintwork, that’s the chemical reacting with iron particles.
- Rinse thoroughly and dry with a clean microfibre before you clay. Claying wet or dirty paint is asking for scratches.
Choosing your clay:
Fine-grade clay suits daily-driven cars with light contamination and is the safer default before coating, since it’s less likely to leave marring on softer clear coats. Medium-grade clay tackles heavier build-up, think fleet vehicles or cars that have gone a year or two without decontamination, but it demands more lubrication and a lighter hand. Beyond traditional clay bars, synthetic clay towels and clay mitts do the same job with less risk of dropping the clay or picking up grit from the floor, and they’re often easier for beginners to control.
The claying technique itself:
- Spray a generous amount of dedicated clay lubricant onto a small section, roughly the size of a placemat.
- Glide the clay back and forth in straight lines with light pressure. Never push hard, the clay’s own tack does the work, not your arm.
- Fold the clay over to a clean face every couple of panels. This point is emphasised in every serious detailing guide, because a clay bar loaded with grit will scratch rather than clean.
- Check the clay regularly. If it feels gritty or you see embedded metal specks, fold to a fresh face or discard that piece entirely.
- Wipe the section dry once it glides smoothly with zero resistance, then move on.
Expect a full car to take a few hours depending on contamination levels and panel count, a timeframe echoed in owner discussions on enthusiast forums covering exactly this kind of prep day. If you’re finding heavy pitting, flaking clear coat, or contamination so severe the clay is loading up every few strokes, that’s your cue to stop and book a professional rather than risk the paint yourself.
After claying:
- Rinse the whole car again to remove lubricant residue, then re-run the baggie test. If it’s still not glass smooth, clay again or check for missed panels.
- Polish now if correction is needed, otherwise skip straight to the IPA wipe.
- Wipe every panel with a diluted isopropyl alcohol solution immediately before coating, this strips any remaining oils and gives the coating a completely clean surface to bond to.
Should you clay a car that already has a ceramic coating?
This is where a lot of DIY prep goes wrong, and it’s worth slowing down here. Claying an existing coating carries real risk, because the clay’s mild abrasion can wear down the coating’s hydrophobic top layer, the very thing giving you that beading and slickness you paid for.
Many experienced detailers avoid claying a coating that’s younger than around 12 months unless there’s a genuine reason to, such as heavy contamination that a topper or maintenance spray can’t shift. For lighter grime on a coated car, gentler options usually solve the problem without touching the coating at all:
- A dedicated iron remover, used exactly as on bare paint
- A very fine synthetic clay, specifically rated safe for coated surfaces
- A ceramic-boosting shampoo that helps lift bonded dirt during a normal wash
If you do decide claying a coated car is necessary, plan to reapply a maintenance topper or spray sealant straight afterwards, since you’ve likely thinned the protective layer slightly and want to restore it before the next rain shower.
And if your paint is genuinely new, think a car straight from the factory or a fresh respray, with no roughness under the baggie test, you can often skip claying altogether and move straight to the IPA wipe. Test first, don’t assume.
What experienced detailers know that most guides skip
Claying is treated by most professionals as a judgement call, not a mandatory box to tick on every single car. A vehicle that’s spent its life garaged and washed weekly might genuinely pass the baggie test with flying colours. A commuter car that’s sat under trees near a railway line almost never will.
The biggest myth worth killing off: clay does not replace polish, and polish does not replace clay. One decontaminates, one corrects. Believing a good polishing session has “sorted the paint” while bonded contamination still sits under the surface is how coatings fail early. The second myth, that a ceramic coating makes paint invincible, causes just as much damage; coatings resist chemical etching and add slickness, they don’t stop stone chips or prevent contamination landing on top of them in future.
For most owners, a DIY clay and coat weekend is entirely achievable if the car’s contamination is light to moderate and you’ve got a free afternoon and decent light. Heavy pitting, flaking lacquer, or contamination so severe the clay loads up constantly are the signals to hand the job to a professional detailer instead, someone with rotary options and correction experience beyond what a bottle of clay lubricant can fix.
Run the baggie test before you buy anything. It costs nothing and it tells you exactly what kind of weekend you’re in for.
— Will
Get your prep right with the correct Diamondbrite products
There are products available designed for every stage of the workflow above, formulated specifically around ceramic performance rather than generic car shampoo that leaves oily residues behind. Ceramic Shampoo options can lift dirt gently during that crucial pre-coat wash without stripping away the slickness you’re working towards, while clay lubricants help keep the clay gliding safely across every panel to reduce the risk of marring during the decontamination stage.

Once the coating’s on, the job isn’t finished, protection needs topping up. A maintenance spray from our Automotive Ceramic range restores hydrophobic performance after any light claying on a coated car, and it takes minutes rather than hours. If you’re prepping a motorhome or leisure vehicle alongside your daily driver, motorhome ceramic protection products follow the same principle: proper prep first, lasting protection second.
Browse the full range on the Diamondbrite shop and pick up everything you need for wash, clay, and coat in one order.
Sources
For a broader detailing primer covering decontamination and correction in more depth, OzKonic Kustomz’s detailing guide is a solid next read. If your paint needs correction beyond what claying can fix, professional body paint services cover what a specialist visit typically involves.
- Is Clay Bar Safe for Clear Coat? Complete Paint Safety Guide
- The importance of clay bar treatment for a flawless ceramic coating application
- Can You Clay Bar a Ceramic Coated Car? – Car Detox
FAQ
Do you have to clay bar before ceramic coating?
In almost all cases, yes. Clay removes bonded contaminants that washing and chemical decon leave behind, and skipping it risks poor coating adhesion and early failure.
What are the downsides of using a clay bar?
Used carelessly, clay can mar paint if it picks up grit, and it will wear down an existing ceramic coating’s hydrophobic layer if applied to coated surfaces without care.
Can I clay bar after ceramic coating?
You can, but it’s generally best avoided on coatings younger than about 12 months unless contamination genuinely demands it, and you should reapply a maintenance topper afterwards to restore protection.
What’s the next step after clay bar?
Rinse off lubricant residue, run the baggie test again to confirm the paint is smooth, polish only if correction is needed, then wipe every panel with an IPA solution immediately before applying your ceramic coating.
