

Yes, you can apply ceramic on plastic trim, and done properly it restores colour and adds lasting protection. The condition is non-negotiable: use a trim-specific, flexible ceramic formulation and prepare the surface thoroughly first. Skip either step and you’ll seal in old residue or end up with cracking and patchiness instead of a durable finish.
TL;DR:
- Proper surface preparation, including thorough decontamination and removal of old dressings, is essential to ensure even coating adhesion and long-lasting results.
- Most hard exterior plastics like polypropylene and ABS respond well to ceramic coatings, while soft or heavily textured plastics often require specialized techniques or should be avoided.
- Coatings last typically between 12 and 24 months, with longevity increasing when regular maintenance involves pH-neutral washes and biannual top-ups.
- Applying the coating in controlled, shaded conditions with thin coats and proper buffing is crucial to avoid patchiness, cracking, or uneven cure.
- Heavily oxidized, cracked, or heavily degraded trim should be restored professionally before applying ceramic coatings for optimal appearance and durability.
Table of Contents
- What ceramic on plastic trim actually does
- Which plastics and trim types are suitable?
- Getting the surface ready before you coat
- How to apply ceramic to plastic trim step by step
- How long does ceramic on plastic trim last?
- Common problems and how to fix them
- How Diamondbrite fits the prep, coat, and maintain routine
- When to DIY and when to call a professional
- Ready to protect your trim properly?
- Sources
- FAQ
What ceramic on plastic trim actually does
A bonded ceramic coating chemically links to the plastic surface rather than sitting on top of it, which is the fundamental difference between coating and dressing. Greasy trim dressings evaporate, wash off, and leave that dull grey cast creeping back within weeks. A cured ceramic layer stays put.
The benefits show up quickly once applied:
- Deeper, richer tone that looks closer to how the trim left the factory, rather than the flat grey most faded plastic develops.
- UV and oxidation resistance that slows the fading process rather than just masking it temporarily.
- Hydrophobic behaviour, so rain and road spray bead off instead of soaking in and leaving watermarks.
- Easier cleaning, since dirt and salt film have less to grip onto.
It’s worth being honest about the ceiling here too. A coating preserves the condition your trim is in when you apply it. It does not repair cracked plastic or reverse structural oxidation that’s eaten deep into the surface. For trims that far gone, you’re better off pairing the coating with proper maintenance guidance once restoration work has brought the surface back first.
Which plastics and trim types are suitable?
Most exterior black plastic trim responds well, but not every surface is a good candidate. Hard exterior plastics like polypropylene and ABS, the kind used for wheel arch trims, bumper inserts, and side mouldings, take a ceramic coating reliably. Textured cladding on 4x4s and SUVs is a classic use case too.
Some surfaces should be left alone:
- Soft or foamy plastics used in weather seals and gaskets, which flex differently and rarely bond well.
- Step and walking surfaces, such as caravan or motorhome running boards, where slip resistance matters more than shine.
- Grossly cracked or delaminated parts, where the substrate itself needs replacing rather than coating.
Textured trim needs a different technique to smooth trim, which is worth knowing before you buy product. Texture holds more product and needs it worked into the grain, while smooth panels want a thin, even film. Whichever you’re tackling, test first: coat a small, discreet section after prep and check it after 24 to 48 hours for even sheen before committing to the whole panel.
Getting the surface ready before you coat
Preparation decides more of the outcome than the coating itself. Detailers who see coatings fail almost always trace it back to something left on the surface, not a weak product. Old dressings, wax transfer, and embedded dirt sit between the plastic and the coating, and no amount of product corrects for that.
- Strip old dressings and wax with a trim-safe degreaser, then wipe the panel down with isopropyl alcohol (IPA) to lift any residue the degreaser missed.
- Decontaminate thoroughly. Use an all-purpose cleaner (APC) with a soft detailing brush to work product into texture pores, and bring out a clay bar if you’re dealing with bonded contamination.
- Assess for restoration needs. Badly oxidised trim sometimes benefits from light abrasion or a dye-based restorer before coating, particularly on faded black plastic that’s gone grey.
- Mask paint edges and adjacent seals with quality tape to stop coating transfer onto gloss panels, where it can leave a hazy line that’s a pain to correct.
The reasoning behind all this is simple: coating over residue just seals that residue in permanently, and pro detailers consistently flag prep as the single biggest factor in whether a coating bonds evenly or turns patchy within weeks.
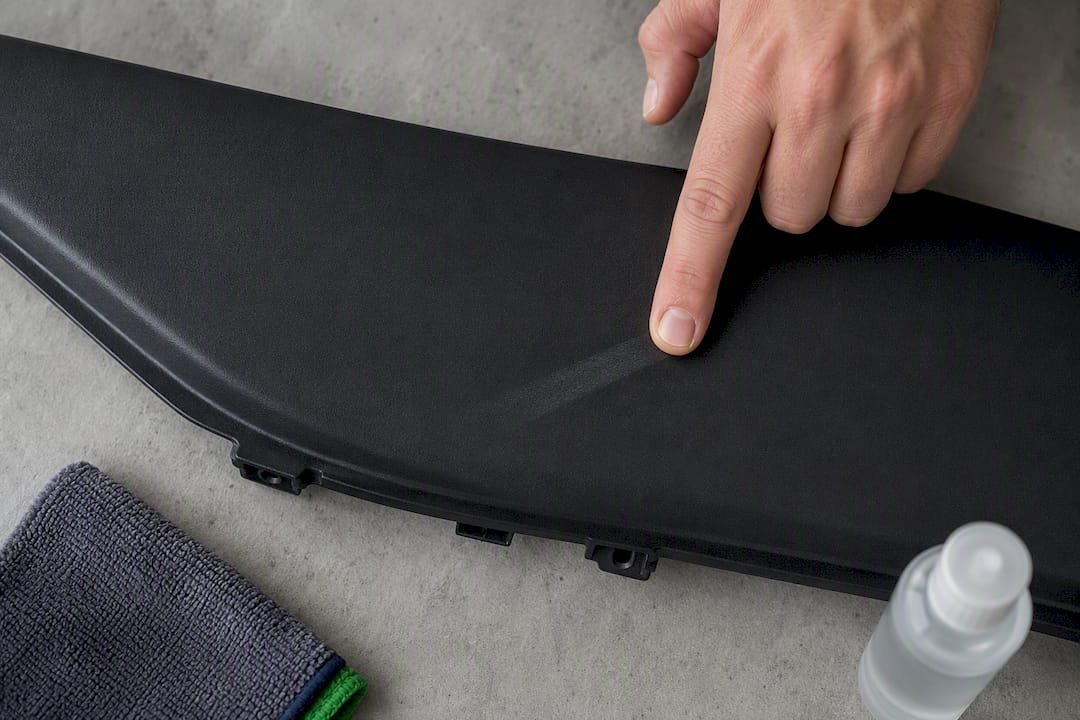
Pro Tip: Run your fingernail across a “cleaned” panel after the IPA wipe. If it leaves a visible line in a grey film, the surface still has residue and isn’t ready.
How to apply ceramic to plastic trim step by step
Work in a shaded, dry space with the panel at room temperature. Direct sun flashes the coating too fast to level properly, and damp air slows curing.
- Gather your tools: a suede or foam applicator, lint-free microfibre towels, IPA for final wipe-downs, and masking tape for edges.
- Never spray coating directly onto the panel. Apply it to the applicator pad first, then transfer it to the trim in controlled passes.
- Use a cross-hatch pattern on textured trim, working the product into the grain in overlapping strokes so no pore gets missed.
- Apply thin, even coats on smooth plastic, then let it flash. You’ll see a light haze appear within a few minutes, which is your cue to buff.
- Buff off excess with a clean microfibre once haze appears, working in straight lines rather than circles.
- Apply a second coat for extra depth on heavily faded trim, but only once the first coat has fully cured, usually 30 to 60 minutes depending on temperature and humidity.
- Avoid moisture for at least 6 to 8 hours after the final coat, and ideally keep the car dry overnight for a fuller cure.
Inspect as you go rather than at the end. Uneven sheen mid-application almost always means a missed spot in prep, and it’s far easier to fix before the coating fully cures than after.
How long does ceramic on plastic trim last?
Quality trim-specific coatings typically protect for 12 to 24 months, depending on how exposed the panel is and how well you maintain it. A rear bumper trim facing constant road spray will fade faster than a door handle surround tucked out of the weather.
Keeping that window on the longer side comes down to a few habits:
- Wash with a pH-neutral shampoo rather than anything harsh or citrus-based, which can strip the coating prematurely.
- Top up with a maintenance spray every 4 to 6 months, which extends hydrophobic performance between full reapplications rather than letting it decline unchecked.
- Check seasonally, particularly after winter road salt exposure or a long spell of strong sun.
Abrasive brushes, degreasers, and repeated clay treatments all shorten coating life, so reserve those for genuine decontamination jobs rather than routine washing. Once beading visibly slows and water starts sheeting instead of forming tight droplets, that’s your sign to reapply rather than wait for full fade-back.
Common problems and how to fix them
Most failures trace back to one of a handful of causes, and nearly all are fixable without stripping the whole job back to bare plastic.
- Patchy finish almost always means incomplete decontamination. Re-clean with an APC and clay bar, let the panel dry fully, then reapply to the affected area only.
- Excessive gloss on textured trim usually means a paint-grade coating was used instead of a flexible, trim-specific one, since paint formulas aren’t designed to move with textured plastic. Correct it with a matting agent or accept a satin finish next time round.
- Cracking or flaking signals either a rigid coating on a flexing panel or a coat applied too thickly. Light cracking can sometimes be buffed out; wider delamination means removing the coating and starting fresh.
- Uneven cure from applying in direct sun or high humidity leaves soft patches. Re-wipe with IPA and reapply once conditions improve.
If a trim has cracked, chalked heavily, or shows signs the plastic itself has degraded rather than just the coating, that’s a job for a professional restoration rather than a DIY fix.
How Diamondbrite fits the prep, coat, and maintain routine
Some car care ranges are built around exactly this workflow: prepare, protect, then maintain. A pH-neutral shampoo handles the regular wash stage without stripping a cured coating, while a ceramic glaze can give trim and paintwork bonded protection that outlasts a greasy dressing. Both slot into the same routine detailers use to keep trim looking factory-fresh rather than chalky.
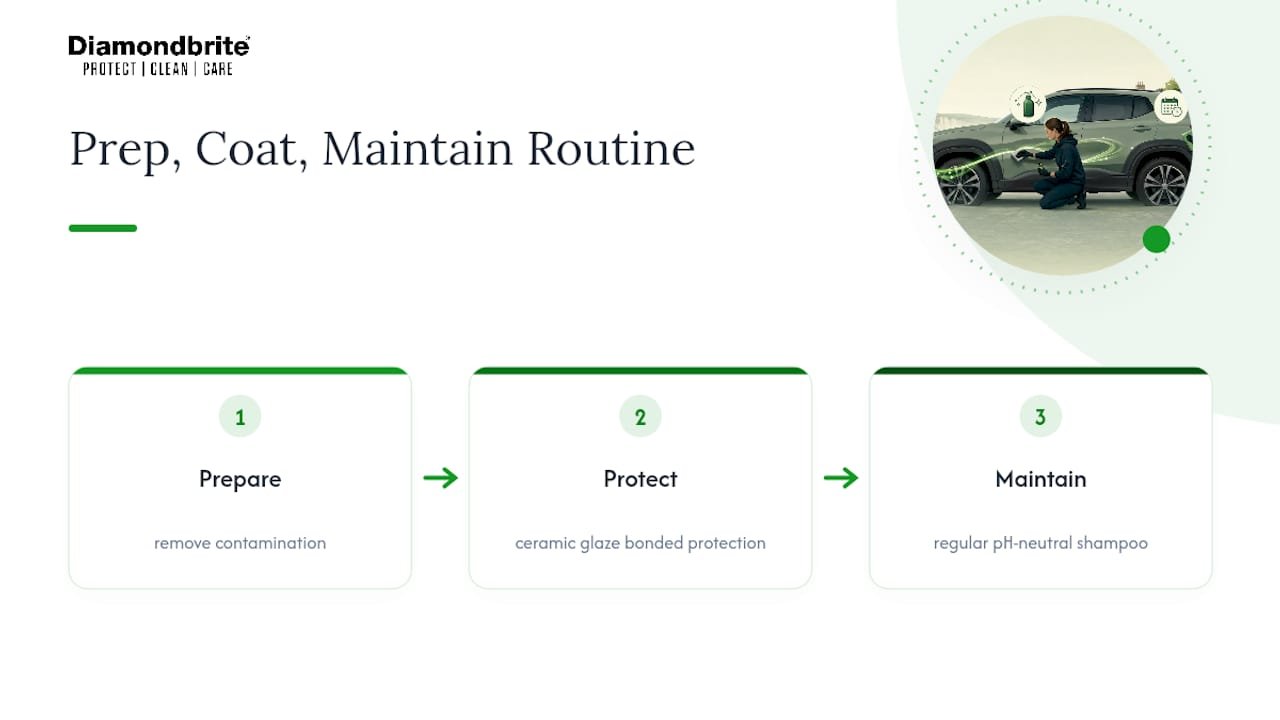
For owners who want the shine without the guesswork, that combination of a gentle wash step and a proper ceramic layer solves the two failure points covered above: contamination left behind, and a coating that doesn’t get topped up. It’s a straightforward system built for everyday motorists, not just enthusiasts with a full detailing kit.
When to DIY and when to call a professional
DIY suits faded but structurally sound trim, a dry workspace, and an hour or two per panel for prep and application. If trim is heavily oxidised, cracked, or you want uniform results across a whole vehicle in one sitting, a professional detailer with restoration tools will get there faster and more evenly than repeated home attempts.
— Will
Ready to protect your trim properly?
You’ve now got the method; the next decision is which product does the job without turning into a weekend-long chore. Ceramic Glaze and Ceramic Shampoo products may be designed to work as a pair to avoid mixing random products and hoping they work well together on textured plastic.

If your trim still beads water and just needs upkeep, start with the ceramic coating maintenance guide to get your top-up schedule right. If it’s your wheels and arches that need the same treatment as your trim, the safe wheel cleaning routine covers that ground too. For badly oxidised or cracked trim, a professional restoration is genuinely the better route before any coating goes near it. Otherwise, head to the Diamondbrite shop and pick up what you need to get started this weekend.
Sources
- Can ceramic coating be applied to plastic trim? — Gauge Magazine
- Is ceramic coating ok on plastic? — Shunpoly
- Ceramic coating for plastic trim: restore & protect — Titan Coatings (extract)
- Plastic and unpainted trim: ceramic coating to beat fading and wax staining — Coatings by the Bay
FAQ
Can you ceramic coat plastic trim?
Yes, provided you use a trim-specific, flexible formulation rather than a paint-grade coating and prepare the surface fully beforehand.
Can ceramic coating be done on plastic in general, not just exterior trim?
It can, though results vary by plastic type. Hard exterior plastics like polypropylene and ABS take coatings well, while soft, foamy, or heavily flexing plastics generally don’t bond as reliably.
What is the best ceramic for restoring plastic trim?
A trim-specific ceramic designed for flexibility and a satin finish, such as Diamondbrite’s Ceramic Glaze, works better on textured plastic than a paint-grade product, which can crack or over-gloss on flexing surfaces.
Can I ceramic coat black plastic trim?
Yes, black plastic trim is the most common candidate for coating, since it shows fading and grey oxidation most visibly and benefits the most from restored colour depth and UV protection.
