

Ventilate the car and run the air conditioning on max for 30 seconds with windows down to dry the evaporator, then follow your nose to find the actual source before treating anything. Bicarbonate of soda, coffee grounds, or activated charcoal will settle light, surface smells overnight. For anything embedded in fabric, you need extraction or an enzymatic cleaner, and for smoke or mould that has soaked in, ozone or fogging is the only realistic fix.
TL;DR:
- Regularly dry the evaporator with a fan on max and windows cracked after each trip to prevent mold growth and musty smells.
- Use bicarbonate of soda or activated charcoal absorbers on surfaces, but remember they do not address embedded odors in fabrics or upholstery.
- Diagnose odor sources by sniff testing the vents, inspecting the cabin filter, and checking under mats or in door seals before cleaning deeply.
- Apply enzymatic cleaners for organic stains and use proper leather cleaners and conditioners for upholstery to avoid damaging soft surfaces.
- For severe odors like smoke or mold, professional ozone or fogging treatments are necessary, but only after thorough cleaning and removal of organic residues.
Table of Contents
- Quick fixes to try right away (and why sprays only mask)
- How to find the odour source: a quick diagnostic checklist
- Deep-cleaning soft surfaces: carpets, upholstery and headlining
- Air conditioning, vents and cabin filter: the hidden sources
- When smells are severe: ozone, fogging and professional odour removal
- Prevention: the simple routine that stops smells returning
- What years of detailing work teach you about car smells
- Keep the inside as protected as the outside
- Sources
- FAQ
Quick fixes to try right away (and why sprays only mask)
Open every door and let the car breathe for ten minutes before you do anything else, ideally somewhere with a through-draught rather than a sealed garage. When you get back in to drive, run the fan on max with the windows cracked for about half a minute at the end of the journey too. That short routine helps dry the evaporator, which matters more than most owners realise, since a damp evaporator is where a huge share of “musty car” smells actually start.
For surface odours, absorbers earn their keep, but they need to be used properly:
- Bicarbonate of soda in a shallow bowl or sprinkled on carpet, left for 6 to 8 hours minimum, then vacuumed thoroughly.
- Fresh coffee grounds in a breathable pouch, left overnight in the footwell.
- Activated charcoal bags tucked under seats for ongoing, low-level absorption.
Bicarbonate of soda helps with light, surface smells, but it doesn’t break down whatever caused the smell in the first place. Fragranced sprays and hanging trees do the same job, only louder. They’re fine for a quick top-up before you sell or return a hire car, but relying on them long-term just means driving around inside two smells instead of one.
Pro Tip: Vacuum thoroughly after any absorber treatment. Leftover bicarbonate or charcoal dust trapped in carpet fibres can actually attract more moisture over time.
How to find the odour source: a quick diagnostic checklist
Treating the wrong spot wastes time and money, so diagnosis comes before cleaning, always. The most reliable trick is the cold-car sniff test: leave the car shut overnight, then open just the driver’s door in the morning and smell before you get in. A musty, damp smell usually points to the evaporator or wet carpet; a sour, biological smell points to spilled food or drink under a seat.
Work through the likely spots in this order:
- Sniff the vents with the fan on for the first 30 seconds. A stale, mouldy note here means the evaporator is your prime suspect.
- Check the cabin air filter. It’s cheap to pull out and often visibly grimy or damp.
- Lift the mats and check the underlay beneath them, and the footwell carpet for damp patches.
- Run a hand along seat seams and check the boot well, spare wheel recess, and headlining for staining.
- Shine a torch into the scuttle drains at the base of the windscreen and check door seals for blocked drainage.
If the smell persists after all five checks come back clean, or if you find mould growth rather than just odour, that’s your cue to call a professional rather than keep guessing.
Deep-cleaning soft surfaces: carpets, upholstery and headlining
Once you’ve found the source, fabric is usually where the real work starts. Vacuum every surface slowly and repeatedly, using a crevice tool to get into seat seams and along the base of the headrests, where crumbs and spilled liquid collect unseen. Pre-treat any visible stains before you go anywhere near extraction, working the stain from the outside in so you don’t spread it further across the carpet.
Hot-water extraction, whether from a hired machine or a proper wet/dry vac with a heated tank, lifts embedded odour that vacuuming alone never touches. Two or three passes over heavily affected carpet is normal: one to apply cleaning solution, one or two to extract it back out along with the dirty water. Leave doors open and use a fan to dry the car fully afterwards. Damp carpet left to dry slowly is exactly how you end up with a fresh mould problem on top of the old smell.
For organic odours, pet accidents, vomit, spilled milk, an enzymatic cleaner works where regular shampoo won’t, because it breaks down the proteins causing the smell rather than just masking them. Test any enzymatic product on a hidden patch of headlining or upholstery first, since fabric-backed materials can react differently to raw carpet.
Leather needs a different approach entirely:
- Use a pH-neutral leather cleaner, never carpet shampoo or all-purpose cleaner.
- Wipe rather than soak. Leather absorbs moisture into its backing and can crack or delaminate if it stays wet too long.
- Follow with a proper leather conditioner to replace the oils the cleaning process strips out.
Pro Tip: Always work extraction from the boot forward to the front seats. Odour and moisture tend to settle at the lowest, rearmost points of the cabin first.
Air conditioning, vents and cabin filter: the hidden sources
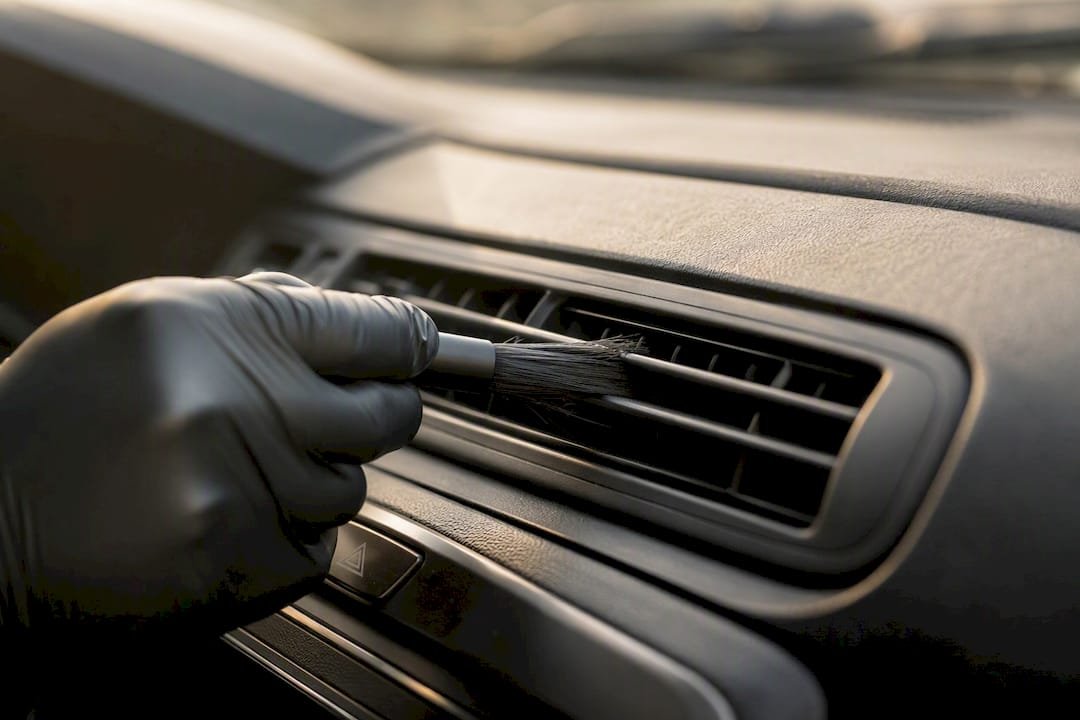
The evaporator sits behind the dashboard and gets wet every single time you use the air conditioning, that’s how it cools the air. The problem is what happens after you switch it off: warm, damp, dark, exactly the conditions mould needs to establish itself on the fins. That’s why the fan-first-30-seconds sniff test from earlier so often points straight back here.
A few DIY steps make a real difference:
- Use an A/C foam cleaner sprayed into the intake (usually at the base of the windscreen or under the dash) to break down mould on the evaporator fins.
- Finish every journey with the fan on max, windows down, for around 30 seconds. It’s a small habit that dries the evaporator and stops mould re-establishing.
- Replace the cabin filter on schedule rather than waiting for it to smell.
Replacing that filter is one of the highest-value five minutes you’ll ever spend on your car. Parts typically run £10 to £30, and most manufacturers recommend annual replacement, yet it’s the part owners forget most often because it’s hidden behind the glovebox. If foam cleaner and filter changes haven’t shifted a persistent musty smell, book a professional A/C clean; a blocked drain or genuinely colonised evaporator core needs proper flushing equipment to sort out.
When smells are severe: ozone, fogging and professional odour removal
Smoke damage, mould that’s spread through the headlining, or a smell that’s survived a full deep clean needs professional-grade treatment. Ozone treatment and fogging reach places a spray bottle physically can’t: inside ducts, behind door cards, deep in foam padding under the seats. ULV foggers, the same equipment used by valeting businesses and dealerships preparing cars for sale, distribute fine disinfectant particles into exactly those gaps.
Order matters here as much as it did earlier in the process:
- Remove all visible contamination and rubbish first.
- Apply enzymatic pre-treatment to any organic residue.
- Extract fabric surfaces thoroughly.
- Run ozone or fogging treatment last, once everything else is clean and dry.
Ozone is genuinely effective at neutralising odour molecules, but the car must be sealed during treatment and thoroughly ventilated afterwards before anyone sits in it. Skipping that step, or running ozone on a car that’s still visibly dirty, wastes the treatment.
For heavy, long-term smoke exposure, even ozone has limits, and headlining replacement becomes the only permanent fix once the material itself has absorbed the smell.
Prevention: the simple routine that stops smells returning
A handful of small habits do more for your car’s air than any single deep clean. Regular filter changes, a brief drying routine on the A/C, and immediate spill response prevent the majority of the problems this guide covers.
- Weekly: clear rubbish out, wipe up any spills the same day, and give mats a quick vacuum.
- Every journey: finish with the fan on max, windows down, for 30 seconds to dry the evaporator.
- Monthly: vacuum properly under seats and in seam lines; pet owners should wash removable seat covers.
- Annually: replace the cabin filter and book a professional A/C check if you’ve noticed any musty note.
- As needed: run a full extraction once or twice a year if you carry pets, children, or muddy kit regularly.
Keep a small kit in the boot: a microfibre cloth, a pH-neutral interior cleaner, bicarbonate of soda, an enzymatic spray, and a hand vacuum. Together they cover almost every odour problem before it has a chance to set in.
What years of detailing work teach you about car smells
Every car that comes in with a “just won’t shift” smell turns out to have layers: old fabric residue under a layer of evaporator mould under a layer of air freshener someone used to cover it all up. Treating the top layer and ignoring the rest is the single most common mistake, and it’s why so many owners feel like they’ve “tried everything.” Diamondbrite has spent over three decades formulating car care products in its Loughborough lab, and that same principle, treat the actual cause, not the symptom, runs through everything from ceramic paint protection to interior care.
— Will
Keep the inside as protected as the outside
You’ve done the hard part: found the source, cleaned it properly, and built a routine to stop it coming back. Diamondbrite’s product range is built around that same logic, treating causes rather than papering over them, which is exactly why it works alongside the steps above rather than against them. A pH-neutral interior cleaner handles hard surfaces like dashboards and door cards without stripping factory coatings, while ceramic shampoo keeps exterior paintwork protected so road grime and contamination aren’t being dragged into the cabin on your shoes every time you get in.

If you’re assembling the small maintenance kit mentioned earlier, Diamondbrite’s online shop stocks the interior and exterior products that support this whole routine in one place, no need to piece it together from a dozen different brands. Browse the range, pick the pieces that match your car’s actual problem, and get your kit stocked before the next spill or damp morning catches you out.
Sources
- Cabin air filter replacement: how often, how to change it and cost
- Coolcaraircon
- How to get rid of bad car smells
FAQ
How do I get rid of an awful smell in my car?
Ventilate and dry the evaporator first, then find the actual source with a sniff test before treating it with absorbers, extraction, or enzymatic cleaner as needed.
What absorbs bad smells in a car?
Bicarbonate of soda, coffee grounds, and activated charcoal all absorb light surface odours, though none of them break down the underlying cause of an embedded smell.
What’s the best odour eliminator for a car?
There’s no single best product. Enzymatic cleaners work best on organic residue, A/C foam cleaners tackle evaporator mould, and ozone treatment is reserved for severe smoke or mould that has survived a full deep clean.
What do dealerships use to deodorise a car?
Dealerships typically use ULV fogging equipment and ozone cycles alongside deep cleaning and enzymatic pre-treatment to reach ducts and fabric backing that sprays can’t penetrate.
How often should I replace my cabin air filter?
Most manufacturers recommend annual replacement, with parts typically costing £10 to £30, making it one of the cheapest ways to prevent musty smells.
