

Yes, you can apply ceramic coating to older paint. The single deciding factor is whether the clear coat is still intact. A sound, adhering clear coat, even on a car with years of sun exposure and light scratches, can be prepared and coated with excellent results. A failing clear coat, one that is peeling, flaking, or exposing bare metal, cannot be saved by a coating and needs professional paint repair first.
Here is the core mechanic to understand: a ceramic coating bonds to and seals the paint surface exactly as it is on the day of application. It protects; it does not repair. Apply it to corrected, decontaminated paint and you get a dramatic improvement in gloss, water behaviour, and long-term protection. Apply it to uncorrected, oxidised paint and the coating locks those defects in permanently, often making swirl marks and dullness more visible under the added gloss.
Two quick examples:
- A ten-year-old hatchback with faded but intact clear coat, properly washed, clayed, and machine-polished before coating, can look close to showroom condition and hold that finish for years.
- The same car coated without correction will have its swirl marks and oxidation amplified by the coating’s reflectivity, with no way to correct them afterwards without removing the coating first.
Key takeaways
Ceramic coating on old paint works when the clear coat is sound and the surface has been properly prepared; preparation determines the outcome more than any other factor.
| Point | Details |
|---|---|
| Clear coat condition decides candidacy | Intact clear coat, even on an older car, can be coated after correct prep. |
| Correction before coating is non-negotiable | Coatings seal defects permanently; polish and decontaminate before applying. |
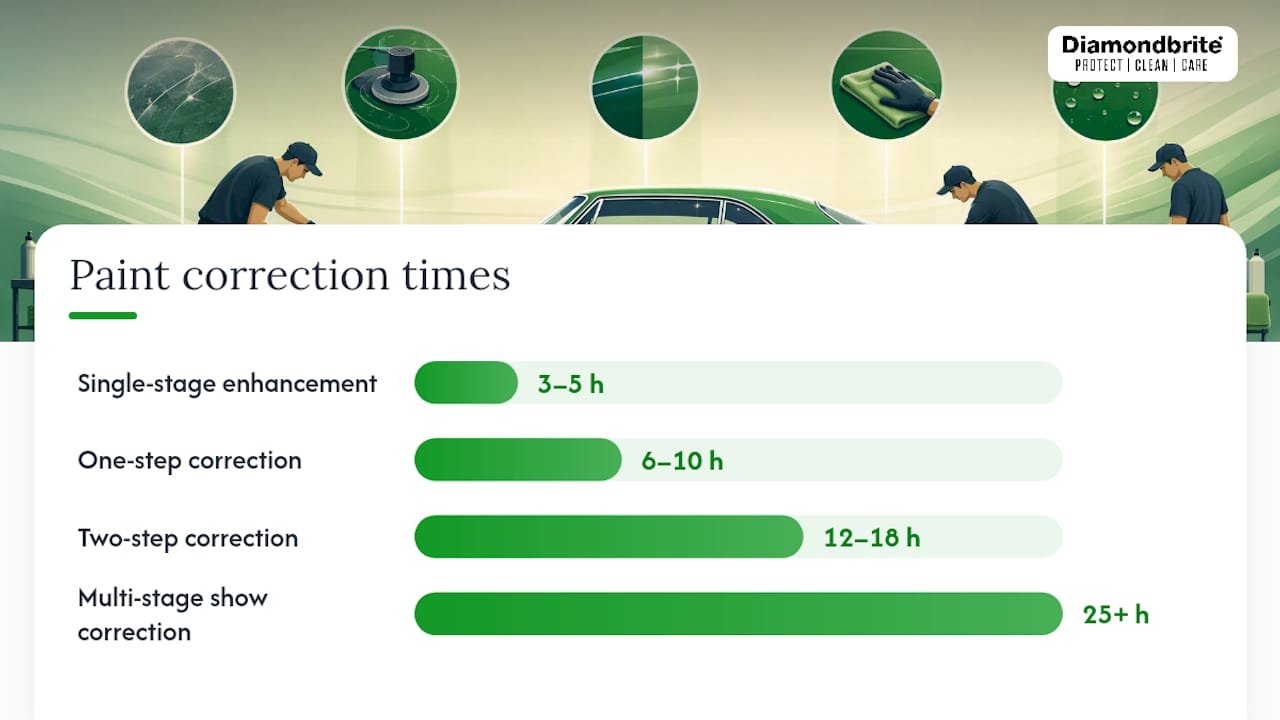
| Correction time drives cost | Professional prep ranges from 3–5 hours for a light polish to 25+ hours for multi-stage correction. |
| Aftercare extends coating life | Hand wash with pH-neutral shampoo and apply a silica booster every 6–12 months. |
| Diamondbrite for DIY | Diamondbrite’s ceramic shampoo, iron remover, and Ceramic Glaze cover the full prep-to-coat workflow at home. |
Table of Contents
- Can you put ceramic coating on old paint? A quick decision checklist
- How to prepare older paint for ceramic coating: the full workflow
- Special cases: single-stage lacquer, peeling paint, and fresh resprays
- What results should you expect on older paint?
- Aftercare for a ceramic coating on older paint
- Should you DIY or hire a professional?
- The Diamondbrite DIY approach for older paint
- What actually matters when coating older paint
- Protect your older paint with Diamondbrite
- Sources
- FAQ
Can you put ceramic coating on old paint? A quick decision checklist
Whether coating is worth it depends on paint condition, not mileage. A fifteen-year-old car with sound clear coat is a better candidate than a three-year-old car with peeling lacquer.
Signs your car is a good candidate:
- Clear coat is intact with no peeling, flaking, or milky patches
- Paint feels rough after washing but has no deep chips or exposed primer
- Oxidation is light to moderate and responds to a test polish on a small area
- No rust bubbling beneath the paint surface
Red flags that usually mean repaint or panel repair first:
- Peeling or flaking clear coat, especially on horizontal panels (bonnet, roof)
- Chalky, powdery finish that does not improve after polishing
- Cloudy or milky patches indicating clear coat failure
- Bare metal or primer visible anywhere on the panel
- Rust lifting the paint from below
Three practical tests you can do yourself:
- Inspect the paint in direct sunlight at a low angle. Swirl marks, oxidation, and clear coat haziness show up clearly this way.
- Run a clean fingernail gently across a suspect area. If the clear coat lifts or flakes, it is failing.
- Wash the car thoroughly and feel the surface. Persistent roughness means bonded contamination, which is fixable with a clay bar. Peeling means it is not.
Pro Tip: Before committing to a full-vehicle job, test one panel, typically a door or quarter panel, after full prep. This shows you both the adhesion quality and the final visual result before you invest time and product across the whole car.
How to prepare older paint for ceramic coating: the full workflow
Preparation is where the outcome is decided. Skipping prep risks poor adhesion, an uneven finish, and reduced durability — and on older paint, the margin for error is smaller than on a new car.
The step-by-step sequence
- Thorough pre-wash and snow foam. Rinse the car, apply a pH-neutral snow foam, and let it dwell for five minutes before rinsing. This lifts loose dirt and reduces the risk of scratching during the contact wash.
- Two-bucket contact wash. Use a pH-neutral shampoo, a clean wash mitt, and separate rinse and wash buckets. Work panel by panel from the roof down.
- Iron decontamination. Spray an iron remover across all painted surfaces and allow it to react (typically 3–5 minutes). Purple bleeding indicates iron particles dissolving. Rinse thoroughly. This step is non-negotiable on older paint, which accumulates years of brake dust and rail fallout.
- Clay bar decontamination. Lubricate the surface with a clay lubricant or diluted shampoo and work a clay bar across each panel. The paint should feel glassy afterwards. If it still feels rough, repeat.
- Paint inspection under controlled lighting. Use a paint inspection light or a bright LED torch at a low angle. Mark panels with masking tape where correction is needed. On older cars, the bonnet and roof typically need the most work.
- Paint correction by severity. This is the most time-consuming stage and the one that most directly determines the final result.
- Enhancement polish: removes light swirls and adds gloss; suitable for paint in reasonable condition.
- Single-step correction: a more aggressive compound followed by a finishing polish; addresses moderate oxidation and scratches.
- Multi-stage correction: compound, intermediate polish, and finishing polish; for heavily oxidised or scratched paint.
- IPA panel wipe. After polishing, wipe every panel with an isopropyl alcohol (IPA) solution or a dedicated panel-prep product. This removes polish oils that would otherwise prevent the coating from bonding correctly.
- Coating application. Work in a shaded, dust-free environment. Apply the ceramic coating to one panel at a time using a foam or suede applicator, spreading thinly and evenly. Follow the product’s flash time guidance before buffing.
- Curing. Keep the car dry and out of direct rain for at least 24 hours after application. Full cure typically takes 7–14 days depending on temperature and humidity.
Tools and consumables by stage:
- Pre-wash: snow foam, pressure washer or hose, foam lance
- Contact wash: pH-neutral shampoo, wash mitt, two buckets with grit guards
- Iron decontamination: iron remover spray
- Clay: clay bar or clay mitt, clay lubricant
- Correction: dual-action or rotary polisher, cutting and finishing pads, compound and finishing polish
- Panel prep: IPA wipes or panel-prep spray
- Coating: ceramic coating product, foam or suede applicator blocks, clean microfibre cloths
Correction time shapes the cost and outcome more than any other variable. Professional installer guidance puts a single-stage enhancement polish at 3–5 hours on a standard sedan, a one-step correction at 6–10 hours, a two-step correction at 12–18 hours, and a multi-stage show correction at 25 or more hours. That labour is what drives the price difference between a basic coating job and a full correction-and-coat.
Pro Tip: The IPA panel wipe is the step most DIYers skip. Polish residue left on the surface creates an invisible barrier that stops the coating bonding properly. Wipe every panel immediately before you coat it, not hours earlier.
Special cases: single-stage lacquer, peeling paint, and fresh resprays
Not every older car follows the standard clear-coat workflow. Three situations change the approach significantly.
Single-stage lacquer finishes
Older vehicles, particularly those from the 1980s and early 1990s, often have single-stage paint with no dedicated clear coat. The colour and gloss come from the same layer. Ceramic coatings can be applied to single-stage finishes, but adhesion and visual behaviour differ from modern systems. The coating bonds directly to the colour coat, which is softer and more porous. Experienced technicians recommend a test patch on an inconspicuous panel before committing to a full application, as results vary considerably by paint brand and age.
Heavily oxidised, peeling, or chalky paint
Polishing can recover moderate oxidation, but there is a limit. Once the clear coat has failed structurally, no amount of correction will restore it. Signs of structural failure include:
- Milky or cloudy patches that do not respond to polish
- Flaking that exposes the colour coat or primer beneath
- Chalky powder that returns within days of polishing
In these cases, the correct path is panel repair or a full respray. Applying a coating over failing paint will not stabilise it and may make removal harder later.
Recent resprays
Fresh paint needs time to fully cure before coating. Solvent-based paints typically need 30–60 days; waterborne paints used by most modern bodyshops may be ready sooner, but always confirm with the bodyshop. Coating too early traps residual solvents beneath the ceramic layer, which can cause bubbling, poor adhesion, or discolouration.
What results should you expect on older paint?
The final gloss level is determined by the substrate, not the coating. A ceramic coating enhances whatever surface it sits on. Correct the paint thoroughly beforehand and the improvement can be dramatic. Leave defects in place and the coating’s added reflectivity will make them more obvious, not less.
Realistic outcome guide by preparation level:
- Full correction before coating: significant gloss improvement, strong hydrophobic water behaviour, UV protection, and easier cleaning. Older paint that has been properly corrected and coated often looks better than it did when the car was new.
- Enhancement polish only: moderate gloss improvement, good hydrophobic performance, some remaining swirl marks visible in direct light.
- No correction, coating only: existing defects become more visible under the added gloss; hydrophobic performance is present but adhesion may be compromised by residual contamination.
Longevity on older paint depends on three things: how thoroughly the paint was prepared, the quality of the coating product, and how the car is maintained afterwards. A well-prepared older car with a quality coating, maintained correctly, can realistically hold protection for two to five years. Poor prep or neglected maintenance shortens that considerably.
Properly applied coatings do not damage healthy paint. Most cases where owners report problems trace back to inadequate preparation or incorrect application, not the coating chemistry itself. That is reassuring, but it also reinforces the point: the prep is the job.
Aftercare for a ceramic coating on older paint
A coating applied to older paint needs consistent maintenance to perform well. The surface has already been through years of environmental exposure; the coating extends its life, but only if you look after it.
Do’s:
- Use a dedicated drying towel or microfibre cloth; pat rather than drag
- Remove bird droppings and tree sap promptly, as they etch through coatings given enough time
- Apply a silica booster or maintenance spray every 6–12 months to refresh hydrophobic performance
- Carry out an iron decontamination wash once or twice a year to remove bonded fallout
Don’ts:
- Avoid automatic brush car washes; the brushes introduce swirl marks and can degrade the coating
- Do not use alkaline or acidic cleaning products on coated surfaces
- Avoid pressure washing at very close range on panel edges, where the coating is thinnest
Pro Tip: The first sign that a coating needs a silica boost is when water stops beading and starts sheeting instead. That is normal after several months and does not mean the coating has failed. A maintenance spray restores the hydrophobic effect without stripping the base layer.
Should you DIY or hire a professional?
Both routes can produce good results. The honest answer is that the right choice depends on your tools, your time, and your confidence with a machine polisher.
What a credible DIY job requires:
- A dual-action polisher and at least two pad types (cutting and finishing)
- A clean, shaded working space, ideally a garage
- 6–12 hours of uninterrupted time for a full-size car
- Patience with the IPA wipe and coating application steps
What a professional brings:
- A controlled environment (temperature, humidity, dust)
- Paint thickness gauges to avoid overcutting thin clear coat
- Experience reading paint under inspection lighting
- Warranty on the finished work
Questions to ask a professional installer
- What preparation is included in the quoted price?
- How many correction stages are you planning, and why?
- Does the quote include panel prep and a final inspection under lighting?
- What are the warranty terms, and what voids them?
- Can I see before-and-after photos from a similar vehicle?
Red flags to watch for:
- An instant quote given without seeing the car in person
- A “coating only” offer for a visibly oxidised or dull vehicle
- No mention of paint correction or decontamination in the process
- No curing environment or plan for keeping the car dry post-application
On cost shape: a DIY kit with basic correction products costs a fraction of a professional correction-and-coat job, but the professional route includes the labour, the environment, and the expertise. For a car with significant oxidation or thin clear coat, the professional route is the safer investment.
The Diamondbrite DIY approach for older paint
For owners who want to handle the job themselves, Diamondbrite’s ceramic-care range covers every stage of the workflow described above.
Recommended product types for older paint:
- A ceramic-infused cleaner shampoo for the initial wash and ongoing maintenance
- An iron remover for decontamination
- A clay-compatible shampoo or lubricant for the clay stage
- A panel-prep or IPA wipe for the final surface clean before coating
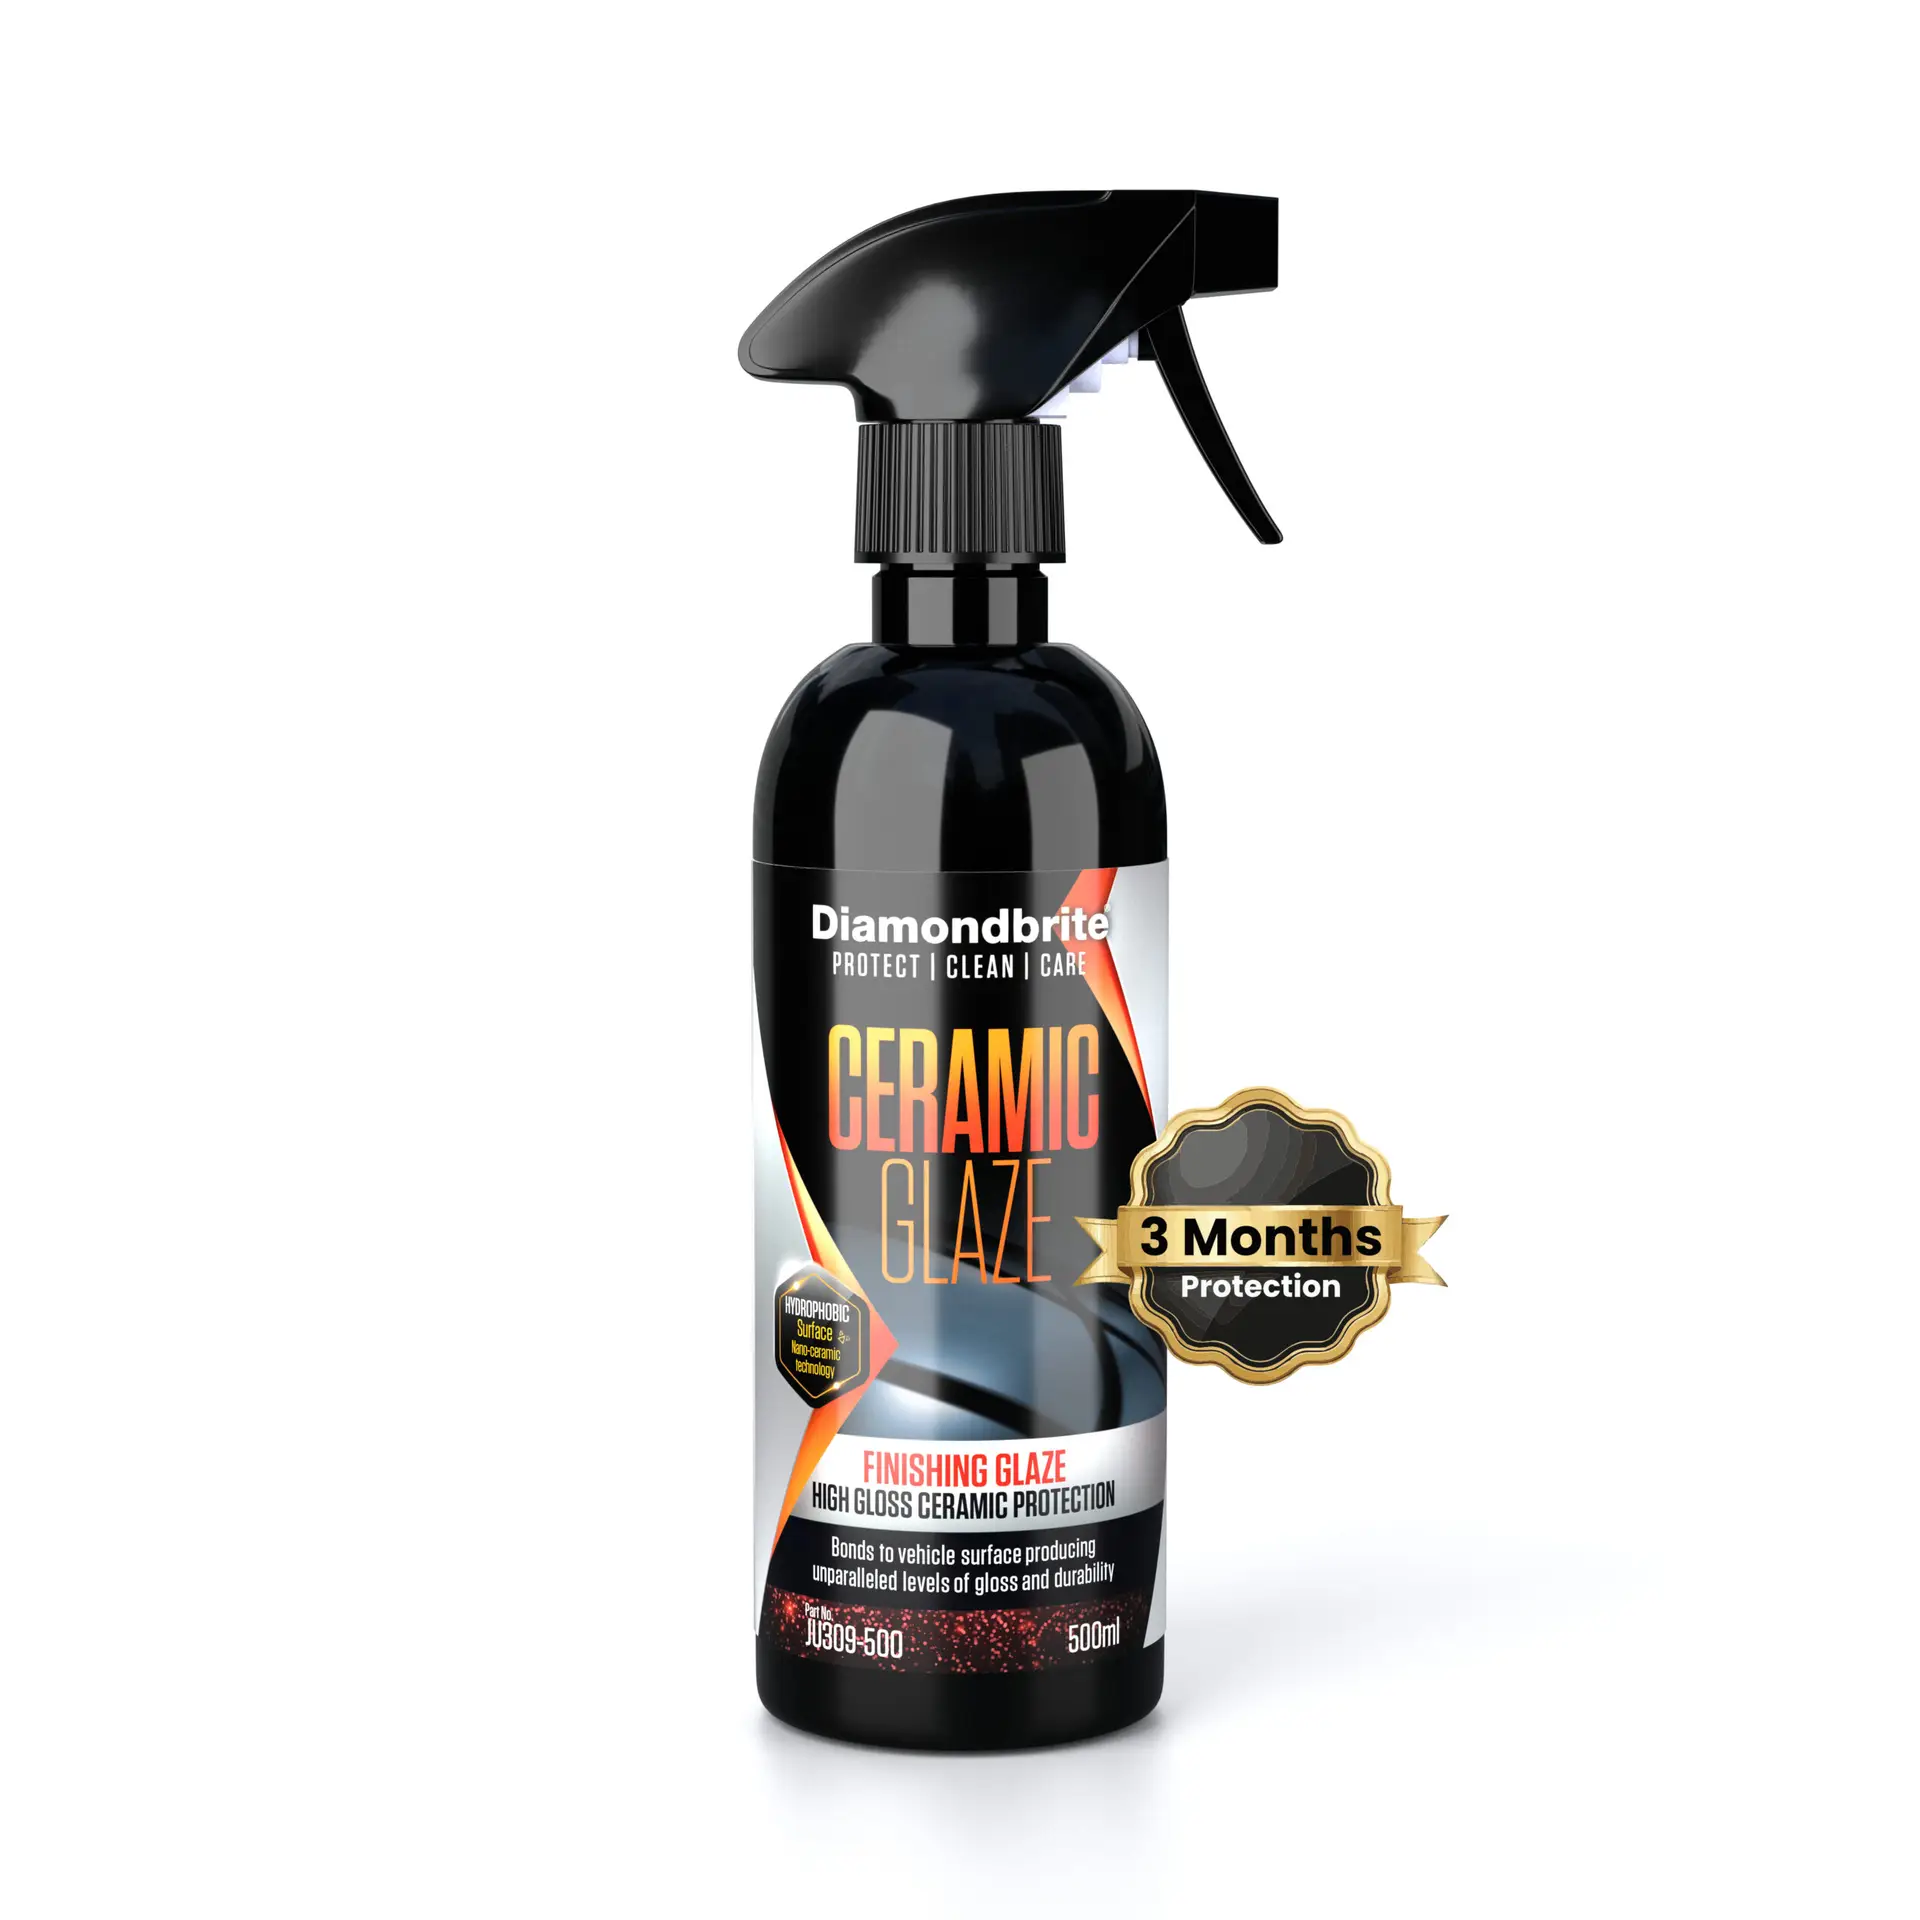
- Diamondbrite Ceramic Glaze as the protective coating layer
A safe beginner workflow using Diamondbrite products
- Wash thoroughly with a Diamondbrite ceramic shampoo using the two-bucket method.
- Apply iron remover, allow to react, and rinse.
- Clay the surface using a clay bar with shampoo as lubricant.
- Polish lightly with an enhancement polish on a dual-action polisher, or by hand for small areas.
- Wipe every panel with an IPA or panel-prep solution immediately before coating.
- Apply Diamondbrite Ceramic Glaze panel by panel, following the product instructions for flash time and buffing.
- Keep the car dry and shaded for at least 24 hours.
Safety and limitation notes:
- If the clear coat is thin or the paint is heavily oxidised, stop at the polish stage and consult a professional before coating.
- Always test on one panel first and inspect the result in direct sunlight before proceeding.
- Do not coat in direct sunlight or temperatures below 10°C.
Pro Tip: Work on one panel at a time from start to finish during the coating stage. Coating product that flashes too long before buffing becomes difficult to remove and can leave high spots.
Browse the full range at the Diamondbrite online shop to find the right products for your prep and maintenance routine.
What actually matters when coating older paint
Most of the anxiety around ceramic coating on older vehicles comes from the wrong place. Owners worry about the coating itself: whether it will bond, whether it will last, whether it is worth the money. The coating is rarely the problem. What determines the outcome, every time, is the hour of work done before the coating touches the paint.
A car with ten years of sun exposure and light swirl marks can look genuinely impressive after a thorough decontamination, a careful machine polish, and a quality ceramic glaze. The coating does not need the paint to be perfect; it needs the paint to be clean, corrected, and free of oils. That is achievable on most older vehicles with the right products and a methodical approach.
If you are unsure about the condition of your clear coat, have the paint assessed by a professional before committing to a full job. A good detailer will tell you honestly whether correction is worth it or whether a panel needs repainting first. That conversation costs nothing and can save you from locking in a result you cannot undo.
Protect your older paint with Diamondbrite
If you are ready to take on the prep yourself, Diamondbrite’s ceramic-care range gives you everything from the first wash to the final glaze in one place. The Ceramic Glaze is formulated to bond to prepared automotive paint, including older clear-coat systems, and the supporting products, ceramic shampoo, iron remover, and panel-prep solutions, cover every stage of the workflow described in this article.

For ongoing maintenance, Diamondbrite’s pH-neutral car shampoo is designed specifically for coated surfaces, keeping the hydrophobic layer intact wash after wash. Browse the full range and find the right kit for your car at the Diamondbrite online shop.
Sources
- Paint correction before ceramic coating: 2026 pro installer guide | LA Wrap and Tint School
- What are the risks or downsides of applying ceramic coating on older or poorly maintained paint?
- Ceramic coating for high-mileage cars: Is it worth it? | EveryDetailMe
- Does ceramic coating harm paint? | Car Detailing Guru Melbourne
- Can Ceramic Coating Be Applied on Older Paint Without Prep Work in Sarasota? | Sharkey’s Detailing & Tint
FAQ
Can ceramic coating be used on faded paint?
Yes, provided the clear coat is still adhering. Faded paint responds well to polishing before coating, and the combination of correction and a ceramic layer can restore significant gloss and protection.
Will ceramic coating damage paint?
A properly applied coating does not damage healthy paint. Problems attributed to coatings almost always trace back to poor preparation or incorrect application technique.
Is there a downside to ceramic coating on older cars?
The main risk is locking in existing defects. Applying a coating to uncorrected paint amplifies swirl marks and oxidation under the added gloss, making them harder to address afterwards.
How soon after a new respray can you apply ceramic coating?
Solvent-based paints typically need 30–60 days to cure fully before coating. Always confirm the paint system and recommended cure window with the bodyshop before booking a coating appointment.
