

A correctly prepared ceramic coating, maintained with a pH-neutral shampoo, is the most effective way to protect alloy wheels from brake dust, corrosion, and everyday road grime. Detailing professionals consistently point to ceramic chemistry as the approach that genuinely changes how brake dust behaves on a wheel surface, turning a scrubbing session into a quick rinse. Diamondbrite Ceramic Glaze builds that durable shield on the wheel face, and Diamondbrite Ceramic Shampoo keeps it performing week after week without degrading the coating. The practical payoff is real: owners typically find that coated wheels need far less effort to clean, with brake dust rinsing away rather than bonding to the surface.
Key takeaways
Ceramic coating, properly prepared and maintained with a pH-neutral shampoo, is the most durable and low-effort way to protect alloy wheels from brake dust and corrosion.
| Point | Details |
|---|---|
| Prep is everything | Deep clean, decontaminate, and IPA-wipe before coating; skipping this is the top cause of early failure. |
| Avoid lug holes and hubs | Never coat inside lug nut holes or hub contact surfaces, as this affects bolt torque and safety. |
| Use pH-neutral products | Acidic cleaners degrade ceramic coatings; use Diamondbrite Ceramic Shampoo for every maintenance wash. |
| Recoat when beading stops | Loss of hydrophobic beading and returning brake-dust bonding are the clearest signs a recoat is due. |
| Diamondbrite for UK conditions | Diamondbrite Ceramic Glaze and Ceramic Shampoo are formulated for British roads, salt, and temperature ranges. |
Table of Contents
- How do ceramic coatings protect alloy wheels from brake dust?
- Preparing your alloy wheels for coating
- Step-by-step DIY application of Diamondbrite Ceramic Glaze
- What maintenance routine keeps coated wheels performing?
- What coatings won’t fix, and when to recoat
- Choosing the right product and what it costs
- Why Diamondbrite recommends ceramic protection for UK wheels
- Diamondbrite ceramic wheel protection: shop now
- Sources
- FAQ
How do ceramic coatings protect alloy wheels from brake dust?
SiO2-based ceramic coatings form a hard, slick barrier on the wheel surface that reduces surface energy. Brake dust particles struggle to grip a low-energy surface, so they sit on top rather than embedding into the finish. The result is that a weekly rinse removes most contamination before it has a chance to stain.
Beyond brake dust resistance, a ceramic coating delivers:
- Chemical resistance against acidic fallout and road salts common on UK roads
- Gloss retention that keeps painted and powder-coated finishes looking fresh between washes
- Hydrophobic behaviour so water sheets off rather than pooling and leaving mineral deposits
Detailing experts note that coatings change the way brake dust bonds to a wheel, making weekly or fortnightly washes a quick rinse-and-wipe rather than intensive scrubbing. That shift in cleaning effort is the practical reason most owners choose ceramic protection in the first place.
Ceramic wheel coatings do not repair kerb rash, fill pitting, or reverse existing corrosion. Their job is to protect a sound surface, not restore a damaged one. Coat only wheels that are already in good condition.
Preparing your alloy wheels for coating
Preparation is the single biggest determinant of coating longevity. Skipping decontamination or polishing before application is the most common reason coatings fail prematurely. Follow these steps in order:
- Remove the wheel from the vehicle where possible. Off-car preparation gives you access to the inner barrel and spoke backs, and makes every subsequent step easier.
- Deep clean with a pH-neutral wheel shampoo to remove loose brake dust and road film.
- Iron fallout removal using a dedicated fallout remover. Watch for the purple reaction that signals dissolved ferrous particles lifting from the surface.
- Clay decontamination to pull bonded industrial fallout and tar from the finish.
- Polish if needed. Light swirls or oxidation should be corrected now. Once the coating goes on, it locks in whatever is underneath.
- IPA wipe-down with isopropyl alcohol on a clean microfibre to strip any polish residue and oils. The surface must be completely bare before coating.
Pro Tip: Run a clean finger across the wheel face after the IPA wipe. If it squeaks, the surface is ready. Any drag or slipperiness means contamination remains.
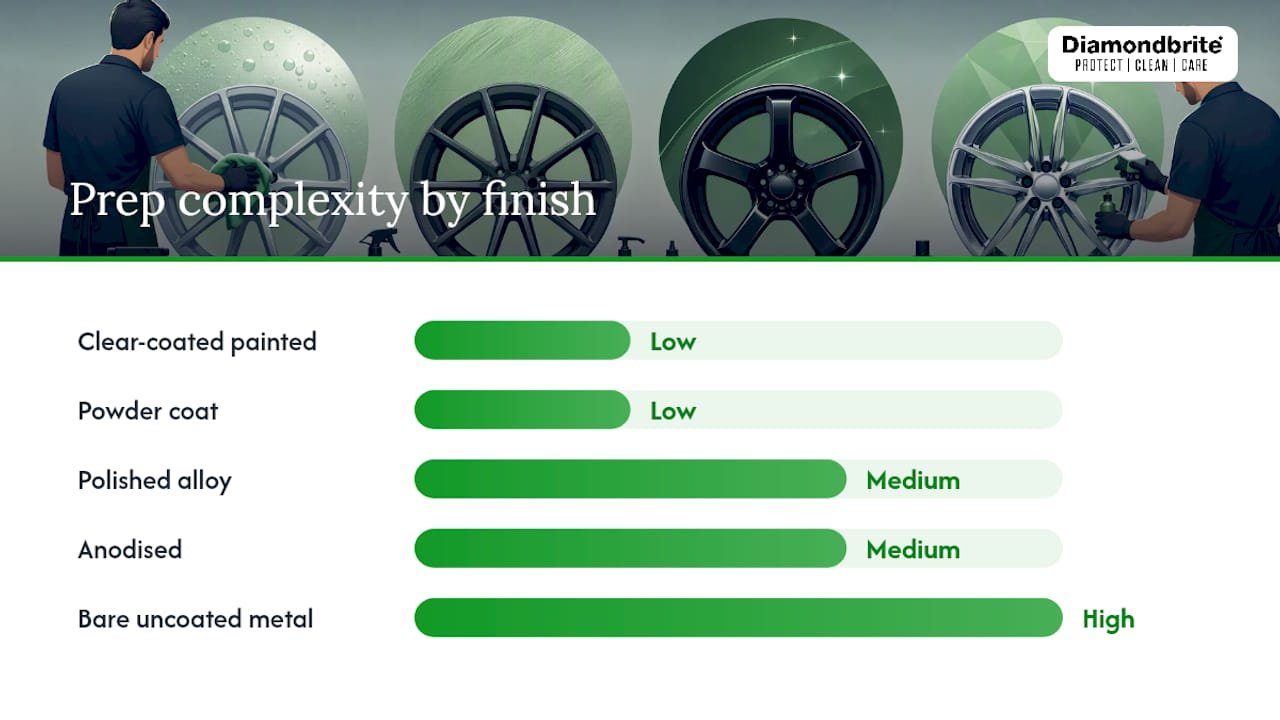
Wheel finish compatibility
| Finish type | Prep complexity | Notes |
|---|---|---|
| Clear-coated painted | Low | Most straightforward; standard prep sequence applies |
| Powder coat | Low | Durable substrate; responds well to ceramic coating |
| Polished alloy | Medium | Requires careful polishing; check manufacturer guidance before coating |
| Anodised | Medium | Confirm coating compatibility with wheel manufacturer first |
| Bare/uncoated metal | High | Prone to oxidation; professional advice recommended before coating |
Never coat over loose, flaking, or corroded finishes. Fix kerb rash and pitting first, or the coating will simply seal in the damage and peel prematurely.
Step-by-step DIY application of Diamondbrite Ceramic Glaze
Work in a shaded, dry area with ambient temperature between 10°C and 25°C. Humidity and direct sun both affect how the product levels and bonds. Gather lint-free applicator pads and several clean microfibre cloths before you start.
- Shake the product and dispense a small amount onto the applicator pad. Less is more; a thin, even layer bonds better than a thick one.
- Work one section at a time — one spoke face or one quarter of the barrel. Apply in straight, overlapping passes.
- Allow the bonding window specified on the product label. You will typically see the coating begin to haze slightly as it starts to cure.
- Level and wipe off with a clean, dry microfibre using light pressure. Flip the cloth frequently to avoid redepositing product.
- Inspect under a torch or work light for high spots or streaking before moving to the next section.
- Repeat across all sections, then allow the wheel to cure undisturbed.
Some product instructions recommend leaving coated wheels undisturbed for several hours to reach full performance. Avoid driving through standing water or a car wash for at least 24 hours after application.
Safety note: Do not apply coating inside lug nut holes or on hub contact surfaces. Coating those areas can alter bolt friction and compromise correct torque seating, which is a genuine safety risk.
Pro Tip: Test your technique on a small, hidden section of the inner barrel first. It lets you judge the product’s working time before committing to the visible spoke faces.
Pro Tip: Apply in thin coats. A second thin layer applied after the first has fully cured adds durability without the high-spot risk that comes from applying too much product in one pass.
Troubleshooting common application issues
High spots or streaking usually mean the product was left too long before levelling, or the cloth was saturated. Buff the area firmly with a fresh microfibre while the coating is still workable. If it has hardened, a light machine polish will remove it before you reapply.
Uneven coverage across a spoke typically results from inconsistent applicator pressure. Work in consistent, overlapping passes and keep the pad flat against the surface.
What maintenance routine keeps coated wheels performing?
Once the coating has fully cured, your cleaning routine changes. The goal is to preserve the hydrophobic layer, not strip it.
- Use Diamondbrite Ceramic Shampoo or another pH-neutral wheel shampoo for every wash. Acidic cleaners degrade the coating chemistry and shorten its life.
- Rinse wheels with a hose or pressure washer before touching them with a cloth or brush. This lifts loose brake dust without abrasion.
- Use a soft-bristle wheel brush on spoke backs and inner barrels. Avoid abrasive pads on coated faces.
- Apply an iron fallout remover periodically, not at every wash. Overuse of fallout removers can clog the coating and reduce its effectiveness over time.
Pro Tip: After a quick rinse, dry the wheel face with a damp microfibre rather than leaving it to air-dry. This prevents water spots from forming on the coating and keeps the hydrophobic effect looking its best.
| Task | Recommended frequency |
|---|---|
| Rinse with water | Weekly or after every drive in wet/salty conditions |
| pH-neutral shampoo wash | Every 1–2 weeks |
| Iron fallout removal | Every 4–6 weeks, or when purple reaction is strong |
| Coating inspection | Every 3 months |
What coatings won’t fix, and when to recoat
Ceramic protection is not a cure-all. A wheel coating resists contamination and staining but will not prevent kerb rash, rock chips, or mechanical damage. Set realistic expectations before you invest time in application.
Common failure modes include:
- Thermal cycling from repeated heavy braking, which stresses the coating bond over time
- Chemical attack from acidic cleaners or road salt used without rinsing
- Mechanical abrasion from stiff brushes or automatic car washes with rotating bristles
Signs that your coating needs refreshing:
- Water no longer beads and sheets off the wheel face
- Brake dust begins to stick and requires scrubbing to remove
- Visible gloss drop compared to a freshly coated wheel
Wheel coatings typically degrade faster than the same product applied to body panels. High-heat braking, salty UK winter roads, and motorway mileage all accelerate breakdown. Owners who cover high mileage or drive in coastal areas should inspect their coating every three months and plan to recoat more frequently than the headline product claim suggests.
Choosing the right product and what it costs
Your choice between DIY and professional application comes down to wheel finish, confidence level, and budget.
Buying criteria to consider:
- Wheel finish compatibility (see the prep table above)
- Ease of application for a first-time user
- Heat resistance rating, particularly for track-day or performance vehicles
- Realistic durability versus headline claims
Diamondbrite Ceramic Glaze is well-suited to UK owners because it is formulated for the temperature ranges and contamination levels typical of British roads, and it works across the most common wheel finishes (clear-coated, powder coat). Diamondbrite Ceramic Shampoo pairs directly with it for maintenance, keeping the coating intact without the pH risk that generic wheel cleaners carry.
Professional application is worth the premium when your wheels have a specialist finish (polished, anodised, or custom-painted), when you want a longer-duration coating applied under controlled conditions, or when you simply prefer a guaranteed result.
Why Diamondbrite recommends ceramic protection for UK wheels
Ceramic chemistry is not a marketing claim. The formulations Diamondbrite develops in its Loughborough lab are built around the specific challenges UK owners face, including salt, damp, and the iron-rich brake dust that accumulates on alloys driven in stop-start urban traffic. The coating creates a surface that genuinely makes maintenance easier, and the time savings compound over a full ownership period.
One safety point worth repeating: never apply any ceramic product inside lug nut holes or on hub contact surfaces. The coating alters friction at those interfaces, and that affects how correctly your wheel bolts seat and torque. It is a small area to mask off, and it matters.
Owners who follow the preparation and maintenance steps in this guide typically find that their wheels stay cleaner for longer, retain their gloss through winter, and require far less effort at each wash. That is the practical case for ceramic protection, and it is one we stand behind.
Diamondbrite ceramic wheel protection: shop now
Diamondbrite Ceramic Glaze gives you a durable, hydrophobic barrier on your alloy wheels that makes brake dust rinse away rather than bond. Pair it with Diamondbrite Ceramic Shampoo for a maintenance routine that preserves the coating week after week without the pH risk of standard wheel cleaners.

For the best value, pick up both products together from the Diamondbrite online shop alongside a quality microfibre kit. Full application guides are available on the Diamondbrite site, so you have everything you need from prep to first wash. Browse the full ceramic car care range and place your order today at Diamondbrite.
Sources
- Ceramic Coating on Wheels and Calipers: Is It Worth It? | EuroLuxe Detailing
- Ceramic coating for wheels | Chariotz
- Applying A Wheel Coating + The Benefits | MyCarCleaning
- Application process & benefits of a wheel ceramic coating – Just Car Care
- Wheel Ceramic Coatings: Are They Worth It? — PROTEK
FAQ
How long does a ceramic wheel coating last?
Wheel coatings typically last less than the same product on body panels because of heat from braking and road salt exposure. Inspect every three months and recoat when hydrophobic beading declines noticeably.
Can I protect alloy wheels without removing them from the car?
You can, but removing the wheels gives far better access to spoke backs and inner barrels, and makes decontamination and application significantly more thorough. Off-car prep is the recommended approach.
Which wheel finishes are safe to coat with a ceramic glaze?
Clear-coated painted and powder-coated wheels are the most straightforward. Polished and anodised finishes need manufacturer confirmation before coating, as some specialist lacquers react differently to SiO2-based products.
What is the difference between a wheel sealant and a ceramic coating?
A wheel sealant is typically a polymer-based product that bonds to the surface for a few months; a ceramic coating uses SiO2 chemistry to form a harder, longer-lasting barrier with greater heat and chemical resistance. For UK owners dealing with brake dust and road salt, ceramic chemistry generally outperforms traditional sealants over a full season.
Why should I avoid acidic cleaners on coated wheels?
Acidic wheel cleaners break down the SiO2 bond in ceramic coatings, shortening their effective life. A pH-neutral shampoo such as Diamondbrite Ceramic Shampoo cleans effectively without attacking the coating chemistry.
