

The most reliable way to clean car glass is an ammonia-free automotive glass cleaner paired with a two-towel microfibre technique: one plush towel to apply and loosen grime, one low-pile glass towel to buff dry. This approach works on exterior and interior glass, protects aftermarket and factory tint, and removes the oily interior film that household sprays routinely miss. Independent testing confirms that technique and towel quality matter more than brand choice alone.
Pro Tip: Keep a dedicated glass towel and a small bottle of ammonia-free cleaner in your boot. A two-minute touch-up between washes prevents grime from bonding and means you rarely need a full deep clean.
Table of Contents
- What belongs in your glass-cleaning kit
- How to clean exterior glass without streaks
- Removing greasy film and haze from interior glass
- How to remove bird droppings, tar and sap safely
- How to clean and maintain your windscreen wipers
- Keeping your windscreen clear in damp UK conditions
- What you should never use on car glass
- Why ammonia-free cleaners are non-negotiable for tinted glass
- How often to clean your glass and what it costs
- Cleaning side mirrors and the rearview mirror
- How often should you deep-clean your car’s glass?
- Laminated vs. tempered glass: does the cleaning method change?
- Key takeaways
- The habit that actually makes a difference
- Diamondbrite glass care: tint-safe products for every clean
- Useful sources
What belongs in your glass-cleaning kit
You do not need much, but what you choose matters. The wrong cloth or the wrong spray is the most common reason car windows streak.
Recommended kit:
- Two dedicated microfibre towels. A plush towel for the application pass; a thin, low-pile glass towel for the final buff. Never use the same towel for glass that you use for wax or interior dressings — contamination is the single most common cause of persistent streaks.
- Ammonia-free automotive glass cleaner. A trigger spray or aerosol foam. Aerosol foams cling to vertical glass and reduce drips, often needing fewer passes.
- Spray bottle. For a DIY mix or to dilute isopropyl alcohol.
- Isopropyl alcohol (70% IPA / 30% distilled water). For spot degreasing greasy interior patches.
- Distilled water and white vinegar. A 1:1 mix for a safe home-made cleaner on light haze.
- Small glass pad or soft detailing brush. For reaching edge seams and corners.
Microfibre care matters. Wash microfibres separately, use no fabric softener, and store them dry. Grit embedded from mixed washes can scratch glass on the next use.
| Item | Purpose | Notes |
|---|---|---|
| Plush microfibre | Application and scrub pass | Dedicated to glass only |
| Low-pile glass towel | Final dry buff | Lint-free, no wax residue |
| Ammonia-free glass cleaner | Main cleaning agent | Tint-safe; avoid household sprays |
| 70% IPA solution | Spot degreasing | Avoid overspray on plastics |
| Distilled water + white vinegar (1:1) | DIY haze remover | Light film only; ventilate after use |
| Small detailing brush | Edge and seam cleaning | Soft bristles only |
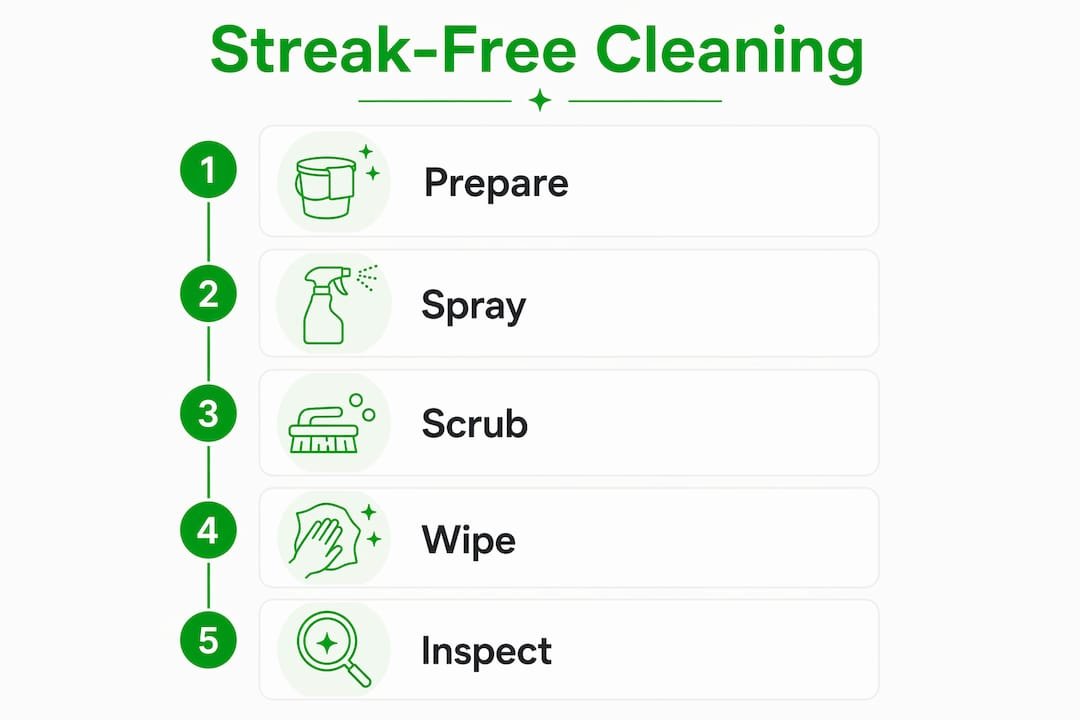
Pro Tip: Pack a compact version of this kit in a zip bag in your boot: one folded glass towel, one small spray bottle of ammonia-free cleaner. It takes up almost no space and saves you from improvising with a service-station paper towel.
How to clean exterior glass without streaks
The golden rule: always clean in shade, never on hot glass. Direct sunlight causes cleaners to evaporate unevenly, leaving behind the very residue you are trying to remove.
Step-by-step exterior routine:
- Lift the wipers away from the glass.
- Rinse the glass with water to remove loose grit — skipping this step risks dragging abrasive particles across the surface.
- Move the car into shade, or wait for a cooler part of the day.
- Spray the cleaner onto your plush microfibre towel rather than directly onto the glass. For aerosol foam, a light mist directly onto the glass is fine.
- Wipe in overlapping vertical strokes, then horizontal strokes, working from top to bottom.
- Immediately follow with the dry low-pile glass towel, buffing in the same pattern until no moisture remains.
A routine exterior window clean on an average car takes a moderate amount of time. A more thorough exterior-only deep clean, including edges and corners, takes noticeably longer.
For dried-on grime, apply the cleaner and allow a brief dwell before wiping. This softens the deposit so you can lift it cleanly rather than scrubbing.
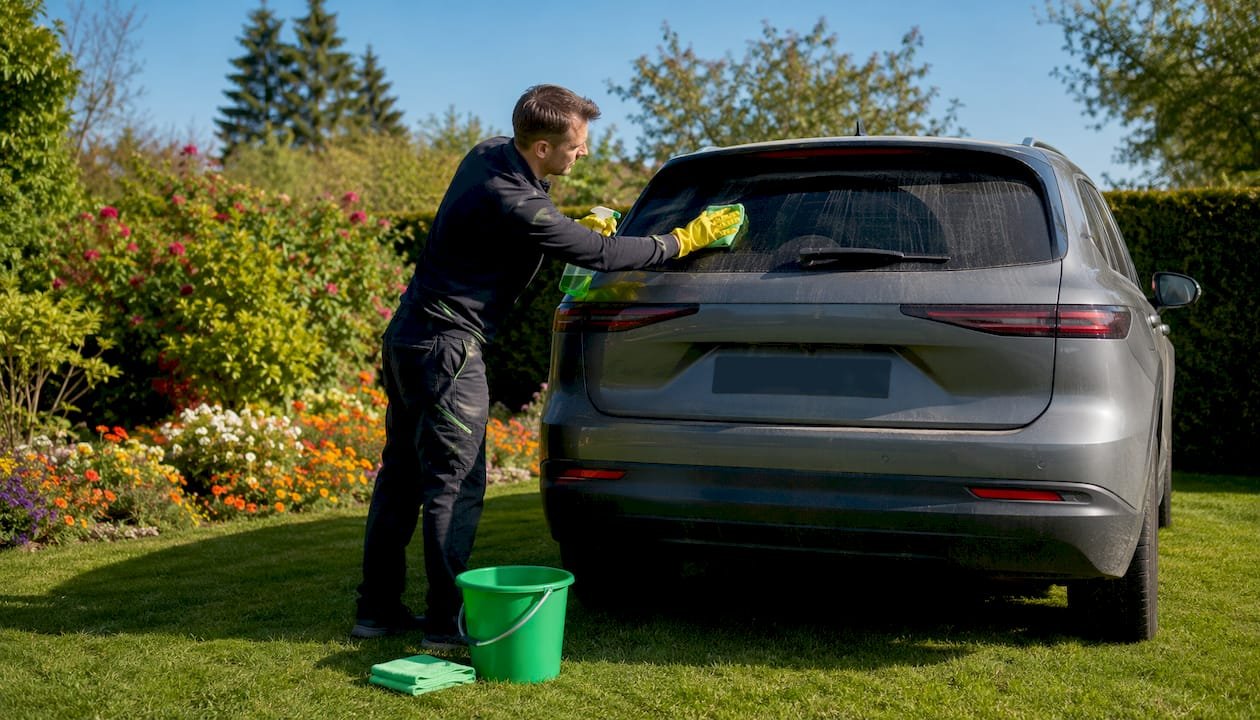
Pro Tip: For heavily contaminated glass, an aerosol foam cleaner clings to the surface and gives the product time to work — you end up making fewer passes and the result is noticeably cleaner.
Removing greasy film and haze from interior glass
Interior glass is a different challenge. Off-gassing from dashboard plastics and upholstery, sunscreen transferred from hands, and breath condensation all build a hazy, oily film that a single wipe rarely shifts. The two-pass method solves this reliably.
Two-pass interior method:
- Fold a clean microfibre into a small pad. Wipe the glass in a circular motion to loosen the film, then in vertical strokes.
- Refold to a fresh face of the towel frequently — a dirty face just redistributes the film.
- For the steep angle of a windscreen, press the folded pad flat with your fingertips to maintain even contact and avoid smear trails.
- Apply your cleaner to a second clean microfibre (not directly onto the glass, to protect the dashboard and infotainment screen from overspray).
- Wipe in circular then vertical strokes.
- Immediately buff dry with a fresh low-pile glass towel.
For light haze, a 1:1 distilled water and white vinegar mix works well and is safe for most vehicles. Ventilate the car afterwards. For greasier spots, use a 70% isopropyl alcohol solution as a targeted spot treatment, keeping overspray away from plastics and screens.
Interior haze often needs more than one cleaning session to clear fully, particularly after a long period of build-up. Inspect the glass under different light angles — sunlight from the side reveals streaks that are invisible head-on.
Pro Tip: After cleaning, hold a torch at a low angle across the glass. Any remaining film or streak shows up immediately, so you can target it before it dries.
How to remove bird droppings, tar and sap safely
Stubborn contaminants need a dwell-and-lift approach, not brute force. Scrubbing dried deposits risks scratching the glass or damaging any hydrophobic coating you have applied.
- Bird droppings: Soak with ammonia-free glass cleaner and allow to dwell for around 10 seconds. Lift gently with a folded microfibre. Buff immediately. Never drag dried droppings across the glass dry.
- Tree sap: Apply cleaner and allow a slightly longer dwell. If the sap is hardened, a dedicated tar and sap remover (applied sparingly to a microfibre, not directly to the glass) is more effective. Test on a hidden edge first.
- Tar spots: A small amount of 70% isopropyl alcohol on a folded microfibre works as a spot treatment. Rinse the area with water afterwards and follow with a standard glass clean.
- Adhesive residue (sticker or label remnants): The same 70% IPA mix, applied with light pressure. Avoid prolonged contact with surrounding trim or rubber seals.
Safety notes: Never use a razor blade on coated or tinted glass. Avoid abrasive pads or scourers — they leave micro-scratches that catch light and worsen over time. If a contaminant has bonded deeply or covers a large area, a professional detailer is the safer option.
Always test any solvent on a small, out-of-sight area first, and rinse thoroughly with water after treatment.
How to clean and maintain your windscreen wipers
Clean glass and dirty wipers are a contradiction. A wiper blade coated in road grime will smear your freshly cleaned windscreen within minutes.
Wiper cleaning routine:
- Lift the wiper arm carefully away from the glass and prop it so it cannot snap back.
- Wipe the rubber blade along its full length with a cloth dampened with isopropyl alcohol or a mild detergent solution.
- Run the cloth along the blade edge — you will often see a dark residue lift off.
- Check the rubber for cracks, splits or flat spots. Press the blade gently against a flat surface to confirm even contact along its length.
- Lower the arm gently back onto the glass.
- Test on wet glass: a good blade clears cleanly in one pass with no streaking or skipping.
Replace wipers when you notice streaking, a chattering noise, or visible splits in the rubber. For most UK drivers, replacement every several months is typical, though heavy winter use shortens that interval. If you are storing a vehicle for an extended period, prop the wiper arms away from the glass to prevent the rubber from deforming against the windscreen.
Keeping your windscreen clear in damp UK conditions
Fog on the interior of your windscreen is a safety issue, not just an inconvenience. The priority is warm, dry airflow.
- Immediate fog clearance: Switch the heater to windscreen demist mode, turn the air conditioning on (it dehumidifies the air), and switch off the air recirculation setting so fresh outside air enters. Open a window slightly if conditions allow.
- Persistent interior fogging: Often caused by damp carpets, wet clothing, or a blocked cabin air filter. Address the moisture source rather than just clearing the glass repeatedly.
- Anti-fog sprays: Applied to the interior glass surface, these reduce condensation build-up. Follow the manufacturer’s guidance on application near sensors and cameras — some products are not compatible with heated glass elements or proximity sensors.
- Hydrophobic exterior coatings: On the outside, a ceramic or hydrophobic glass coating causes water to bead and roll off rather than sheet across the glass, improving visibility in rain without wipers at speed.
- Compatibility check: Always verify that any anti-fog or hydrophobic product is compatible with your vehicle’s glass type, particularly if the glass has a factory coating or embedded heating elements.
What you should never use on car glass
Some of the most widely shared glass-cleaning hacks cause real damage. Here is what to avoid and why.
- Newspaper: The ink can transfer onto glass and rubber seals, and the paper fibres are abrasive enough to leave micro-scratches visible under headlights. Paper towels carry the same risk — they shed lint and leave fibres that catch light.
- Household ammonia-based cleaners: Ammonia degrades tint adhesive, causing bubbling and peeling. It also damages interior plastics and rubber seals over time.
- Scourers and abrasive pads: These scratch glass coatings and the glass surface itself, creating permanent marks.
- Dirty or contaminated towels: A towel used for waxing or interior dressings will deposit those products onto the glass, creating a film that is harder to remove than the original grime.
- Solvents near interior screens and plastics: Strong solvents can discolour or craze plastic trim and damage anti-reflective coatings on infotainment screens. Always apply to the towel, never spray directly.
Safer alternatives: Use dedicated microfibre glass towels instead of paper products; choose ammonia-free automotive glass cleaners instead of household sprays; use a 70% IPA solution for spot degreasing rather than undiluted solvents.
Pro Tip: Before applying any stronger solvent to a new area, test it on a hidden edge of the glass or trim. A 30-second test saves you from a costly mistake.
Why ammonia-free cleaners are non-negotiable for tinted glass
Ammonia breaks down tint adhesive, causing bubbling, peeling and discolouration over time. This applies to both aftermarket window film and some factory-applied tints. The damage is cumulative — a single use may not show immediately, but repeated exposure degrades the film progressively.
The industry standard for automotive glass care is an ammonia-free formulation; this is not a marketing preference but a practical requirement. When cleaning tinted glass, also avoid prolonged dwell times with any solvent near the edge seams, where the film is most vulnerable to lifting.
Practical steps to protect your tint:
- Always check the label before using any glass cleaner on tinted windows. “Ammonia-free” must be stated explicitly.
- Avoid prolonged contact of any cleaner with the edge seams of the tint film.
- After cleaning, inspect the tint in good light for any signs of lifting or bubbling at the edges.
- If you have multiple vehicles with tinted glass, keep a clearly labelled tint-safe kit for each one.
Pro Tip: Label your tint-safe spray bottle clearly and keep it separate from your general detailing kit. It takes seconds and prevents the wrong product being grabbed in a hurry.
How often to clean your glass and what it costs
Suggested schedule:
- Weekly touch-up (5–15 minutes): A quick pass with a damp glass towel and ammonia-free spray on the windscreen and side windows. Small, frequent touch-ups prevent grime from bonding and reduce the effort needed for deeper cleans.
- Full interior and exterior clean (30–60 minutes): Every 1–3 months, depending on how much you drive, local air quality, and whether you park outdoors. UK winters and urban driving accelerate build-up.
Approximate DIY costs:
- A quality bottle of ammonia-free automotive glass cleaner: £6–£12.
- Two dedicated microfibre glass towels: £5–£15 for a pair.
- Distilled water and white vinegar for a home mix: under £3.
- Total starter kit: roughly £15–£25, with the cleaner and towels lasting many months.
Buying better microfibres upfront pays off. A quality glass towel used correctly lasts far longer than a cheap one that sheds fibres and needs replacing after a few washes. Store your kit in a sealed bag to keep towels clean between uses, and replenish your cleaner when the bottle reaches roughly a quarter full so you are never caught short.
Cleaning side mirrors and the rearview mirror
Side mirrors and the interior rearview mirror are easy to overlook, but a smeared mirror at night or in rain reduces visibility as much as a dirty windscreen.
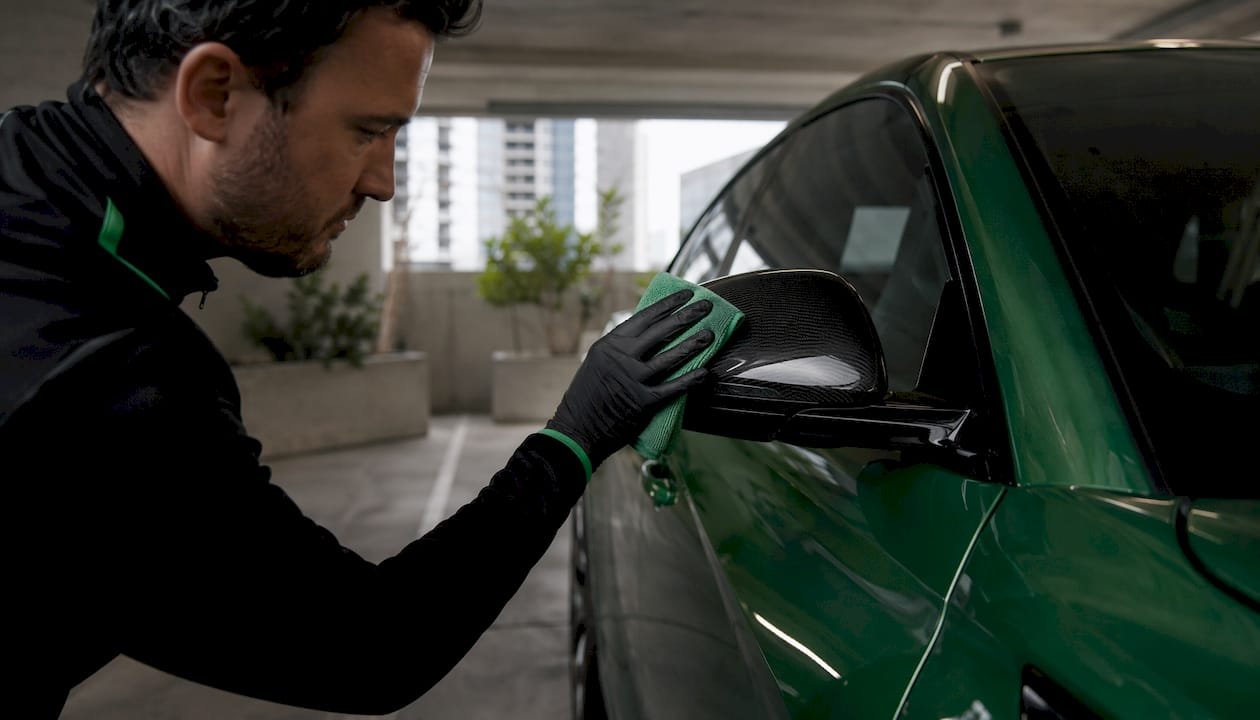
For side mirrors, fold the mirror in gently if your vehicle allows it, then wipe with a damp ammonia-free glass cloth in a single direction from top to bottom. The mirror housing often traps road spray and insects along the lower edge — use a soft detailing brush to clear this before wiping the mirror face. Buff dry immediately to avoid water spots.
The interior rearview mirror picks up fingerprints and interior off-gassing film. Apply a small amount of ammonia-free cleaner to a folded microfibre and wipe the mirror face, being careful not to let the cloth catch on the mirror’s mounting bracket or any integrated sensors. A single clean stroke, followed by a dry buff, is usually enough.
Both mirrors benefit from the same hydrophobic coating you might apply to the windscreen exterior — water beads off rather than sheeting across the mirror face, which makes a real difference in heavy rain.
How often should you deep-clean your car’s glass?
A thorough glass clean is worth doing every month or so for a daily driver in typical UK conditions. If you park outdoors, drive on motorways regularly, or live near industrial areas, do it more frequently.
The windscreen is the priority. A clean windscreen is a safety requirement, not just an aesthetic one. Haze and film scatter light from oncoming headlamps, making night driving significantly more tiring and reducing reaction time. Interior haze in particular builds gradually and is easy to stop noticing until a bright light source reveals it.
Side windows and rear glass can follow a slightly longer cycle — every 6–8 weeks for most drivers — unless you notice visibility issues sooner. The rearview and side mirrors deserve attention at every full clean.
Laminated vs. tempered glass: does the cleaning method change?
Most UK cars use two types of glass: laminated glass for the windscreen and tempered (toughened) glass for the side and rear windows.
Laminated glass (windscreen) consists of two glass layers bonded with a plastic interlayer. It is more resistant to shattering but can develop internal delamination if harsh solvents penetrate edge chips or cracks. Clean laminated glass with ammonia-free products and avoid applying strong solvents near any existing chips or cracks. If your windscreen has a hydrophobic factory coating, check the manufacturer’s guidance before applying an additional product.
Tempered glass (side and rear windows) is heat-treated for strength and shatters into small, blunt pieces rather than sharp shards. It is generally more tolerant of cleaning products, but the same ammonia-free rule applies if the glass is tinted. Tempered glass can also carry embedded heating elements (rear demister) — avoid abrasive cloths or excessive pressure over these elements, and do not apply strong solvents directly to the glass in that area.
In practice, the cleaning technique is the same for both types: ammonia-free cleaner, two-towel microfibre method, no abrasives. The main difference is caution around chips and cracks on laminated glass, and care around heating elements on tempered rear glass.
Key takeaways
The most reliable way to achieve streak-free, tint-safe results is an ammonia-free automotive glass cleaner combined with a two-towel microfibre method: one plush towel to apply, one low-pile towel to buff dry.
| Point | Details |
|---|---|
| Two-towel microfibre method | Use a plush towel to apply cleaner and a low-pile glass towel to buff dry for streak-free results. |
| Ammonia-free is non-negotiable | Ammonia degrades tint adhesive, causing bubbling and peeling; always check the label before using any cleaner on tinted glass. |
| Avoid paper towels and dirty cloths | Newspaper and paper towels shed fibres; a cloth contaminated with wax or dressing is the most common cause of persistent streaks. |
| Clean in shade, inspect in varied light | Hot glass causes uneven evaporation and streaks; check results with a torch at a low angle to catch remaining film. |
| Diamondbrite glass cleaner | Diamondbrite’s ammonia-free glass cleaner and ceramic hydrophobic coating are formulated for automotive use and complement the two-towel technique described throughout. |
The habit that actually makes a difference
Most glass-cleaning problems come down to two things: the wrong cloth and the wrong timing. Cleaning in direct sun with a towel that has touched wax or tyre dressing will streak every time, regardless of which cleaner you use. The fix is not a better product — it is a dedicated glass towel kept clean and a decision to work in shade.
The interior windscreen is the one surface most drivers underestimate. That gradual haze from off-gassing and fingerprints scatters oncoming headlamps and makes night driving harder than it needs to be. A proper two-pass clean every month or so, inspected with a torch at a low angle, makes a genuine difference to how the car feels to drive after dark.
Ammonia on tinted glass is the other mistake worth taking seriously. The damage is cumulative and often invisible until the tint starts to bubble at the edges. Switching to a labelled ammonia-free product costs nothing extra and protects an investment that is expensive to replace.
Keep the kit simple, keep the towels dedicated, and clean little and often. That is the approach that works.
Diamondbrite glass care: tint-safe products for every clean
Clean glass starts with the right product, and Diamondbrite’s automotive glass cleaner is formulated specifically for vehicles — ammonia-free, safe for tinted windows, and effective on both interior haze and exterior road film. For drivers who want longer-lasting clarity, Diamondbrite’s ceramic hydrophobic glass coating builds a durable, water-repelling layer that causes rain to bead and roll off the windscreen, reducing the need for frequent cleaning and improving visibility in wet conditions.

The glass cleaner suits quick touch-ups and full interior cleans alike, while the ceramic hydrophobic coating is the natural next step after a thorough exterior clean — applied once, it extends the time between deep cleans and keeps glass looking clearer for longer. Both products are designed to work with the two-towel microfibre method described in this guide, so the technique you have already learned translates directly.
Browse the full range and pick up both products at the Diamondbrite online shop — straightforward ordering, with the full product range available in one place.
Useful sources
- AutoDetailPedia: Clean car windows without streaks — Detailed technique guide covering the two-towel method, microfibre care, and tint-safe product advice; one of the most thorough practical references available.
- Jalopnik: Clean outside car windows streak-free — Practical exterior cleaning steps with useful guidance on shade, timing and the vinegar DIY mix.
- Car and Driver: Best car glass cleaners tested — Independent product testing that confirms technique and microfibre quality matter more than brand alone.
- CleaningBro: Clean inside car windshield without streaks — Interior-focused guide with good coverage of haze sources and the two-pass removal method.
- Kia: How to clean the inside of a car windshield — Manufacturer-level step-by-step guide for interior windscreen cleaning, useful for context on technique and safety.
